Always consult the official Owners Manuals first
Difference between revisions of "MFC-101 MIDI foot controller"
| Line 5: | Line 5: | ||
=MFC-101: documentation= | =MFC-101: documentation= | ||
| − | + | * [http://www.fractalaudio.com/downloads/manuals/mfc-101/MFC-101-Owners-Manual.pdf Owner's Manual] | |
| − | |||
| − | * [http://www.fractalaudio.com/downloads/manuals/mfc-101/MFC-101-Owners-Manual.pdf | ||
* [http://www.fractalaudio.com/downloads/manuals/mfc-101/MFC-101-Looper-Control-Mode.pdf MFC-101 Looper Control Mode] | * [http://www.fractalaudio.com/downloads/manuals/mfc-101/MFC-101-Looper-Control-Mode.pdf MFC-101 Looper Control Mode] | ||
| − | * [http://www.fractalaudio.com/downloads/manuals/mfc-101/MFC-101-Quickstart.pdf MFC-101 Quick Start] | + | * [http://www.fractalaudio.com/downloads/manuals/mfc-101/MFC-101-Quickstart.pdf MFC-101 Quick Start Guide] |
=MFC-101: Mark I - Mark II - Mark III versions= | =MFC-101: Mark I - Mark II - Mark III versions= | ||
| − | + | Mark I is the original model. | |
| − | + | ||
| − | + | Mark II: | |
| − | + | "The only change is the CAT-5 connector is now an Ethercon jack. An Ethercon jack will work with either a CAT-5 cable or an Ethercon cable." [http://forum.fractalaudio.com/mfc-discussion/57199-mfc-101-mkii.html#post717377 source] | |
| − | + | ||
| − | + | Mark III has solid-State switch technology. No moving parts except a spring "actuator". Switching is fully electronic and silent with no switches to wear out. Mechanical lifespan 1 million actuations. It provides a FASLINK connector. Separate firmware is required. | |
| − | |||
=MFC-101: manufacturing= | =MFC-101: manufacturing= | ||
| − | + | Fractal Audio:<BR> | |
| + | "The MFC-101 is fully made in China." [http://www.thegearpage.net/board/showpost.php?p=19557079&postcount=348 source] | ||
=MFC-101: power and cables= | =MFC-101: power and cables= | ||
| − | + | You can use the supplied 9VAC adapter to power the MFC. This also is the recommended power method when upgrading the firmware. Do NOT connect the adapter to the MFC simultaneously with the use of an Ethernet, Ethercon or XLR cable, or when using MIDI phantom power, or damage can occur! | |
| − | + | ||
| − | + | MIDI can be used for just communications (5 pins), or for communications and phantom power (7 pins). A good MIDI cable is required. To receive tuner and tempo data all pins of a 5-pin MIDI cable must be connected. Many low-cost MIDI cables just have 3 pins connected and are not properly shielded, resulting in audible data transfers. | |
| − | + | ||
| − | + | To use phantom power via MIDI, a 7-pin MIDI cable is required. All pins must be wired (pins 6 and 7 carry power). Connect the 9VAC adapter to the phantom power input at the rear of the Axe-Fx (the Axe-doesn't provide power itself, it needs the power supply). | |
| − | + | ||
| − | + | A CAT5 Ethernet cable can be used, instead of MIDI, for communications and power. It provides power to the MFC-101 without requiring the power supply, transmits MIDI data and tuner and tempo information, and switches off the MFC-101 when the Axe-Fx II is switched off. Mark II and III models also support Ethercon which is sturdier than Ethernet. When using Ethernet/Ethercon, the MFC's MIDI OUT port won't pass data anymore, you can't use both ports simultaneously. [http://forum.fractalaudio.com/mfc-discussion/44511-there-pass-midi-thru-midi-foot-controller-while-expansion-cat-5-mode.html#post587648 source] | |
| − | + | ||
| − | + | The 3rd and best way to connect the MFC-101 is through [[FASLINK]]. This is supported by the Mark III model and Axe-Fx II XL and XL+. An XLR cable powers the MFC and transfers data. | |
| − | + | ||
| − | + | The connection method must be specified in the I/O menu and in the Setup and MIDI menus of the MFC-101. | |
| − | + | ||
| + | The internal PSU for the MFC-101 will also support an expansion module for the MFC-101, but such a module has never been released. [http://forum.fractalaudio.com/axe-fx-ii/35997-axe-fx-ii-technical-questions-thread-30.html#post491404 source-1] [http://forum.fractalaudio.com/axe-fx-ii/35997-axe-fx-ii-technical-questions-thread-49.html#post492331 source-2] [http://forum.fractalaudio.com/axe-fx-ii/35997-axe-fx-ii-technical-questions-thread-49.html#post492332 source-3] | ||
| + | |||
| + | More information about connecting and powering the MFC-101 in the Owner's Manual. | ||
| + | |||
| + | Do not power up the Axe-Fx after the MFC. None of the switches may work, until a preset is switched. Cliff: "This happens when the Axe-Fx II is not powered on first. Selecting any preset on the MFC will reset the state machine." [http://forum.fractalaudio.com/axe-fx-ii-discussion/75019-axefx-ii-strange-interaction-mfc.html#post917400 source] | ||
| + | |||
| + | Fractal Audio:<BR> | ||
| + | "Do NOT attempt to extract power from the MFC connector. It is only rated for 1A and if you burn out the port we won't cover that under warranty." [http://forum.fractalaudio.com/axe-fx-ii-discussion/54261-axe-fx-rj-45-pinout.html#post688733 source] | ||
| + | |||
| + | [http://www.axefxtutorials.com AxeFxTutorials] published several videos explaining how to set up the Axe-Fx II and the MFC-101 for basic use as well as how to configure expression pedals. | ||
| + | |||
| + | [http://forum.fractalaudio.com/threads/mfc-all-red-lights-on-frustrated.113858/#post-1362569 About a MFC-101 startup power issue when using 7-pin MIDI cables] | ||
=MFC-101: firmware updates= | =MFC-101: firmware updates= | ||
| − | + | Go through Edit > Setup to see the currently loaded firmware version. | |
| − | + | ||
| − | + | All firmware release notes can be found here: [[MFC-101 firmware release notes]]. | |
| − | + | ||
| − | + | [http://www.fractalaudio.com/support-fractal.html Download the latest MFC-101 firmware here], launch Fractal-Bot and follow the instructions. Note that there are different firmware files for Mark I/II and Mark III units. | |
| − | + | ||
| − | + | The update process requires a MIDI interface. The Axe-Fx II can be configured as such. Updating is not possible via Ethernet/Ethercon. During the update process, the MFC-101 cannot be powered via MIDI phantom power. The firmware file includes a handy Read Me - Firmware Update Guide, explaining the process. It also explains how to configure the Axe-Fx II as a MIDI interface, and how to power the MFC-101 via Ethernet/Ethercon during updating if you haven't got the power supply. | |
| − | + | ||
| − | + | An upgrade may require you to reset the MFC-101 to its factory settings. If so, it will be stated in the release notes. To reset the MFC-101, power on while holding switch #11. Note: this erase all configured settings. You can save these on forehand and restore these afterwards using Fractal-Bot. | |
| − | + | ||
| − | + | If you're experiencing problems, go to the Utility > Preset menu on the Axe-Fx II. This makes sure the Axe-Fx II is not sending out stuff which could interfere with the update process. | |
| + | |||
| + | Error messages during updating: | ||
| + | * Error 14: rare problem that occurs after a failed firmware update. Once this occurs, you can start over to achieve success, but the MFC-101 will “time out” if the update is not completed quickly enough, causing the unit to display ERROR 14 again. Decrease the MIDI Buffer Delay setting in Fractal-Bot (in step 1 “READY”) to 90ms or lower to speed the firmware transmission process. Alternatively, try to slow things down by increasing buffer delay to, say, 400. | ||
| + | * Error 16: usually indicates that the MFC saw “garbage” during a firmware update. This problem is often seen when using “inferior” MIDI Interfaces, but can also indicate computer problems, or even a bad MIDI cable. In rare cases, re-downloading the firmware update can also solve this problem. | ||
| + | * Error 18: indicates that the MFC-101 has received some stray MIDI message while awaiting a firmware update. Please make sure no other MIDI applications are running on your computer, or, if using the Axe-Fx II as a MIDI Interface, ensure that I/O: MIDI: SEND REALTIME SYSEX is set to “NONE”. | ||
| + | * The manual listst and explains more error messages. | ||
=MFC-101: backup and restore= | =MFC-101: backup and restore= | ||
| − | + | Use Edit > Setup > Sysex Data. | |
=MFC-101: restore to factory defaults= | =MFC-101: restore to factory defaults= | ||
| − | + | Power the MFC-101 while holding switch 11. The manual lists all factory default settings. | |
=MFC-101: test mode= | =MFC-101: test mode= | ||
| − | + | Press Edit followed by Reveal, to enter test mode. | |
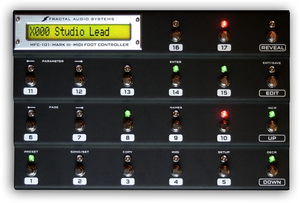
=MFC-101: LEDs= | =MFC-101: LEDs= | ||
| − | + | With the MFC-101 in Axe-Fx Mode: | |
| − | + | * Red means that the effect is present in the preset, bypassed. | |
| − | + | * Green means that the effect is present in the preset, enabled. | |
| − | + | * Off means that the effect is not present in the preset. | |
| − | + | ||
| − | + | You can disable Red LEDs (Edit > Setup > Set IAOffLed Off), which works better for colorblind people. | |
| + | |||
| + | Put small bits of painter's tape on top of them to decrease the LED brightness. [http://forum.fractalaudio.com/mfc-101-general-discussion/36965-midi-foot-controller-lights-too-bright-i-have-splendid-solution-works-perfectly.html#post504249 Or use this smart and simple solution]. | ||
=MFC-101: TotalSync= | =MFC-101: TotalSync= | ||
| − | + | When you switch presets on the front panel of the Axe-Fx II, the MFC-101 can switch along. It's called TotalSync. Enable/Disable this in the MFC's MIDI menu. | |
| − | + | ||
| + | TotalSync doesn't work in Song and Set modes, and custom MFC-101 Tx Map and Axe-Fx II preset remapping (for example to support scenes) are not supported. | ||
=MFC-101: use two MFC-101s= | =MFC-101: use two MFC-101s= | ||
| − | + | Matt:<BR> | |
| + | "True Master Slave is not possible. Split merge works in theory, but there can be hiccups. One MFC can respond to program changes from another, but the two units won't appear to be in any kind of sync". [http://forum.fractalaudio.com/mfc-discussion/100431-can-you-use-another-mfc-control-mfc.html#post1204154 source] | ||
=MFC-101: tuner and tempo information= | =MFC-101: tuner and tempo information= | ||
| − | + | To show the Tuner display and see the Tempo LED blink in the correct tempo, the MFC-101 must be in Axe-Fx Mode. Also, a connection type must be used which supports this: 5-pin MIDI, CAT5 (Ethernet/Ethercon) or XLR. On the Axe-Fx II (I/O > MIDI) Send Realtime Sysex must be set to to Tuner, Tempo, or All. | |
| − | + | ||
| − | + | The MFC won't display tuner data when using an external switch to switch on the tuner. It will be displayed on the Axe-Fx though. | |
| − | + | ||
| − | + | When the Tuner on the Axe-Fx is set to anything other than its first tab page, the message "Waiting for tuner" appears. | |
| − | + | ||
| − | + | When the tuner display is active, it's still possible to engage/bypass other effects, switch banks, presets and songs etc. | |
| + | |||
| + | You can combine Tap Tempo and Tuner functionality: hold Tap Tempo will enter the Tuner mode. Use Edit > Setup to set this up. This does not work with external switches. | ||
| + | |||
| + | [http://wiki.fractalaudio.com/axefx2/index.php?title=Tuner#Creating_a_Tuner_Preset How to create a tuner "preset" instead of an IA switch] | ||
| + | |||
| + | To use an external switch to control Tap Tempo: connect the switch to one of the switch inputs on the MFC. Set the switch type in Edit > Setup to Toggle or Momentary, depending on the switch. In Edit > MIDI > XS set the switch to control CC #14. In Edit > MIDI > XS set the switch to TypTOG. | ||
=MFC-101: Axe-Edit= | =MFC-101: Axe-Edit= | ||
| − | + | It's recommended to not use the MFC-101 while Axe-Edit is running. It's possible to do so, but using the MFC-101 can cause audio gaps, and fast switching can cause communications issues. | |
| − | + | ||
| + | Engaging and bypassing effects on the MFC-101 will not always update the block states in Axe-Edit. To make Axe-Edit recognise such changes, its polling mechanism must be engaged. This can be accomplished by attaching the Bypass parameter of any block in the preset to a controller. The block doesn't have to be connected to anything on the grid (so use a low CPU block). | ||
=MFC-101: Axe-Fx II XL= | =MFC-101: Axe-Fx II XL= | ||
| − | + | Fractal Audio:<BR> | |
| − | + | "The MFC-101 stores 384 presets. The Axe-Fx II Mark I/II also store 384 presets. Many MIDI controllers only store 128 presets. There is no correlation between the number of presets on a MIDI controller and the device being controlled. This is not a bug, mistake or deception." [http://forum.fractalaudio.com/mfc-discussion/84702-accessing-bank-d-xl-mfc-101-mk1.html#post1034747 source] | |
| − | + | ||
| + | To access Axe-Fx II presets above 384, you need to use MIDI mapping (transmit table). | ||
| + | |||
| + | Axe-Fx II XL firmware 15: "Added “MFC ECHO TO MIDI OUT” option for Axe-Fx II XL (I/O > MIDI). Turning this to On echoes all MIDI data from the MFC to MIDI Out. This can be used to send MIDI PC and CC messages to other equipment connected to MIDI Out." | ||
=MFC-101: software editors= | =MFC-101: software editors= | ||
| − | + | MFC_Edit is the offical editor for the MFC-101. | |
=MFC-101: initial configuration= | =MFC-101: initial configuration= | ||
| − | + | [http://www.fractalaudio.com/support.php#manuals Read the Quick Start Guide.] | |
| − | + | ||
| − | + | Basics: | |
| − | + | * Use the Edit menu to program the MFC-101. There's no software editor. You may have to press Edit for a couple of seconds (long press), depending on a configuration setting. | |
| − | + | * Make sure you select the correct Axe-Fx model (Edit > Setup) and connection port (Edit > MIDI). The latest firmware defaults to "XL" and "FASlink". | |
| − | + | * Decide whether you want to use Axe-Fx Mode or not (Edit > Setup). | |
| − | + | * Choose the desired Bank Size (Edit > Setup). The MFC supports 384 presets. | |
| − | + | * Use Edit > Midi to configure the IA switches. | |
| + | |||
| + | Tutorials on G66 site: | ||
| + | * [http://www.g66.eu/nl/products/mission 1] | ||
| + | * [http://www.g66.eu/nl/support/fractal-audio-support 2] | ||
=MFC-101: select the number of preset/IA switches= | =MFC-101: select the number of preset/IA switches= | ||
| − | + | The MFC-101 defaults at 5 presets per bank. It can be set to any number. Use Edit > Setup > Bank Size to change this, depending on how many IA switches you want to be accessible directly without needing to press Reveal. | |
| − | + | ||
| − | + | * When using size "0", use the Up/Down switches to scroll through banks and automatically load the preset. | |
| − | + | * When using size "1", use the Up/Down switches to scroll through banks, then press switch 1 to load the preset. If you want the bank number to be the same as the preset number, set Display Offset on the Axe-Fx II to 1, set Offset Axe-Fx on the MFC to 1 and set Offset MFC-101 to 1. | |
| − | + | ||
| + | Bank Size also influences Song and Set Mode's layout. | ||
| + | |||
| + | Preset switches start from the bottom row by default. You can change this using the parameter FirstPresetSwitch. This lets you specify where the presets start on the board. Preceding switches automatically are IA switches. | ||
=MFC-101: Bank Style= | =MFC-101: Bank Style= | ||
| − | + | Use Edit > Setup > Bank Style to tell the MFC-101 what to do when changing banks: | |
| − | + | * automatically load the first preset of a bank | |
| − | + | * automatically load the preset at the current position in the bank (default) | |
| − | + | * nothing. | |
| − | + | ||
| − | + | When set to None, banking up/down will show the bank number and the preset range within the bank (Smart Banks). | |
| − | + | ||
| + | Scrolling speed through Banks, Songs and Sets cannot be adjusted. | ||
| + | |||
| + | When using Bank Size "0" or "1", use the Up/Down switches to scroll through banks and automatically load the "Autoload" preset. | ||
=MFC-101: Bank/Song Limit and Bank/Song Wrap= | =MFC-101: Bank/Song Limit and Bank/Song Wrap= | ||
| − | + | You may need access to just a subset of all available banks on the MFC-101. The Bank/Song Limit parameter lets you define the range of this subset. This prevents having to scroll through banks/songs you don't need. | |
| − | + | ||
| + | Also, you may want to stop scrolling through banks/songs after reaching the first or last bank/song (no wrapping around). The Bank/Song Wrap parameter lets you enable/disable this. | ||
=MFC-101: Global preset= | =MFC-101: Global preset= | ||
| − | + | Set Global Preset to ON (off by default) in Edit > Setup and assign a preset. | |
| − | + | ||
| − | + | The Global Preset preset can now be recalled at any time by pressing a preset switch a 2nd time. The MFC will display "GBL" while the Global Preset is active. You can switch to other scenes within that preset and engage/bypass individual blocks. Pressing the preset another time (3rd time) returns you to the previous preset. However, if you press another preset switch instead (not the one from which you switched to the Global Preset), that preset will be recalled. | |
| − | + | ||
| − | + | You can specify which scene you want to recall when using Global Preset by using Custom Mapping on the Axe-Fx (I/O > MIDI). | |
| − | + | ||
| + | Turn off Global Preset if you want to be able to recall a preset in its saved state by pressing a preset switch a second time (see Panic switch). | ||
| + | |||
| + | The Global Preset can also be set to "Backtrack", see below. | ||
| + | [http://forum.fractalaudio.com/mfc-discussion/49374-wicked-wiki-8-pressing-midi-foot-controller-101-preset-switch-twice.html More information] | ||
=MFC-101: alternate presets= | =MFC-101: alternate presets= | ||
| − | + | A 2nd stomp on a preset switch lets you activate another preset, which can be different per preset. This is an alternative to using a Global Preset or Backtracking. You can set this in the Preset menu on the MFC-101. Note that the "alternate preset" is a program change, not a "preset switch" as configured on the MFC. | |
| − | + | ||
| − | + | [http://forum.fractalaudio.com/mfc-discussion/49374-wicked-wiki-8-pressing-midi-foot-controller-101-preset-switch-twice.html More information] | |
| + | |||
| + | You use Alternate Preset in combination with Axe-Fx Scenes by mapping presets to scenes on the Axe-Fx II. | ||
=MFC-101: Backtracking= | =MFC-101: Backtracking= | ||
| − | + | Backtracking means that a 2nd stomp on a preset switch will recall the previous preset. You can set this per preset (Edit > Preset) or configure Global Preset to act as Backtrack ("BAK"). Backtracking always recalls scene 1. | |
| − | + | ||
| − | + | [http://forum.fractalaudio.com/mfc-discussion/49374-wicked-wiki-8-pressing-midi-foot-controller-101-preset-switch-twice.html Wicked Wiki] | |
=MFC-101: scenes= | =MFC-101: scenes= | ||
| − | + | The MFC-101 offers special support for Axe-Fx II preset scenes: | |
| − | + | * Recall any of the 8 scenes directly | |
| − | + | * Increment or decrement scenes | |
| − | + | * Switch between scenes 1 and 2. | |
| − | + | ||
| − | + | You can also use general MIDI commands to switch scenes, or use external momentary switches. | |
| − | + | ||
| + | Use I/O > Midi > Mapping if you want preset switches to switch to specific scenes. For example, if you want the first 5 preset switches on the MFC to switch to preset 000, scenes 1-5, use Mapping. | ||
| + | |||
| + | More information in [[Scenes]]. | ||
=MFC-101: PC MIDI channel(s)= | =MFC-101: PC MIDI channel(s)= | ||
| − | + | By default the MFC-101 sends MIDI Program Changes on all MIDI channels, regardless of the selected MIDI channel on which the MFC-101 operates. | |
| − | + | ||
| − | + | To disable this behavior ([http://forum.fractalaudio.com/mfc-discussion/87571-mfc-sends-cc-0-midi-channel-2-preset-change.html#post1061520 source]): | |
| − | + | * Optionally reset the MFC-101 to FACTORY settings if you also want to do the step noted in "PS". | |
| − | + | * Temporarily set BANK SIZE to 17. | |
| − | + | * Turn off all PCs in preset 1. | |
| − | + | * Edit: COPY PRESET 1 to preset locations 2 through 17. | |
| − | + | * Edit COPY BANK 1 to bank locations 2 through the end. | |
| + | |||
| + | P.S. Make a BACKUP of the initialized MFC with all PCs off, so you can avoid ever needing to do this again, no matter what setup you require in the future. | ||
=MFC-101: assign IA functionality (Axe-Fx or general MIDI)= | =MFC-101: assign IA functionality (Axe-Fx or general MIDI)= | ||
| − | + | Any switch can operate as a toggle (latching) or as a momentary switch, and can be given a 7-character name (Edit > Setup). | |
| − | + | ||
| − | + | IA switches can be assigned to Axe-Fx functions or to general MIDI functionality. | |
| − | + | ||
| − | + | In Axe-Fx Mode go to Edit > Midi > IA and select the desired block for each switch from the list of effects. In Axe-Fx Mode IAs operate globally, meaning that you cannot change switch functionality per preset. | |
| − | + | ||
| + | You can assign an effect to the switch. The switch will then enable or bypass that effect. You can also select an effect X/Y, to switch between X and Y. Other available Axe-Fx functions include Vol Inc, Vol Dec, scenes. | ||
| + | |||
| + | If you select "None", the switch is not assigned to specific Axe-Fx functionality. It will be available for general MIDI use (referred to as: General Use IA Switch). This lets you program MIDI commands. You can send 2 separate MIDI CCs, a MIDI PC, and additional custom MIDI commands per switch. Use value 127 to switch on effects, 0 to switch off. Or select OFF to send nothing at all. General Use IAs operate globally (same across all presets). | ||
| + | |||
| + | If Axe-Fx Mode is disabled, the MFC-101 determines which effect in a preset is engaged or bypassed (Edit > Preset). In this case preset names in Preset Mode are preced by a "P" (instead of "X"). | ||
=MFC-101: carry over IA state when switching presets= | =MFC-101: carry over IA state when switching presets= | ||
| − | + | You may want "general function" onboard IAs to "carry over" their active state when switching presets. This is controlled through the Global and Send w/Preset parameters for general function IAs. Global defaults to Off, and Send w/Preset defaults to On. See the table in the Owner's Manual for a description of how these parameters work together. | |
=MFC-101: group switches (switch linking)= | =MFC-101: group switches (switch linking)= | ||
| − | + | The Switch Links setting lets you define a group of switches. Within that group only one setting can be active, so selecting one switch will automatically disable the others within the group (mutually exclusive). There's a maximum of two groups and 5 switches per group. Switch Links is particularly useful to switch channels on an external amp which supports MIDI. | |
=MFC-101: methods to switch between amp blocks/settings= | =MFC-101: methods to switch between amp blocks/settings= | ||
| Line 185: | Line 242: | ||
=MFC-101: turn an IA into a preset switch= | =MFC-101: turn an IA into a preset switch= | ||
| − | + | Set the switch's function to None (Edit > MIDI). Then scroll to the PC page, set it to On and specify the Program Change number. Set the Switch Type (Edit > Setup) to Momentary, for correct LED behavior. | |
| − | + | ||
| − | + | To also make the MFC-101 switch to the Bank containing the preset, enable TotalSync. | |
| + | |||
| + | This is a great alternative to using the Global Preset feature. | ||
=MFC-101: engage and bypass multiple effects= | =MFC-101: engage and bypass multiple effects= | ||
| − | + | Here's a trick that lets you assign multiple effects to one switch. Source: M@. | |
| − | + | ||
| − | + | # Pick a (low CPU) surrogate such as VOLx or FILTERx, set to NULL. On the Axe-Fx II, go to I/O > CTRL and assign the same MIDI CC to your surrogate and all of the effects you want assign across the single footswitch. | |
| − | + | # Place the surrogate effect block (disconnected) in every preset that has your target block(s). | |
| − | + | # Set its bypass state and that of the assigned effect(s) to the same initial state. | |
| − | + | # Assign the surrogate to the Axe-Fx IA in the MFC-101. | |
| − | + | # Now you have've got bi-color-LED-enabled control over different multiple blocks across different patches from a single IA switch. | |
| + | |||
| + | Alternatively: assign the same CC (or an external controller) to all desired effects. But you won't get multi-color LEDs. | ||
=MFC-101: toggle between two effects= | =MFC-101: toggle between two effects= | ||
| − | + | Set up the switch to send a CC to an external controller. Assign Bypass in two effect blocks to the same controller. Set the Start value of one block to 100 and the other to 0. | |
| − | + | ||
| − | + | An example when alternating between Comp and Drive: set one of the externals to the same CC as COMP, then use it to bypass Drive. Set the switch to COMP and you'll get RED=DRIVE, GREEN=COMPRESSOR (source: Matman). | |
| + | |||
| + | [http://forum.fractalaudio.com/mfc-discussion/70746-how-use-one-ia-switch-turn-one-effect-another-off-simultaneously.html More methods] | ||
=MFC-101: use a single switch to enable some effects and bypass others= | =MFC-101: use a single switch to enable some effects and bypass others= | ||
| − | + | [http://forum.fractalaudio.com/mfc-discussion/39864-1-step-3-ia-actions-possible.html#post539974 Solutions] | |
=MFC-101: switch between two speeds= | =MFC-101: switch between two speeds= | ||
| − | + | You can use a switch to change speeds (tremolo, vibe, phaser, rotary etc.): | |
| − | + | * Assign an external controller to the effect's Rate parameter. | |
| − | + | * Enter Min and Max values in the modifier menu. | |
| − | + | * On the MFC assign a switch to the controller's MIDI CC. | |
| − | + | ||
| + | To force a gradual change between the two settings, increase Damp in the modifier menu of the effect parameter on the Axe-Fx. | ||
=MFC-101: Songs and Sets= | =MFC-101: Songs and Sets= | ||
| − | + | In Song and Set modes names on the MFC start with a "S". You can assign up to 15 presets per song, depending on the Bank Size setting. The MFC supports up to 100 songs. Preset switches in Songs can be set to OFF. | |
| − | + | ||
| − | + | You can also use Song Mode to circumvent a limitation of Preset Mode. In Preset Mode banks have no names, you have to remember which presets are in numbered banks. However, if you assign presets to songs in Song Mode, maintaining the bank structure, you can name them. | |
| − | + | ||
| − | + | Sorting a Song or Set list is not possible. | |
| + | |||
| + | You cannot set scenes. A preset in a song will always load scene 1. | ||
| + | |||
| + | An alternative to Song Mode: [[Scenes]]. | ||
| − | =MFC-101: create a "lead" switch= | + | =MFC-101: ways to create a "lead" switch= |
* If you have a single solo preset, use Global Preset (press any preset twice to recall the solo preset). | * If you have a single solo preset, use Global Preset (press any preset twice to recall the solo preset). | ||
* If you have various solo presets, use the Alternate Preset feature (press a preset switch twice to recall an "alternate" preset for that switch). | * If you have various solo presets, use the Alternate Preset feature (press a preset switch twice to recall an "alternate" preset for that switch). | ||
| Line 228: | Line 296: | ||
=MFC-101: Panic switch= | =MFC-101: Panic switch= | ||
| − | + | It can be handy to be able to quickly recall the current scene in its saved state (revert), just by pressing the current scene switch a second time. This will reset any changed IAs to their save state for this scene. This requires that Scene Revert (I/O > MIDI) is set to ON. | |
| − | + | ||
| + | Alternatively you can also press the preset switch (the current one) again. This loads scene 1 of the current preset in its saved state. This requires that Global Preset (MFC) is not enabled. Set Ignore Redundant PC (Axe-Fx) to Off to prevent audio gaps. | ||
=MFC-101: expression pedal= | =MFC-101: expression pedal= | ||
| − | + | You can connect up to 4 expression pedal(s) to the rear of the MFC-101. Expression pedals need 1/4" TRS (stereo) cables! | |
| − | + | ||
| − | + | Use Edit > Setup and Edit > MIDI to configure the pedals. Edit > Preset lets you override global expression pedal settings. | |
| − | + | ||
| − | + | By default pedal #1 is mapped to CC 11 (global Output 1 volume) and pedal #2 to CC 16 (External 1). Pedals 3 and 4 default to OFF, which may not be obvious because the MFC will let you calibrate the pedals. | |
| − | + | ||
| − | + | Calibration: see chapter 7 of the manual. Note that it's normal for pedals not to employ the full value range (0 - 127). If your pedal only gets to 100 or so, it can still perform 100%. Note: after calibration you can check if the pedal goes from 0 to 127 by entering the MFC's test mode (see above). Near the end of the test you can test the pedals. | |
| − | + | ||
| + | Use the Beginning Value parameter (Edit > Midi) to define the state of the pedal after switching presets. "PDL" means that the position of the pedal is polled and recalled, "Off" means that the pedal is off until moved (default), or you can select a specific value between 0 and 127. | ||
| + | |||
| + | While you can define/limit the operational range of an expression pedal (globally or per preset), you also use the Modifier menu of effects blocks on the Axe-Fx II for this purpose. | ||
| + | |||
| + | Settings in Edit > MIDI are global. If you want program a pedal to behave differently in specific presets, adjust in Edit > Preset. | ||
=MFC-101: make a pedal control different effects without switching presets= | =MFC-101: make a pedal control different effects without switching presets= | ||
| − | + | Method 1 (i.e. using a single pedal control either Wah or Whammy): | |
| − | + | # Insert a Wah block. | |
| − | + | # Insert a Pitch block, directly above or below the Wah in a parallel row. Connect it back to to the main row. | |
| − | + | # In the Modifier menu of BOTH effects (Wah: Frequency; Pitch: Control): set Source to External 1. Enable Auto-engage. | |
| − | + | # Add a Mixer block to the main row, just after Wah and Pitch. | |
| − | + | # Edit Mixer: enter the Modifier menu of the Gain parameter for the row that connects to the Wah. Set Source to another external controller (which will be attached to an IA-switch to switch between Wah and Whammy). Set Start Value to 100% and End Value to 0. | |
| − | + | # Do the same for the row that connects to the Pitch block. But: set Start Value to 0% and End Value to 100%. | |
| − | + | # Program an IA-switch on the MFC to switch between Wah and Whammy, using the Mixer rows. Use the CC of the external controller that you specified while editing the Mixer block, and send "127" for the Wah, and "0" for the Whammy. | |
| − | + | # That's all. Moving the pedal should activate both the Wah and the Pitch block. But thanks to the Mixer block you'll only hear one of these effects. If you're hearing the Wah and the Whammy effects simultaneously, you need to press the IA-switch to get the Mixer block to work | |
| − | + | ||
| − | + | Method 2 (i.e. using a single pedal control Vol and Wah): (source: Bakerman) | |
| − | + | # Place a Volume block on the grid. | |
| − | + | # Assign an IA switch to an external controller's CC. | |
| − | + | # Assign another external controller the Wah and Volume control knobs. | |
| − | + | # Set the first external controller as a Bypass modifier for both blocks and reverse the slope of one (start 100, end 0). | |
| − | + | # Now the IA switch will toggle between Wah/Volume and the pedal will control both. | |
| − | + | ||
| − | + | Method 3 (using scenes to make the pedal control something else, such as Wah and Whammy and Volume): | |
| − | + | # Put Wah and Pitch and Volume in one column (parallel). | |
| − | + | # Assign an external controller (pedal) to the effects. Set to Auto-Engage in Wah and Pitch. | |
| − | + | # In Wah and Pitch turn down Level in the block's Y state. | |
| − | + | # Scene 1 is for Wah. Set Wah to X, set Pitch to Y, bypass Volume. | |
| − | + | # Scene 1 is for Whammy. Set Wah to Y, set Pitch to Y, bypass Volume. | |
| + | # Scene 3 is for Volume. Set Wah to Y, set Pitch to Y, engage Volume. | ||
| + | # To make this work with effcts without X/Y support, [http://forum.fractalaudio.com/axe-fx-ii-wish-list/77285-ring-mod-x-y.html#post954149 use a scene controller]. | ||
=MFC-101: alternative to auto-engaging= | =MFC-101: alternative to auto-engaging= | ||
| − | + | Auto-engage (Axe-Fx) can sometimes cause an audible hickup when it enables an effect (such as Whammy). There's an alternative, using the effect's Mix modifier settings: | |
| − | + | * Auto-engage = off, Min = 100, Max = 0, Start = 60, Mid = 0, End = 49,8, Slope = 100, Scale = 10, Offset = -100. | |
| − | + | ||
| − | + | These settings pass the unmodified signal at heel-down position, and switch to 100% processed sound when moving the pedal, while retaining the expression pedal's regular functionality. | |
| + | |||
| + | Note that this only works with effects where the heel-down position sounds like the unmodified direct tone, and which have a Mix parameter. This rules out Wah for example. | ||
=MFC-101: external switch= | =MFC-101: external switch= | ||
| − | + | You can connect momentary or toggle/latching switches to the rear of the MFC-101. There are 2 inputs which, when using TRS (stereo) cables, support 4 switches in total. A single switch can also be used with a TS (mono) cable, but you need to set the second switch to Off. | |
| − | + | ||
| − | + | Use Edit > Setup and Edit > Midi to configure external switches. | |
| − | + | ||
| − | + | You can specify whether the external switch is a momentary or latching switch type. | |
| − | + | ||
| − | + | An external switch can control a single MIDI CC, using value 0 for off and 127 for on. You can't use them for preset switching (MIDI PCs) or custom MIDI stuff. | |
| − | + | ||
| − | + | Settings in Edit > MIDI are global. If you want program the switch to behave differently with some presets, adjust in Edit > Preset. | |
| + | |||
| + | The parameters TyHDW and TypTog and TypAUT control whether an external switch carries over its active state when switching presets: | ||
| + | * Latching: when set to TypHDW, the state is carried over because the MFC-101 polls the switch after having switched presets. Use TypTOG to prevent polling but this may cause the LED on the external switch to lose sync. | ||
| + | * Momentary: when set to TypHDW, they operate as a momentary switch and retaining states is irrelevant. Use TypTOG to simulate a latching (toggle) switch, but the switch won't retain its state. | ||
| + | |||
| + | [http://forum.fractalaudio.com/axe-fx-ii-discussion/86024-wicked-wiki-18-a.html Wicked Wiki] | ||
=MFC-101: connect a expression pedal with switch= | =MFC-101: connect a expression pedal with switch= | ||
| − | + | Some expression pedals have a separate switch. You can use separate connections for the pedal and the switch and configure the switch to activate an effect which can be controlled with the pedal, such as a wah. | |
| − | + | # Connect the expression pedal to the MFC using one of the 4 expression pedal inputs on the MFC. Use a stereo (TRS) cable. | |
| − | + | # Connect the switch to one of the 2 switch inputs on the MFC. Use either a stereo (TRS) or mono (TS) cable. If using a mono cable, disable the other connection of the switch in the setup menu. | |
| − | + | # On the Axe-Fx, insert a Wah block in the preset. | |
| − | + | # Set the FREQ or CONTROL parameter of the Wah block to the External controller (the one that's tied to to the expression pedal, see below). | |
| − | + | # Use Damping if desired. Set PC RST to On. Keep Auto-engage Off because you will be using the switch. | |
| − | + | # Save the preset with the Wah disabled. | |
| − | + | # In I/O > Ctrl on the Axe-Fx, note which CC is used for the Wah 1 block (default #97). | |
| − | + | # In I/O > Ctrl on the Axe-Fx, note which CC is used for the External controller which is tied to the expression pedal, mentioned above. | |
| − | + | # In I/O > Midi on the Axe-Fx, verify that the External controller which is tied to the expression pedal is set to 0%. | |
| − | + | # Make sure that the expression pedal is calibrated (Edit > Setup on the MFC). | |
| − | + | # Make a connection between the pedal and the Axe-Fx by selecting the right CC and channel in Edit > MIDI on the MFC. Make sure you select the correct pedal input (XP1 - XP4). The CC must match the External controller's CC on the Axe-Fx (see above). | |
| − | + | # In Edit > Setup on the MFC set the external switch to Toggle. Make sure you select the correct switch input (XS1 - XS4). | |
| − | + | # Make a connection between the switch and the Axe-Fx by selecting the right CC and channel in Edit > MIDI on the MFC. Make sure you select the correct switch input (XS1 - XS4). The CC must match the CC of the Wah block on the Axe-Fx (see above). Set type to HDW. When using a mono cable for the switch, disable the other connection (set it to Off) to prevent MIDI problems. | |
| − | + | # Tell the MFC the switch values for Off and On (Edit > MIDI). 000 = Off. 127 = On. If the LED works vice versa, switch the values: 000 = On, 127 = Off. | |
=MFC-101: troubleshooting= | =MFC-101: troubleshooting= | ||
| − | + | Noise issues: | |
| − | + | * Change the Axe-Fx II's MIDI channel (I/O > MIDI) from Omni to 1. | |
| − | + | * Don't place the MFC-101 nearby powered speakers or on top of the Axe-Fx. | |
| − | + | * Ticking or clicking sound in sync with Tap Tempo is probably interference from your MIDI cable, leaking into your guitar pickup or guitar cable. Make sure to route the MIDI cable away from anything that it may interfere with, or use CAT5 or XLR. Or switch off "Send Realtime Sysex" when you don't need to use the Tuner and Tap tempo. [http://forum.fractalaudio.com/axe-fx-ii-discussion/43099-first-live-show-fractal-good-bad-clicking-sound.html#post570956 source] Another source might be the 'watch you're wearing! [http://forum.fractalaudio.com/threads/ticking-clock-sound-on-presets.109314 source] | |
| − | + | ||
| − | + | Switch issues: | |
| − | + | * If the MFC-101 won't scroll down anymore, switch #1 may be stuck. Depress it a number of times. [http://forum.fractalaudio.com/mfc-wishes-bugs/42153-admin-midi-foot-controller-stopped-down-scrolling-during-performance.html source] | |
| − | + | * When none of the switches or connnected pedals operate until you switch presets, try powering the Axe-Fx before the MFC. | |
| − | + | ||
| − | + | Solving the "Waiting for tuner" message: | |
| − | + | * The Axe-Fx II Tuner must be on its first page. | |
| − | + | * Verify that SendRealtimeSysex in the Axe-Fx's MIDI menu is set to All or Tuner. | |
| − | + | ||
| + | "Name timeout..." message: | ||
| + | * Set the MFC- 101 to the correct port and same MIDI channel as the Axe-Fx II. Make sure the cable is connected firmly at both sides. It that doesn't help: try another cable. If that doesn't help: clean the connections at both sides (blow air). | ||
| + | * Read par. 14.6 of the manual. | ||
=MFC-101: accessories= | =MFC-101: accessories= | ||
| − | + | Connect an additional MIDI controller to the MIDI IN port on the MFC-101. Select the correct MIDI channel for the added device in Edit > System. Enable Receive Program Changes in Edit > System. Suggestion: Tech 21 MIDI Mouse: small, battery powered (or 5-pins MIDI phantom power or power supply). | |
| − | + | ||
| − | + | Hardware MIDI utility such as MIDI Solution's Event Processor or Bome's MIDI Translator, which convert MIDI messages, such as a specific MIDI CC, into other messages like a PC. | |
| − | + | The MFC-101 by itself cannot switch amp channels, unless you have a MIDI-controlled amp connected to the Axe-Fx II or the MFC-101. You can use MIDI to control an external MIDI switcher for this task. [http://forum.fractalaudio.com/mfc-discussion/39851-amp-channel-switching-w-out-midi-2.html Suggestions.] | |
| − | |||
| − | |||
| − | |||
| − | |||
=MFC-101: 3D image= | =MFC-101: 3D image= | ||
[https://3dwarehouse.sketchup.com/model.html?id=ud6398579-2d83-432c-83a0-52c17d76acda 3D image of the MFC-101] | [https://3dwarehouse.sketchup.com/model.html?id=ud6398579-2d83-432c-83a0-52c17d76acda 3D image of the MFC-101] | ||
| − | |||
| − | |||
[[category:MIDI]] | [[category:MIDI]] | ||
[[category:Connecting]] | [[category:Connecting]] | ||
Revision as of 13:34, 12 April 2017
The information on this page supplements the official manuals.
Contents
- 1 MFC-101: documentation
- 2 MFC-101: Mark I - Mark II - Mark III versions
- 3 MFC-101: manufacturing
- 4 MFC-101: power and cables
- 5 MFC-101: firmware updates
- 6 MFC-101: backup and restore
- 7 MFC-101: restore to factory defaults
- 8 MFC-101: test mode
- 9 MFC-101: LEDs
- 10 MFC-101: TotalSync
- 11 MFC-101: use two MFC-101s
- 12 MFC-101: tuner and tempo information
- 13 MFC-101: Axe-Edit
- 14 MFC-101: Axe-Fx II XL
- 15 MFC-101: software editors
- 16 MFC-101: initial configuration
- 17 MFC-101: select the number of preset/IA switches
- 18 MFC-101: Bank Style
- 19 MFC-101: Bank/Song Limit and Bank/Song Wrap
- 20 MFC-101: Global preset
- 21 MFC-101: alternate presets
- 22 MFC-101: Backtracking
- 23 MFC-101: scenes
- 24 MFC-101: PC MIDI channel(s)
- 25 MFC-101: assign IA functionality (Axe-Fx or general MIDI)
- 26 MFC-101: carry over IA state when switching presets
- 27 MFC-101: group switches (switch linking)
- 28 MFC-101: methods to switch between amp blocks/settings
- 29 MFC-101: turn an IA into a preset switch
- 30 MFC-101: engage and bypass multiple effects
- 31 MFC-101: toggle between two effects
- 32 MFC-101: use a single switch to enable some effects and bypass others
- 33 MFC-101: switch between two speeds
- 34 MFC-101: Songs and Sets
- 35 MFC-101: ways to create a "lead" switch
- 36 MFC-101: Panic switch
- 37 MFC-101: expression pedal
- 38 MFC-101: make a pedal control different effects without switching presets
- 39 MFC-101: alternative to auto-engaging
- 40 MFC-101: external switch
- 41 MFC-101: connect a expression pedal with switch
- 42 MFC-101: troubleshooting
- 43 MFC-101: accessories
- 44 MFC-101: 3D image
MFC-101: documentation
MFC-101: Mark I - Mark II - Mark III versions
Mark I is the original model.
Mark II: "The only change is the CAT-5 connector is now an Ethercon jack. An Ethercon jack will work with either a CAT-5 cable or an Ethercon cable." source
Mark III has solid-State switch technology. No moving parts except a spring "actuator". Switching is fully electronic and silent with no switches to wear out. Mechanical lifespan 1 million actuations. It provides a FASLINK connector. Separate firmware is required.
MFC-101: manufacturing
Fractal Audio:
"The MFC-101 is fully made in China." source
MFC-101: power and cables
You can use the supplied 9VAC adapter to power the MFC. This also is the recommended power method when upgrading the firmware. Do NOT connect the adapter to the MFC simultaneously with the use of an Ethernet, Ethercon or XLR cable, or when using MIDI phantom power, or damage can occur!
MIDI can be used for just communications (5 pins), or for communications and phantom power (7 pins). A good MIDI cable is required. To receive tuner and tempo data all pins of a 5-pin MIDI cable must be connected. Many low-cost MIDI cables just have 3 pins connected and are not properly shielded, resulting in audible data transfers.
To use phantom power via MIDI, a 7-pin MIDI cable is required. All pins must be wired (pins 6 and 7 carry power). Connect the 9VAC adapter to the phantom power input at the rear of the Axe-Fx (the Axe-doesn't provide power itself, it needs the power supply).
A CAT5 Ethernet cable can be used, instead of MIDI, for communications and power. It provides power to the MFC-101 without requiring the power supply, transmits MIDI data and tuner and tempo information, and switches off the MFC-101 when the Axe-Fx II is switched off. Mark II and III models also support Ethercon which is sturdier than Ethernet. When using Ethernet/Ethercon, the MFC's MIDI OUT port won't pass data anymore, you can't use both ports simultaneously. source
The 3rd and best way to connect the MFC-101 is through FASLINK. This is supported by the Mark III model and Axe-Fx II XL and XL+. An XLR cable powers the MFC and transfers data.
The connection method must be specified in the I/O menu and in the Setup and MIDI menus of the MFC-101.
The internal PSU for the MFC-101 will also support an expansion module for the MFC-101, but such a module has never been released. source-1 source-2 source-3
More information about connecting and powering the MFC-101 in the Owner's Manual.
Do not power up the Axe-Fx after the MFC. None of the switches may work, until a preset is switched. Cliff: "This happens when the Axe-Fx II is not powered on first. Selecting any preset on the MFC will reset the state machine." source
Fractal Audio:
"Do NOT attempt to extract power from the MFC connector. It is only rated for 1A and if you burn out the port we won't cover that under warranty." source
AxeFxTutorials published several videos explaining how to set up the Axe-Fx II and the MFC-101 for basic use as well as how to configure expression pedals.
About a MFC-101 startup power issue when using 7-pin MIDI cables
MFC-101: firmware updates
Go through Edit > Setup to see the currently loaded firmware version.
All firmware release notes can be found here: MFC-101 firmware release notes.
Download the latest MFC-101 firmware here, launch Fractal-Bot and follow the instructions. Note that there are different firmware files for Mark I/II and Mark III units.
The update process requires a MIDI interface. The Axe-Fx II can be configured as such. Updating is not possible via Ethernet/Ethercon. During the update process, the MFC-101 cannot be powered via MIDI phantom power. The firmware file includes a handy Read Me - Firmware Update Guide, explaining the process. It also explains how to configure the Axe-Fx II as a MIDI interface, and how to power the MFC-101 via Ethernet/Ethercon during updating if you haven't got the power supply.
An upgrade may require you to reset the MFC-101 to its factory settings. If so, it will be stated in the release notes. To reset the MFC-101, power on while holding switch #11. Note: this erase all configured settings. You can save these on forehand and restore these afterwards using Fractal-Bot.
If you're experiencing problems, go to the Utility > Preset menu on the Axe-Fx II. This makes sure the Axe-Fx II is not sending out stuff which could interfere with the update process.
Error messages during updating:
- Error 14: rare problem that occurs after a failed firmware update. Once this occurs, you can start over to achieve success, but the MFC-101 will “time out” if the update is not completed quickly enough, causing the unit to display ERROR 14 again. Decrease the MIDI Buffer Delay setting in Fractal-Bot (in step 1 “READY”) to 90ms or lower to speed the firmware transmission process. Alternatively, try to slow things down by increasing buffer delay to, say, 400.
- Error 16: usually indicates that the MFC saw “garbage” during a firmware update. This problem is often seen when using “inferior” MIDI Interfaces, but can also indicate computer problems, or even a bad MIDI cable. In rare cases, re-downloading the firmware update can also solve this problem.
- Error 18: indicates that the MFC-101 has received some stray MIDI message while awaiting a firmware update. Please make sure no other MIDI applications are running on your computer, or, if using the Axe-Fx II as a MIDI Interface, ensure that I/O: MIDI: SEND REALTIME SYSEX is set to “NONE”.
- The manual listst and explains more error messages.
MFC-101: backup and restore
Use Edit > Setup > Sysex Data.
MFC-101: restore to factory defaults
Power the MFC-101 while holding switch 11. The manual lists all factory default settings.
MFC-101: test mode
Press Edit followed by Reveal, to enter test mode.
MFC-101: LEDs
With the MFC-101 in Axe-Fx Mode:
- Red means that the effect is present in the preset, bypassed.
- Green means that the effect is present in the preset, enabled.
- Off means that the effect is not present in the preset.
You can disable Red LEDs (Edit > Setup > Set IAOffLed Off), which works better for colorblind people.
Put small bits of painter's tape on top of them to decrease the LED brightness. Or use this smart and simple solution.
MFC-101: TotalSync
When you switch presets on the front panel of the Axe-Fx II, the MFC-101 can switch along. It's called TotalSync. Enable/Disable this in the MFC's MIDI menu.
TotalSync doesn't work in Song and Set modes, and custom MFC-101 Tx Map and Axe-Fx II preset remapping (for example to support scenes) are not supported.
MFC-101: use two MFC-101s
Matt:
"True Master Slave is not possible. Split merge works in theory, but there can be hiccups. One MFC can respond to program changes from another, but the two units won't appear to be in any kind of sync". source
MFC-101: tuner and tempo information
To show the Tuner display and see the Tempo LED blink in the correct tempo, the MFC-101 must be in Axe-Fx Mode. Also, a connection type must be used which supports this: 5-pin MIDI, CAT5 (Ethernet/Ethercon) or XLR. On the Axe-Fx II (I/O > MIDI) Send Realtime Sysex must be set to to Tuner, Tempo, or All.
The MFC won't display tuner data when using an external switch to switch on the tuner. It will be displayed on the Axe-Fx though.
When the Tuner on the Axe-Fx is set to anything other than its first tab page, the message "Waiting for tuner" appears.
When the tuner display is active, it's still possible to engage/bypass other effects, switch banks, presets and songs etc.
You can combine Tap Tempo and Tuner functionality: hold Tap Tempo will enter the Tuner mode. Use Edit > Setup to set this up. This does not work with external switches.
How to create a tuner "preset" instead of an IA switch
To use an external switch to control Tap Tempo: connect the switch to one of the switch inputs on the MFC. Set the switch type in Edit > Setup to Toggle or Momentary, depending on the switch. In Edit > MIDI > XS set the switch to control CC #14. In Edit > MIDI > XS set the switch to TypTOG.
MFC-101: Axe-Edit
It's recommended to not use the MFC-101 while Axe-Edit is running. It's possible to do so, but using the MFC-101 can cause audio gaps, and fast switching can cause communications issues.
Engaging and bypassing effects on the MFC-101 will not always update the block states in Axe-Edit. To make Axe-Edit recognise such changes, its polling mechanism must be engaged. This can be accomplished by attaching the Bypass parameter of any block in the preset to a controller. The block doesn't have to be connected to anything on the grid (so use a low CPU block).
MFC-101: Axe-Fx II XL
Fractal Audio:
"The MFC-101 stores 384 presets. The Axe-Fx II Mark I/II also store 384 presets. Many MIDI controllers only store 128 presets. There is no correlation between the number of presets on a MIDI controller and the device being controlled. This is not a bug, mistake or deception." source
To access Axe-Fx II presets above 384, you need to use MIDI mapping (transmit table).
Axe-Fx II XL firmware 15: "Added “MFC ECHO TO MIDI OUT” option for Axe-Fx II XL (I/O > MIDI). Turning this to On echoes all MIDI data from the MFC to MIDI Out. This can be used to send MIDI PC and CC messages to other equipment connected to MIDI Out."
MFC-101: software editors
MFC_Edit is the offical editor for the MFC-101.
MFC-101: initial configuration
Basics:
- Use the Edit menu to program the MFC-101. There's no software editor. You may have to press Edit for a couple of seconds (long press), depending on a configuration setting.
- Make sure you select the correct Axe-Fx model (Edit > Setup) and connection port (Edit > MIDI). The latest firmware defaults to "XL" and "FASlink".
- Decide whether you want to use Axe-Fx Mode or not (Edit > Setup).
- Choose the desired Bank Size (Edit > Setup). The MFC supports 384 presets.
- Use Edit > Midi to configure the IA switches.
Tutorials on G66 site:
MFC-101: select the number of preset/IA switches
The MFC-101 defaults at 5 presets per bank. It can be set to any number. Use Edit > Setup > Bank Size to change this, depending on how many IA switches you want to be accessible directly without needing to press Reveal.
- When using size "0", use the Up/Down switches to scroll through banks and automatically load the preset.
- When using size "1", use the Up/Down switches to scroll through banks, then press switch 1 to load the preset. If you want the bank number to be the same as the preset number, set Display Offset on the Axe-Fx II to 1, set Offset Axe-Fx on the MFC to 1 and set Offset MFC-101 to 1.
Bank Size also influences Song and Set Mode's layout.
Preset switches start from the bottom row by default. You can change this using the parameter FirstPresetSwitch. This lets you specify where the presets start on the board. Preceding switches automatically are IA switches.
MFC-101: Bank Style
Use Edit > Setup > Bank Style to tell the MFC-101 what to do when changing banks:
- automatically load the first preset of a bank
- automatically load the preset at the current position in the bank (default)
- nothing.
When set to None, banking up/down will show the bank number and the preset range within the bank (Smart Banks).
Scrolling speed through Banks, Songs and Sets cannot be adjusted.
When using Bank Size "0" or "1", use the Up/Down switches to scroll through banks and automatically load the "Autoload" preset.
MFC-101: Bank/Song Limit and Bank/Song Wrap
You may need access to just a subset of all available banks on the MFC-101. The Bank/Song Limit parameter lets you define the range of this subset. This prevents having to scroll through banks/songs you don't need.
Also, you may want to stop scrolling through banks/songs after reaching the first or last bank/song (no wrapping around). The Bank/Song Wrap parameter lets you enable/disable this.
MFC-101: Global preset
Set Global Preset to ON (off by default) in Edit > Setup and assign a preset.
The Global Preset preset can now be recalled at any time by pressing a preset switch a 2nd time. The MFC will display "GBL" while the Global Preset is active. You can switch to other scenes within that preset and engage/bypass individual blocks. Pressing the preset another time (3rd time) returns you to the previous preset. However, if you press another preset switch instead (not the one from which you switched to the Global Preset), that preset will be recalled.
You can specify which scene you want to recall when using Global Preset by using Custom Mapping on the Axe-Fx (I/O > MIDI).
Turn off Global Preset if you want to be able to recall a preset in its saved state by pressing a preset switch a second time (see Panic switch).
The Global Preset can also be set to "Backtrack", see below. More information
MFC-101: alternate presets
A 2nd stomp on a preset switch lets you activate another preset, which can be different per preset. This is an alternative to using a Global Preset or Backtracking. You can set this in the Preset menu on the MFC-101. Note that the "alternate preset" is a program change, not a "preset switch" as configured on the MFC.
You use Alternate Preset in combination with Axe-Fx Scenes by mapping presets to scenes on the Axe-Fx II.
MFC-101: Backtracking
Backtracking means that a 2nd stomp on a preset switch will recall the previous preset. You can set this per preset (Edit > Preset) or configure Global Preset to act as Backtrack ("BAK"). Backtracking always recalls scene 1.
MFC-101: scenes
The MFC-101 offers special support for Axe-Fx II preset scenes:
- Recall any of the 8 scenes directly
- Increment or decrement scenes
- Switch between scenes 1 and 2.
You can also use general MIDI commands to switch scenes, or use external momentary switches.
Use I/O > Midi > Mapping if you want preset switches to switch to specific scenes. For example, if you want the first 5 preset switches on the MFC to switch to preset 000, scenes 1-5, use Mapping.
More information in Scenes.
MFC-101: PC MIDI channel(s)
By default the MFC-101 sends MIDI Program Changes on all MIDI channels, regardless of the selected MIDI channel on which the MFC-101 operates.
To disable this behavior (source):
- Optionally reset the MFC-101 to FACTORY settings if you also want to do the step noted in "PS".
- Temporarily set BANK SIZE to 17.
- Turn off all PCs in preset 1.
- Edit: COPY PRESET 1 to preset locations 2 through 17.
- Edit COPY BANK 1 to bank locations 2 through the end.
P.S. Make a BACKUP of the initialized MFC with all PCs off, so you can avoid ever needing to do this again, no matter what setup you require in the future.
MFC-101: assign IA functionality (Axe-Fx or general MIDI)
Any switch can operate as a toggle (latching) or as a momentary switch, and can be given a 7-character name (Edit > Setup).
IA switches can be assigned to Axe-Fx functions or to general MIDI functionality.
In Axe-Fx Mode go to Edit > Midi > IA and select the desired block for each switch from the list of effects. In Axe-Fx Mode IAs operate globally, meaning that you cannot change switch functionality per preset.
You can assign an effect to the switch. The switch will then enable or bypass that effect. You can also select an effect X/Y, to switch between X and Y. Other available Axe-Fx functions include Vol Inc, Vol Dec, scenes.
If you select "None", the switch is not assigned to specific Axe-Fx functionality. It will be available for general MIDI use (referred to as: General Use IA Switch). This lets you program MIDI commands. You can send 2 separate MIDI CCs, a MIDI PC, and additional custom MIDI commands per switch. Use value 127 to switch on effects, 0 to switch off. Or select OFF to send nothing at all. General Use IAs operate globally (same across all presets).
If Axe-Fx Mode is disabled, the MFC-101 determines which effect in a preset is engaged or bypassed (Edit > Preset). In this case preset names in Preset Mode are preced by a "P" (instead of "X").
MFC-101: carry over IA state when switching presets
You may want "general function" onboard IAs to "carry over" their active state when switching presets. This is controlled through the Global and Send w/Preset parameters for general function IAs. Global defaults to Off, and Send w/Preset defaults to On. See the table in the Owner's Manual for a description of how these parameters work together.
MFC-101: group switches (switch linking)
The Switch Links setting lets you define a group of switches. Within that group only one setting can be active, so selecting one switch will automatically disable the others within the group (mutually exclusive). There's a maximum of two groups and 5 switches per group. Switch Links is particularly useful to switch channels on an external amp which supports MIDI.
MFC-101: methods to switch between amp blocks/settings
- Use a single Amp block and scene controllers.
- Use a single Amp block and X/Y, with a dedicated Amp X/Y switch, or scenes.
- Use two Amp blocks with their bypass parameters attached to an external controller, and a switch.
- Use two Amp blocks with a Mixer block set to "morph" and attached to an external controller, and a switch.
- Use two Amp blocks with scenes, and dedicated scene switches.
- Use two Amp blocks, with dedicated AMP 1 and AMP 2 switches (and Switch Linking).
MFC-101: turn an IA into a preset switch
Set the switch's function to None (Edit > MIDI). Then scroll to the PC page, set it to On and specify the Program Change number. Set the Switch Type (Edit > Setup) to Momentary, for correct LED behavior.
To also make the MFC-101 switch to the Bank containing the preset, enable TotalSync.
This is a great alternative to using the Global Preset feature.
MFC-101: engage and bypass multiple effects
Here's a trick that lets you assign multiple effects to one switch. Source: M@.
- Pick a (low CPU) surrogate such as VOLx or FILTERx, set to NULL. On the Axe-Fx II, go to I/O > CTRL and assign the same MIDI CC to your surrogate and all of the effects you want assign across the single footswitch.
- Place the surrogate effect block (disconnected) in every preset that has your target block(s).
- Set its bypass state and that of the assigned effect(s) to the same initial state.
- Assign the surrogate to the Axe-Fx IA in the MFC-101.
- Now you have've got bi-color-LED-enabled control over different multiple blocks across different patches from a single IA switch.
Alternatively: assign the same CC (or an external controller) to all desired effects. But you won't get multi-color LEDs.
MFC-101: toggle between two effects
Set up the switch to send a CC to an external controller. Assign Bypass in two effect blocks to the same controller. Set the Start value of one block to 100 and the other to 0.
An example when alternating between Comp and Drive: set one of the externals to the same CC as COMP, then use it to bypass Drive. Set the switch to COMP and you'll get RED=DRIVE, GREEN=COMPRESSOR (source: Matman).
MFC-101: use a single switch to enable some effects and bypass others
MFC-101: switch between two speeds
You can use a switch to change speeds (tremolo, vibe, phaser, rotary etc.):
- Assign an external controller to the effect's Rate parameter.
- Enter Min and Max values in the modifier menu.
- On the MFC assign a switch to the controller's MIDI CC.
To force a gradual change between the two settings, increase Damp in the modifier menu of the effect parameter on the Axe-Fx.
MFC-101: Songs and Sets
In Song and Set modes names on the MFC start with a "S". You can assign up to 15 presets per song, depending on the Bank Size setting. The MFC supports up to 100 songs. Preset switches in Songs can be set to OFF.
You can also use Song Mode to circumvent a limitation of Preset Mode. In Preset Mode banks have no names, you have to remember which presets are in numbered banks. However, if you assign presets to songs in Song Mode, maintaining the bank structure, you can name them.
Sorting a Song or Set list is not possible.
You cannot set scenes. A preset in a song will always load scene 1.
An alternative to Song Mode: Scenes.
MFC-101: ways to create a "lead" switch
- If you have a single solo preset, use Global Preset (press any preset twice to recall the solo preset).
- If you have various solo presets, use the Alternate Preset feature (press a preset switch twice to recall an "alternate" preset for that switch).
- If you use Song Mode, create solo presets and assign them to songs.
- If you prefer IAs, configure a switch to change the state of two effects at once. If two effects is not enough, you can use custom MIDI to configure more. Or assign a single CC to multiple effects on the Axe-Fx II (I/O > Ctrl), and change them all in one go with a single switch.
- Use Scenes
MFC-101: Panic switch
It can be handy to be able to quickly recall the current scene in its saved state (revert), just by pressing the current scene switch a second time. This will reset any changed IAs to their save state for this scene. This requires that Scene Revert (I/O > MIDI) is set to ON.
Alternatively you can also press the preset switch (the current one) again. This loads scene 1 of the current preset in its saved state. This requires that Global Preset (MFC) is not enabled. Set Ignore Redundant PC (Axe-Fx) to Off to prevent audio gaps.
MFC-101: expression pedal
You can connect up to 4 expression pedal(s) to the rear of the MFC-101. Expression pedals need 1/4" TRS (stereo) cables!
Use Edit > Setup and Edit > MIDI to configure the pedals. Edit > Preset lets you override global expression pedal settings.
By default pedal #1 is mapped to CC 11 (global Output 1 volume) and pedal #2 to CC 16 (External 1). Pedals 3 and 4 default to OFF, which may not be obvious because the MFC will let you calibrate the pedals.
Calibration: see chapter 7 of the manual. Note that it's normal for pedals not to employ the full value range (0 - 127). If your pedal only gets to 100 or so, it can still perform 100%. Note: after calibration you can check if the pedal goes from 0 to 127 by entering the MFC's test mode (see above). Near the end of the test you can test the pedals.
Use the Beginning Value parameter (Edit > Midi) to define the state of the pedal after switching presets. "PDL" means that the position of the pedal is polled and recalled, "Off" means that the pedal is off until moved (default), or you can select a specific value between 0 and 127.
While you can define/limit the operational range of an expression pedal (globally or per preset), you also use the Modifier menu of effects blocks on the Axe-Fx II for this purpose.
Settings in Edit > MIDI are global. If you want program a pedal to behave differently in specific presets, adjust in Edit > Preset.
MFC-101: make a pedal control different effects without switching presets
Method 1 (i.e. using a single pedal control either Wah or Whammy):
- Insert a Wah block.
- Insert a Pitch block, directly above or below the Wah in a parallel row. Connect it back to to the main row.
- In the Modifier menu of BOTH effects (Wah: Frequency; Pitch: Control): set Source to External 1. Enable Auto-engage.
- Add a Mixer block to the main row, just after Wah and Pitch.
- Edit Mixer: enter the Modifier menu of the Gain parameter for the row that connects to the Wah. Set Source to another external controller (which will be attached to an IA-switch to switch between Wah and Whammy). Set Start Value to 100% and End Value to 0.
- Do the same for the row that connects to the Pitch block. But: set Start Value to 0% and End Value to 100%.
- Program an IA-switch on the MFC to switch between Wah and Whammy, using the Mixer rows. Use the CC of the external controller that you specified while editing the Mixer block, and send "127" for the Wah, and "0" for the Whammy.
- That's all. Moving the pedal should activate both the Wah and the Pitch block. But thanks to the Mixer block you'll only hear one of these effects. If you're hearing the Wah and the Whammy effects simultaneously, you need to press the IA-switch to get the Mixer block to work
Method 2 (i.e. using a single pedal control Vol and Wah): (source: Bakerman)
- Place a Volume block on the grid.
- Assign an IA switch to an external controller's CC.
- Assign another external controller the Wah and Volume control knobs.
- Set the first external controller as a Bypass modifier for both blocks and reverse the slope of one (start 100, end 0).
- Now the IA switch will toggle between Wah/Volume and the pedal will control both.
Method 3 (using scenes to make the pedal control something else, such as Wah and Whammy and Volume):
- Put Wah and Pitch and Volume in one column (parallel).
- Assign an external controller (pedal) to the effects. Set to Auto-Engage in Wah and Pitch.
- In Wah and Pitch turn down Level in the block's Y state.
- Scene 1 is for Wah. Set Wah to X, set Pitch to Y, bypass Volume.
- Scene 1 is for Whammy. Set Wah to Y, set Pitch to Y, bypass Volume.
- Scene 3 is for Volume. Set Wah to Y, set Pitch to Y, engage Volume.
- To make this work with effcts without X/Y support, use a scene controller.
MFC-101: alternative to auto-engaging
Auto-engage (Axe-Fx) can sometimes cause an audible hickup when it enables an effect (such as Whammy). There's an alternative, using the effect's Mix modifier settings:
- Auto-engage = off, Min = 100, Max = 0, Start = 60, Mid = 0, End = 49,8, Slope = 100, Scale = 10, Offset = -100.
These settings pass the unmodified signal at heel-down position, and switch to 100% processed sound when moving the pedal, while retaining the expression pedal's regular functionality.
Note that this only works with effects where the heel-down position sounds like the unmodified direct tone, and which have a Mix parameter. This rules out Wah for example.
MFC-101: external switch
You can connect momentary or toggle/latching switches to the rear of the MFC-101. There are 2 inputs which, when using TRS (stereo) cables, support 4 switches in total. A single switch can also be used with a TS (mono) cable, but you need to set the second switch to Off.
Use Edit > Setup and Edit > Midi to configure external switches.
You can specify whether the external switch is a momentary or latching switch type.
An external switch can control a single MIDI CC, using value 0 for off and 127 for on. You can't use them for preset switching (MIDI PCs) or custom MIDI stuff.
Settings in Edit > MIDI are global. If you want program the switch to behave differently with some presets, adjust in Edit > Preset.
The parameters TyHDW and TypTog and TypAUT control whether an external switch carries over its active state when switching presets:
- Latching: when set to TypHDW, the state is carried over because the MFC-101 polls the switch after having switched presets. Use TypTOG to prevent polling but this may cause the LED on the external switch to lose sync.
- Momentary: when set to TypHDW, they operate as a momentary switch and retaining states is irrelevant. Use TypTOG to simulate a latching (toggle) switch, but the switch won't retain its state.
MFC-101: connect a expression pedal with switch
Some expression pedals have a separate switch. You can use separate connections for the pedal and the switch and configure the switch to activate an effect which can be controlled with the pedal, such as a wah.
- Connect the expression pedal to the MFC using one of the 4 expression pedal inputs on the MFC. Use a stereo (TRS) cable.
- Connect the switch to one of the 2 switch inputs on the MFC. Use either a stereo (TRS) or mono (TS) cable. If using a mono cable, disable the other connection of the switch in the setup menu.
- On the Axe-Fx, insert a Wah block in the preset.
- Set the FREQ or CONTROL parameter of the Wah block to the External controller (the one that's tied to to the expression pedal, see below).
- Use Damping if desired. Set PC RST to On. Keep Auto-engage Off because you will be using the switch.
- Save the preset with the Wah disabled.
- In I/O > Ctrl on the Axe-Fx, note which CC is used for the Wah 1 block (default #97).
- In I/O > Ctrl on the Axe-Fx, note which CC is used for the External controller which is tied to the expression pedal, mentioned above.
- In I/O > Midi on the Axe-Fx, verify that the External controller which is tied to the expression pedal is set to 0%.
- Make sure that the expression pedal is calibrated (Edit > Setup on the MFC).
- Make a connection between the pedal and the Axe-Fx by selecting the right CC and channel in Edit > MIDI on the MFC. Make sure you select the correct pedal input (XP1 - XP4). The CC must match the External controller's CC on the Axe-Fx (see above).
- In Edit > Setup on the MFC set the external switch to Toggle. Make sure you select the correct switch input (XS1 - XS4).
- Make a connection between the switch and the Axe-Fx by selecting the right CC and channel in Edit > MIDI on the MFC. Make sure you select the correct switch input (XS1 - XS4). The CC must match the CC of the Wah block on the Axe-Fx (see above). Set type to HDW. When using a mono cable for the switch, disable the other connection (set it to Off) to prevent MIDI problems.
- Tell the MFC the switch values for Off and On (Edit > MIDI). 000 = Off. 127 = On. If the LED works vice versa, switch the values: 000 = On, 127 = Off.
MFC-101: troubleshooting
Noise issues:
- Change the Axe-Fx II's MIDI channel (I/O > MIDI) from Omni to 1.
- Don't place the MFC-101 nearby powered speakers or on top of the Axe-Fx.
- Ticking or clicking sound in sync with Tap Tempo is probably interference from your MIDI cable, leaking into your guitar pickup or guitar cable. Make sure to route the MIDI cable away from anything that it may interfere with, or use CAT5 or XLR. Or switch off "Send Realtime Sysex" when you don't need to use the Tuner and Tap tempo. source Another source might be the 'watch you're wearing! source
Switch issues:
- If the MFC-101 won't scroll down anymore, switch #1 may be stuck. Depress it a number of times. source
- When none of the switches or connnected pedals operate until you switch presets, try powering the Axe-Fx before the MFC.
Solving the "Waiting for tuner" message:
- The Axe-Fx II Tuner must be on its first page.
- Verify that SendRealtimeSysex in the Axe-Fx's MIDI menu is set to All or Tuner.
"Name timeout..." message:
- Set the MFC- 101 to the correct port and same MIDI channel as the Axe-Fx II. Make sure the cable is connected firmly at both sides. It that doesn't help: try another cable. If that doesn't help: clean the connections at both sides (blow air).
- Read par. 14.6 of the manual.
MFC-101: accessories
Connect an additional MIDI controller to the MIDI IN port on the MFC-101. Select the correct MIDI channel for the added device in Edit > System. Enable Receive Program Changes in Edit > System. Suggestion: Tech 21 MIDI Mouse: small, battery powered (or 5-pins MIDI phantom power or power supply).
Hardware MIDI utility such as MIDI Solution's Event Processor or Bome's MIDI Translator, which convert MIDI messages, such as a specific MIDI CC, into other messages like a PC.
The MFC-101 by itself cannot switch amp channels, unless you have a MIDI-controlled amp connected to the Axe-Fx II or the MFC-101. You can use MIDI to control an external MIDI switcher for this task. Suggestions.