Read the Owners Manual first!
Difference between revisions of "Editors"
| (960 intermediate revisions by 7 users not shown) | |||
| Line 1: | Line 1: | ||
| − | |||
__TOC__ | __TOC__ | ||
| − | = | + | =Software editors= |
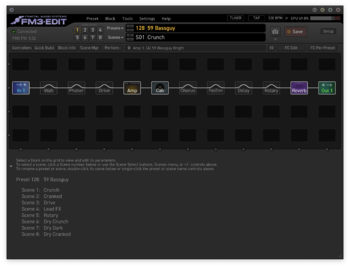
| − | + | Axe-Edit III, FM3-Edit and FM9-Edit are the software editors for Fractal Audio's Axe-Fx III, FM3 and FM9 guitar processors. You can download the latest versions from Fractal Audio's [https://www.fractalaudio.com/support support page]. | |
| − | |||
| − | + | VP4-Edit is the editor for the VP4. While it shares many features with the other editors, there are also differences. Parts of the information supplied below may not apply to VP4-Edit. | |
| − | |||
| − | [ | + | System requirements: |
| + | * Mac OS 10.7 or newer (Intel or M1 processors) | ||
| + | * Windows 7 or newer (32-bit or 64-bit) | ||
| + | * On Windows computers, Fractal Audio's USB driver has to be installed first. It can be downloaded from the support link above. | ||
| + | * If you get an error message about a missing <q>MSVCP140.dll</q> file install the [https://www.microsoft.com/en-us/download/details.aspx?id=52685 MS Visual C++ Redistributable Update]. | ||
| + | * Older versions of the editors can be downloaded from the [http://archive.axefx.fr unofficial archive]. | ||
| + | * The [[Fractal-Bot]] utility is built into the editors, and is found under the Tools menu. | ||
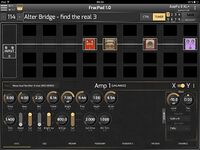
| − | + | [[image:editor.png|350px]] | |
| − | + | =Install and connect= | |
| − | + | ==Install== | |
| − | The | + | The installer is packaged in a <samp>*.zip</samp> on Windows or <samp>*.dmg</samp> on macOS, archive file. Double-click, or select and open the file, and follow the on-screen instructions. |
| − | + | ==Release notes== | |
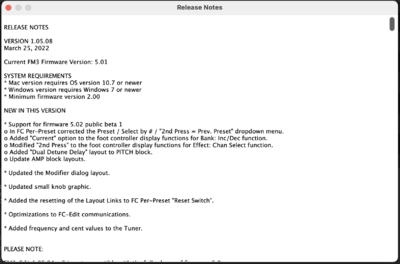
| − | + | Release Notes are included with each installer download. '''<u>Read them!</u>''' They include information about new features, changes, and what you should be aware of before updating and using the new version. Release notes are also displayed after installation and can be found under <code>Help > View Release Notes</code>. | |
| − | = | + | Click on the top-left program logo, or select <code>Help > About</code> to see the installed version. |
| + | |||
| + | [[image:releasenotes.png|400px]] | ||
| + | |||
| + | ==Connect== | ||
| + | |||
| + | The software editors depend on USB 2.0 or greater to connect to the hardware. Operation without an USB connection to the guitar processor is <u>NOT</u> supported; there is <q>no offline</q> editing. The connection uses the USB-B port on the hardware (VP4: USB-C). On the FM3 we cannot connect using the USB-A port. | ||
| + | |||
| + | On Windows computers, Fractal Audio's USB driver has to be installed first, and can be downloaded from the Fractal Audio [https://www.fractalaudio.com/support/ support page]. | ||
| + | |||
| + | To confirm that the editor is communicating with your Axe-Fx II, look for a green check mark with the word <q>Connected!</q> in the upper left corner of the program window. If the message does not appear, don’t panic, instead, go to <code>Settings > Preferences</code> to select the ports of the device, or read the Troubleshooting section below. | ||
| + | |||
| + | The editor relies on intensive two-way communication which can cause audio gaps or stutters when operating the guitar processor through its onboard user interface or through a foot controller like the Fractal Audio Systems FC-6 and FC-12. The <code>Settings > Pause Communications</code> menu, or press the <kbd class="keycap">F8</kbd> key on your keyboard, puts communications on hold between the editor and modeler so you can test performance without glitches. | ||
| + | |||
| + | The editor can control multiple guitar processors of the same model. Select <code>Tools > Show Available Devices</code> to see which connected devices are detected and available. The dialog box provides <span class="button">Scan</span> and <span class="button">Test</span> options. | ||
| + | |||
| + | Tip: When using a USB-C to female USB-A adapter on a newer Apple computer, plug the USB-C adapter into a USB port on the Mac first, allow it several seconds to <q>wake up</q> and then connect the USB cable to the unit into the adapter. | ||
| + | |||
| + | ==Startup processes== | ||
| + | |||
| + | ===Refresh After New Firmware AKA (<q>RANF</q>)=== | ||
| + | When you first launch the editor, or for the first time after having updated your guitar processor’s firmware, the editor will likely need to refresh the information it stored locally about the device, the so-called <q>definitions</q>. The editor detects such changes and will start the refresh process automatically. The process may run for a while. | ||
| + | |||
| + | You can manually force the editor to re-read block definitions by selecting <code>Settings > Refresh After New Firmware</code> or <code>Settings > Preferences > Refresh</code>. Among forum members this is referred to as <q>RANF</q>. | ||
| + | |||
| + | [[image:RANF.png|250px|link=]] | ||
| + | |||
| + | ===Automatic updates=== | ||
| + | At startup, the editor checks automatically if an official update for the editor is available and if so, offers the option to download and install the update. This process can be disabled in <code>Settings > Preferences > Options</code>. You can also click <code>Help > Check for Updates</code>. Or download the latest version of the editor manually from [http://www.fractalaudio.com/support Support]. | ||
| + | |||
| + | ===Preset and cab names=== | ||
| + | Also, at each startup the editor will fetch all Presets names and Cab names from the guitar processor. This ensures that the editor and the guitar processor are in sync. You can disable this in <code>Settings > Preferences > Options</code>. | ||
| + | |||
| + | When disabled, you can still refresh Preset and Cab names manually by pressing the Refresh icon ([[Image:refresh_button.png|24x24px]]) in <q>picker</q> windows (explained later). | ||
| + | |||
| + | ==Troubleshooting connectivity issues== | ||
| + | |||
| + | Running Fractal-Bot and the software editor at the same time can cause conflicts. Try to avoid this. | ||
| + | |||
| + | The editor should generally detect your guitar processor and connect automatically. If a problem occurs, you will see a <q>Disconnected</q> indicator (above the program logo) or a <q>Communication failure unable to complete the communication request due to time-out</q> warning. | ||
| + | |||
| + | Some steps to resolve possible connection issues are: | ||
| + | |||
| + | * Try manually setting or re-setting the two ports under <code>Settings > Preferences > Ports</code>. | ||
| + | * Try another USB cable that you know is good. Cables from [https://btpa.com/Fractal-Audio/ BTPA.com] are often recommended in the forum for their reliability and quality. | ||
| + | * Ensure that the device is connected through USB. | ||
| + | * If your guitar processor has multiple USB ports, ensure that you’re using the USB Type-B port on the guitar processor. | ||
| + | * If using Windows verify that you’ve installed [https://www.fractalaudio.com/support/ the drivers] for your model. Verify the installed drivers in Windows’ Control Panel. macOS uses universal drivers so doesn't have a separate driver for the computer. | ||
| + | * The editor requires compatible firmware running on the Fractal Audio Systems guitar processor. The version of the installed firmware of the connected guitar processor is displayed in the top-left area of the editor window. | ||
| + | * Reboot! Shut down the editor, shut down your device, and shut down your computer. Re-start your computer, wait for it to finish booting then power on your device and re-start the editor. | ||
| + | * Ensure that your guitar processor is connected directly to your computer or a ''powered'' USB hub. Do not use a cable extender. A REAR panel USB port on the computer is sometimes preferable as front panel ports may utilize a passive/non-powered integrated USB hub. Also, try a different USB port or different USB cable. | ||
| + | * If using Windows, try right-clicking the editor’s shortcut icon and choosing <code>Run as Administrator</code>. | ||
| + | * Try the following steps to reset your port selections: | ||
| + | *# Power on your guitar processor. | ||
| + | *# Launch the editor and go to <code>Settings > Preferences</code>. | ||
| + | *# Set both ports to <samp><<none>></samp>. | ||
| + | *# Close the Preferences dialog and quit the editor. | ||
| + | *# Re-launch the editor. | ||
| + | *# Open <code>Settings > Preferences</code> and select the appropriate ports. You should see a green <q>check</q> next to each port selection. | ||
| + | *# Close the dialog. The editor should now communicate with the hardware. | ||
| + | * Apple's Energy Saver options in some Macs can cause issues like dropped USB connections when the Mac hardware sleeps; You can set them in the System Preferences. | ||
| + | :[[Image:Macos_energy_saver_prefs.png|350px|Suggested macOS Energy Saver settings]] | ||
| + | * Google Chrome can cause issues with older editors. | ||
| + | |||
| + | If you are experiencing issues running the Axe-Fx III, Axe-Edit III and Apple Logic or Pro Tools read <q>[http://forum.fractalaudio.com/threads/fixed-axe-fx-iii-and-logic-pro-midi.145242 Axe-Fx III and Logic Pro MIDI]</q> and <q>[https://forum.fractalaudio.com/threads/solved-axe-edit-partially-freezes-shortly-after-opening-pro-tools.199422 Axe Edit partially freezes shortly after opening Pro Tools]</q>. | ||
| + | |||
| + | <blockquote> | ||
| + | '''FRACTAL AUDIO QUOTES''' | ||
| + | <HR> | ||
| + | |||
| + | <blockquote> | ||
| + | [http://forum.fractalaudio.com/threads/so-frustrated-i-want-to-throw-the-ax8-in-the-trash.120124/page-3#post-1429463] | ||
| + | There is a known issue with Chrome seizing MIDI ports (both physical and virtual MIDI-over-USB ports) as part of some misguided MIDI over the internet idea. Since the AX-8 is USB 1.1 it only allows one connection so if Chrome grabs it then AX-8 Edit won't be able to use it. Unfortunately Google seems uninterested in fixing it. | ||
| + | </blockquote> | ||
| + | |||
| + | <blockquote> | ||
| + | [http://forum.fractalaudio.com/threads/cant-connect-to-ax8-edit.124825/#post-1484972] | ||
| + | Chrome definitely can hijack the MIDI over USB port on the AX8. When that happens, it's not enough to just close the browser, you have to ensure that it is not running in the background. Fractal Audio has tested and confirmed this. | ||
| + | </blockquote> | ||
| + | |||
| + | <blockquote> | ||
| + | [https://forum.fractalaudio.com/threads/usb-firmware-v-1-14-beta-public-beta.185232/post-2286384] | ||
| + | Anything that "grabs" the MIDI ports on the Axe-Fx will prevent Axe-Edit form working. This is a known issue with Logic and Pro Tools as they grab any detected MIDI ports by default. You need to go into SETUP for these products and disable the Axe-Fx MIDI ports in order for Axe-Edit to be able to use them. | ||
| + | </blockquote> | ||
| + | |||
| + | <blockquote> | ||
| + | [https://forum.fractalaudio.com/threads/solved-logic-pro-crashing-with-axe-edit-running.190518/post-2365400] | ||
| + | There's a general setting in Logic that allows you to disable MIDI Inputs for external USB/Audio products that have editor software. Make this change and see if it helps. | ||
| + | </blockquote> | ||
| + | </blockquote> | ||
| + | |||
| + | =Editor preferences= | ||
| + | |||
| + | [[image:prefs.png|500px|link=]] | ||
| + | |||
| + | You can set personal preferences for the editor in <code>Settings > Preferences</code>, or press <kbd class="keycap">Command</kbd>+<kbd class="keycap">P</kbd> on macOS or <kbd class="keycap">Ctrl</kbd>+<kbd class="keycap">P</kbd> on Windows. | ||
| + | |||
| + | '''General menu''' | ||
| + | |||
| + | :; Ports : Shows the input and output ports used by the editor. The program automatically selects the USB ports of a connected guitar processor, so you should not need to manually select ports. Note that port names refer to MIDI even when connected via USB. | ||
| + | |||
| + | '''Controls menu''' | ||
| + | :; Knob Mode : Determines how knobs respond to mouse motion. Linear (default): the values of knob parameters increase as click and drag the mouse away from the center of the knob. Move up or to the right to increase, down or to the left to decrease. The fastest response occurs when you move in a <q>northeast</q> or <q>southwest</q> direction. Circular: the knob pointer follows your mouse pointer as you click and drag in a circular motion. | ||
| + | :; Mouse Wheel : Typically, you won’t need to change this setting, but if the action of your touchpad or the wheel of a connected mouse/trackball seems backwards, change this value to Reverse, or you can disable the wheel altogether. | ||
| + | :; Refresh Rate : Controls the display refresh rate of block parameters, meters and graphs. The default is <q>Fast</q>. | ||
| + | |||
| + | '''Workspace menu''' | ||
| + | |||
| + | :; Snapshots : Sets the location where Snapshot files are saved on disk. | ||
| − | + | :; Library : Sets the root of the Library where blocks and channels are stored on disk. The editor monitors the root folder and all subfolders for valid entries (blocks and channels) to build the library. | |
| − | + | :; Preset Templates : Sets the location for loading and saving preset templates. | |
| − | + | :; Global Settings : The editor stores its settings in this folder. It’s specific to the computer’s operating system and can’t be changed. | |
| − | + | '''Refresh menu''' | |
| − | |||
| − | |||
| − | + | :; Preset Names : Updates the editor with the names of all presets stored in the guitar processor. | |
| − | + | :; Cab Names : Updates the editor with the names of all User Cabs stored in the guitar processor and and Scratchpad names. | |
| − | + | :; Block Definitions : Updates the editor with information about all blocks (block definitions) and all factory cab names. Block definitions are refreshed automatically when you install a new firmware version on the hardware. This option is for troubleshooting only. | |
| − | ''' | + | '''Options menu''' |
| − | + | :; Automatically check for a new version at startup : At startup, the editor checks automatically if an official update for the editor is available and if so, offers the option to download and install the update. This setting lets you disable this process. | |
| − | + | :; Show tooltips when the mouse hovers over buttons : This controls the display of tooltips when hovering over screen elements. | |
| − | + | :; Search returns matches from number and name fields in picker windows : Picker windows include a Search field which helps you filter the list to find a desired entry. You can search on item names or numbers. This behavior can be changed here. | |
| − | + | :; Warn about making backups before Manage Presets or Cabs : By default, Manage Presets and Manage Cabs display a warning about making backups at startup. This setting lets you disable this. | |
| − | + | :; Prompt on edited presets when changing or importing a preset from the editor : This setting enables or disables a safeguard against quitting or switching / importing presets without saving changes first. | |
| − | + | :; Default to <All Banks> when launching the Cabinet Picker : This setting lets you choose your favorite startup option when launching the Cabinet Picker: display cabs from all Cab banks, or a single one. | |
| − | + | :; Warn when editing the FC Master Layout Menu : The Master Layout Menu (MLM) is an important element of operating the foot switches on an FM3, FM9 or FC controller. This setting enables or disables a warning message when editing the MLM. | |
| − | The | + | :; Default the Amp block to <q>Ideal</q> upon initial view : The Amplifier block can be displayed in Ideal or Authentic mode. In AUTHENTIC mode only the controls which are present on the modeled amp are displayed on the main page. In IDEAL mode all controls are displayed. |
| − | + | :; Refresh the Scratchpad names each time the CAB block is selected : When selecting a Cabinet block on the grid, the editor fetches the names of the Scratchpads from the guitar processor to ensure that the editor and the guitar processor are in sync. This setting allows you to disable this to speed operations. | |
| − | + | :; Read the Preset names at startup : At startup, the editor fetches the names of all presets from the guitar processor to ensure that the editor and the guitar processor are in sync. This setting allows you to disable this to speed the launch process. When disabled, you can still refresh preset names manually by pressing the Refresh icon in the Preset Picker or the Manage Presets tool. | |
| − | + | :; Read the User Cab names at startup : At startup, the editor fetches the names of all User Cabs from the guitar processor to ensure that the editor and the guitar processor are in sync. This setting allows you to disable this to speed the launch process. When disabled, you can still refresh the cab names manually by pressing the Refresh icon in the Cabinet Picker or the Manage Cabs tool. | |
| − | + | '''Cabinet Import''' | |
| − | + | :; IR Processing : The built-in (factory) cabs in the guitar processor are processed with proprietary minimum phase transformation (MPT) which guards against phase problems when you mix multiple cabs. This setting allows you to disable or enable MPT when importing external cabs (impulse responses), or when you prefer to use Auto Trim instead which removes superfluous silence from the start of the cab (without applying MPT). | |
| − | + | :; IR Output : This setting determines the format of the user cab (impulse response) that’s created when importing an .ir or .wav file. | |
| − | + | :; WAV Import : Determines which channels are imported when stereo .WAV files are added to the Manage browser menu. | |
| − | + | Other personal preferences which affect the editor can be set in SETUP. For example, select Setup > Config to be able to assign a custom name to your connected guitar processor. | |
| − | + | =User interface controls= | |
| − | |||
| − | |||
| − | + | The various knobs, sliders, dropdowns and switches are used to control sound parameters in the guitar processor. Changes are heard in real time while you work. Note that stuttering or light clicking can occasionally be heard while you adjust certain parameters. | |
| − | ''' | + | '''Knobs''': |
| + | * Click a knob and drag up/right to increase, or down/left to decrease. Fastest response is obtained with 45° northeast/southwest motion. Hold <kbd class="keycap">Command</kbd> on macOS or <kbd class="keycap">Ctrl</kbd> on Windows for finer mouse resolution. | ||
| + | * The default knob mode is LINEAR. You can momentarily invoke CIRCULAR knob mode by holding the <kbd class="keycap">Alt</kbd> key. You can also change the default knob mode under Settings > Preferences > General. | ||
| + | * Double-click the knob or its label to set a generic default value. Important: Generic knob values will not necessarily be the same as those obtained when you reset an entire block, change its type, etc. | ||
| + | * Scroll (mouse wheel, trackpad, etc.) over a knob to edit parameter values. Hold <kbd class="keycap">Command</kbd> on macOS or <kbd class="keycap">Ctrl</kbd> on Windows for fine resolution, giving each wheel click has the same precise action as a single <q>tick</q> of the VALUE wheel on the guitar processor. The <kbd class="keycap">UP</kbd> and <kbd class="keycap">DOWN</kbd> arrow keys are equivalent to using the mouse scroll wheel. | ||
| − | + | '''Faders''': | |
| + | * Click and drag the fader handle. Double-click, wheel and arrow keys work the same as when operating a knob. | ||
| − | ''' | + | '''Switches''': |
| + | * Click the switch. Double-click the label to set it to a default value (see above). Some switches may disengage automatically. | ||
| − | = | + | '''Dropdown menus''': |
| + | * Click the text area of the dropdown to display a list of all options. Double-click the label to set a generic default. Click the <kbd class="keycap">UP</kbd> or <kbd class="keycap">DOWN</kbd> arrows to select the previous or next value. | ||
| − | + | ''Tip: Turn any dropdown menu into a picker window (see below) by holding <kbd class="keycap">Shift</kbd> and clicking the dropdown control.'' [https://forum.fractalaudio.com/threads/fm3-firmware-version-8-00-beta-1.203657/post-2549603] | |
| − | * | + | '''Picker windows''': |
| − | * | + | * This is a special selection window presented when a dropdown would be too small for the available options. Picker windows normally close once you click a selection. Tip: Turn any dropdown menu into a picker window (see below) by holding Shift and clicking the dropdown control. |
| − | + | * Use the <q>Pushpin</q> button in the upper right corner (shown at left) to keep the window pinned open. This allows you to audition multiple options before manually closing the window. | |
| − | * | + | * Picker windows include a Search field which helps you filter the list to find a desired entry. You can search on item names or numbers, and number matching can be disabled in <code>Settings > Preferences > Options</code> as desired. You can also use <kbd class="keycap">ARROW KEYS</kbd> to navigate and the <kbd class="keycap">Enter</kbd> key to make selections in a picker window. |
| − | * | + | * The Cab Picker shows the names of UltraRes cabs in italics. Read more about UltraRes in the [[Owners_Manuals|Blocks Guide]]. |
=Keyboard shortcuts= | =Keyboard shortcuts= | ||
| − | + | '''Presets'''<BR> | |
| − | + | Preset Manager = <kbd class="keycap">Command</kbd>/<kbd class="keycap">Control</kbd>+<kbd class="keycap">M</kbd><BR> | |
| − | + | Preset Picker = <kbd class="keycap">P</kbd><BR> | |
| − | + | Preset up/down = <kbd class="keycap">Command</kbd>/<kbd class="keycap">Control</kbd>+<kbd class="keycap">PgUp</kbd>/<kbd class="keycap">PgDn</kbd>. On a MacBook hold <kbd class="keycap">Fn</kbd> too.<BR> | |
| − | + | Refresh preset = <kbd class="keycap">F5</kbd><BR> | |
| − | + | Save preset = <kbd class="keycap">Command</kbd>/<kbd class="keycap">Control</kbd>+<kbd class="keycap">S</kbd><BR> | |
| − | + | Save preset to new preset number = <kbd class="keycap">Shift</kbd>+<kbd class="keycap">Command</kbd>/<kbd class="keycap">Control</kbd>+<kbd class="keycap">S</kbd><BR> | |
| − | * Command+U | + | Revert preset = <kbd class="keycap">Shift</kbd>+<kbd class="keycap">Command</kbd>/<kbd class="keycap">Control</kbd>+<kbd class="keycap">F12</kbd><BR> |
| − | * | + | Clear preset = <kbd class="keycap">Shift</kbd>+<kbd class="keycap">Command</kbd>/<kbd class="keycap">Control</kbd>+<kbd class="keycap">Backspace</kbd><BR> |
| − | * | + | Save snapshot = <kbd class="keycap">Shift</kbd>+<kbd class="keycap">Control</kbd> (<kbd class="keycap">Alt</kbd>)+<kbd class="keycap">Command</kbd>/<kbd class="keycap">Control</kbd>+<kbd class="keycap">S</kbd><BR> |
| − | * Command ( | + | Import preset = <kbd class="keycap">Shift</kbd>+<kbd class="keycap">Control</kbd> (<kbd class="keycap">Alt</kbd>)+<kbd class="keycap">Command</kbd>/<kbd class="keycap">Control</kbd>+<kbd class="keycap">I</kbd><BR> |
| − | * Command | + | Export preset = <kbd class="keycap">Shift</kbd>+<kbd class="keycap">Control</kbd> (<kbd class="keycap">Alt</kbd>)+<kbd class="keycap">Command</kbd>/<kbd class="keycap">Control</kbd>+<kbd class="keycap">X</kbd><BR> |
| − | * Grid Navigation Mode | + | Recent presets = <kbd class="keycap">Command</kbd>+click on Presets button. |
| − | * | + | |
| − | ** Shift+ | + | '''Scenes'''<BR> |
| + | Select a scene = <kbd class="keycap">Command</kbd>/<kbd class="keycap">Control</kbd>+<kbd class="keycap">1</kbd>/<kbd class="keycap">2</kbd>/<kbd class="keycap">3</kbd>/<kbd class="keycap">4</kbd>/<kbd class="keycap">5</kbd>/<kbd class="keycap">6</kbd>/<kbd class="keycap">7</kbd>/<kbd class="keycap">8</kbd> | ||
| + | |||
| + | '''Blocks'''<BR> | ||
| + | Show Block Info = <kbd class="keycap">Alt</kbd> or <kbd class="keycap">F1</kbd><BR> | ||
| + | Show Quick Build panel = <kbd class="keycap">Q</kbd><BR> | ||
| + | Insert a shunt = <kbd class="keycap">Command</kbd>/<kbd class="keycap">Control</kbd>+<kbd class="keycap">U</kbd><BR> | ||
| + | Bypass or engage the selected block, or toggle X/Y (old editors) = <kbd class="keycap">Spacebar</kbd><BR> | ||
| + | Set state of block across all scenes to engage = <kbd class="keycap">Shift</kbd>+<kbd class="keycap">Spacebar</kbd><BR> | ||
| + | Set state of block across all scenes to bypass = <kbd class="keycap">Shift</kbd>+<kbd class="keycap">Command</kbd>/<kbd class="keycap">Control</kbd>+<kbd class="keycap">Spacebar</kbd><BR> | ||
| + | Disconnect all cables from selected block = <kbd class="keycap">Command</kbd>/<kbd class="keycap">Control</kbd>+<kbd class="keycap">D</kbd><BR> | ||
| + | Delete block = <kbd class="keycap">Backspace</kbd><BR> | ||
| + | Open the Edit field of the selected control = <kbd class="keycap">Enter</kbd><BR> | ||
| + | Display the menu associated with the <q>+</q> button on the selected dropdown control = <kbd class="keycap">+</kbd><BR> | ||
| + | Toggle the “Global” button for the selected control = <kbd class="keycap">G</kbd><BR> | ||
| + | Value up/down = <kbd class="keycap">cursor up</kbd>/<kbd class="keycap">down</kbd><BR> | ||
| + | Save block to Block Library = <kbd class="keycap">Command</kbd>/<kbd class="keycap">Control</kbd>+<kbd class="keycap">B</kbd><BR> | ||
| + | |||
| + | <b>Fine Tune Parameter Value</b><BR> | ||
| + | <kbd class="keycap">Command</kbd>/<kbd class="keycap">Control</kbd>+Mouse, Scroll Wheel or Up/Down arrows<BR> | ||
| + | |||
| + | '''Channels'''<BR> | ||
| + | Select channel (<kbd class="keycap">E</kbd> and <kbd class="keycap">F</kbd> apply to the MUX block only) = <kbd class="keycap">A</kbd>/<kbd class="keycap">B</kbd>/<kbd class="keycap">C</kbd>/<kbd class="keycap">D</kbd>/<kbd class="keycap">E</kbd>/<kbd class="keycap">F</kbd><BR> | ||
| + | Next channel = <kbd class="keycap">X</kbd><BR> | ||
| + | Reset channel = <kbd class="keycap">Command</kbd>/<kbd class="keycap">Control</kbd>+<kbd class="keycap">I</kbd> | ||
| + | |||
| + | '''Tuner'''<BR> | ||
| + | <kbd class="keycap">Command</kbd>/<kbd class="keycap">Control</kbd>+<kbd class="keycap">T</kbd> | ||
| + | |||
| + | '''Devices'''<br> | ||
| + | Show devices = <kbd class="keycap">Command</kbd>/<kbd class="keycap">Control</kbd>+<kbd class="keycap">K</kbd> | ||
| + | |||
| + | '''Communications'''<BR> | ||
| + | <kbd class="keycap">F8</kbd> = pause communications | ||
| + | |||
| + | '''Preferences'''<BR> | ||
| + | <kbd class="keycap">Command</kbd>/<kbd class="keycap">Control</kbd>+<kbd class="keycap">P</kbd> | ||
| + | |||
| + | '''Undo, Redo'''<BR> | ||
| + | Undo = <kbd class="keycap">Command</kbd>/<kbd class="keycap">Control</kbd>+<kbd class="keycap">Z</kbd><BR> | ||
| + | Redo = <kbd class="keycap">Command</kbd>/<kbd class="keycap">Control</kbd>+<kbd class="keycap">Y</kbd><BR> | ||
| + | Cut, copy, paste = <kbd class="keycap">Command</kbd>/<kbd class="keycap">Control</kbd>+<kbd class="keycap">X</kbd>/<kbd class="keycap">C</kbd>/<kbd class="keycap">V</kbd> | ||
| + | |||
| + | '''Preset Manager, Cab Manager'''<BR> | ||
| + | Manage Presets = <kbd class="keycap">Command</kbd>/<kbd class="keycap">Control</kbd>+<kbd class="keycap">M</kbd><BR> | ||
| + | Manage Cabs = Shift+<kbd class="keycap">Command</kbd>/<kbd class="keycap">Control</kbd>+<kbd class="keycap">M</kbd><BR> | ||
| + | Search bar = <kbd class="keycap">F3</kbd> | ||
| + | |||
| + | '''Grid Navigation Mode'''<BR> | ||
| + | <kbd class="keycap">Shift</kbd>+<kbd class="keycap">Command</kbd>/<kbd class="keycap">Control</kbd>+<kbd class="keycap">G</kbd><BR> | ||
| + | |||
| + | '''Window size'''<BR> | ||
| + | Full screen = <kbd class="keycap">Shift</kbd>+<kbd class="keycap">Command</kbd>/<kbd class="keycap">Control</kbd>+<kbd class="keycap">W</kbd><BR> | ||
| + | Normal size = <kbd class="keycap">Shift</kbd>+<kbd class="keycap">W</kbd> | ||
| + | |||
| + | <blockquote> | ||
| + | '''FRACTAL AUDIO QUOTES''' | ||
| + | <HR> | ||
| + | <blockquote> | ||
| + | Undo works on most block edit action — in other words, when you are editing a block and you change a parameter. A few parameters don't support undo. It does not work on grid or other operations — in other words, when you change the layout grid, change a system setting, edit a footswitch, etc. | ||
| + | </blockquote> | ||
| + | </blockquote> | ||
| + | |||
| + | =Main editor window= | ||
| + | |||
| + | The editor’s window can be scaled by dragging a border. Select <code>Settings > View</code> to snap the editor to Normal Size or Full Screen. Note that the editor has a fixed width/height ratio, so the editor may not fill your computer’s entire display in Full Screen mode. | ||
| + | |||
| + | ==Top== | ||
| + | [[image:top.png|700px|link=]] | ||
| + | |||
| + | Many of the controls and commands described below have keyboard shortcuts: | ||
| + | |||
| + | ; <code>Pause Communications</code> : See above. | ||
| + | ; <code>Program logo</code> : Displays the version of the installed editor. | ||
| + | ; <code>Name</code> : If you have given the guitar processor a custom name in <code>Setup > Config</code>, that name will appear in the upper left corner. | ||
| + | ; <code>Scenes</code> : Press one of the numbered buttons at the top to select a Scene. Or select a Scene from a dropdown menu, or scroll through Scenes using the <code>+</code>/<code>-</code> buttons. The name of the scene is displayed next to the dropdown menu, where it can be renamed too. | ||
| + | ; <code>Presets</code> : Select a Preset from a dropdown menu next to the preset name. Or scroll through Presets using the <code>+</code>/<code>-</code> buttons. The number and name of the preset are displayed next to the dropdown menu, where it can be renamed too. | ||
| + | ; <code>Preset name</code> : Once a preset is loaded in the editor, its name is displayed and its contents are displayed on the grid — the structure where blocks are placed and interconnected. The current scene name is displayed too. | ||
| + | ; <code>Snapshot</code> : Create a Snapshot, or use its dropdown menu to show the Snapshot folder contents, clear the list or load a Snapshot. | ||
| + | ; <code>Save</code> : Save the preset. The yellow LED lights when changes to the preset have not yet been saved. | ||
| + | ; <code>Setup</code> : Enter the menu to set global parameters for the guitar processor, including audio I/O, Global EQ, USB levels and more. Read [[Setup menu]] for additional information. | ||
| + | ; <code>Tuner</code> : Displays the Tuner. | ||
| + | ; <code>Tap</code> : Tap to set the Tempo. | ||
| + | ; <code>BPM</code> : Shows the Tempo of the current preset in BPM (<q>Beats Per Minute</q>). | ||
| + | ; <code>CPU</code> : Shows the current CPU usage as a number and meter. When the CPU usage exceeds a threshold, a red <q>Warning</q> message is displayed here. | ||
| + | ; <code>Controllers</code> : Configure Internal Controllers, Scene controllers and Tempo settings. Set the state of Control Switches per scene. See where Modifiers are being used. Read more about these functions in the guitar processor’s Owner’s Manuals. Read <q>[[Controllers and modifiers]]</q> for more information. | ||
| + | ; <code>Quick Build</code> : This lets you insert a block from a graphical interface. | ||
| + | ; <code>Block Info</code>button : Changes the way blocks are displayed on the grid. By default, the full name and the block instance are shown. Pressing <code>Block Info</code> (or holding <kbd class="keycap">Alt</kbd>) will abbreviate the block name, show the active channel and show Global Blocks. | ||
| + | ; <code>Scene Mgr</code> : Scene Manager lets you view and set the state of blocks across scenes, (re)name scenes, copy and swap scenes, etc. | ||
| + | ; <code>Perform</code> : Configure the Performance pages, globally as well as per preset. | ||
| + | ; <code>(i)</code> : Shows the currently being used Amp Type(s) and Amplifier block channel(s). | ||
| + | ; <code>10</code> : Configures Preset and Scene names to mask characters that do not fit on the scribble strips of the foot switches. | ||
| + | ; <code>FC Edit</code> : Configure the onboard switches of the FM3 and FM9, and the FC foot controllers. | ||
| + | ; <code>FC Per-Prst</code> : Same as above, but this applies to the current preset only. | ||
| + | ; <code>Sets/Songs</code> : Create songs and sets for use with an FC controller. Axe-Fx III only. | ||
| + | |||
| + | ==Middle== | ||
| + | |||
| + | The lay-out grid, in the middle section, shows the layout of the preset blocks. Click any block on the grid to display its settings in the editor area below the grid. | ||
| + | |||
| + | [[image:middle.png|700px|link=]] | ||
| + | |||
| + | ==Bottom== | ||
| + | |||
| + | The editor area (bottom) displays either the names of the scenes, or block parameters and controls. | ||
| + | |||
| + | If there's no block selected, or an empty block is selected, this area shows the names of all eight scenes. Click on a number to switch scenes. Double-click the scene name to rename the scene. | ||
| + | |||
| + | Note: this list disappears when a block is selected on the grid. Click on an empty spot on the grid to show the list again. | ||
| + | |||
| + | [[image:scenenames.png|700px|link=]] | ||
| + | |||
| + | Click on a effect block to display parameters and controls. | ||
| + | |||
| + | [[image:left.png|110px|link=]] [[image:block.png|700px|link=]] | ||
| + | |||
| + | The icon at the left shows the name of the currently viewed or edited block. | ||
| + | |||
| + | ; <code>Channel</code> : This lets you select a channel of the currently selected block and lets you manage channels through its dropdown menu. | ||
| + | ; <code>Type</code> : When supported by a block, this lets you select a specific type of the effect. This acts as a kind of super parameter, and changing it can cause other parameters to appear, disappear or change their values. | ||
| + | ; <code>Library</code> : This menu lets you save blocks and channels to your personal library on disk, recall them at will, and provides other functions. | ||
| + | ; <code>Global Block</code> : Link, load and unlink blocks as Global Blocks. This is only available in Axe-Edit. | ||
| + | |||
| + | =Working with blocks= | ||
| + | |||
| + | ==Manage blocks== | ||
| + | |||
| + | '''Insert''' | ||
| + | * Right-click, or <kbd class="keycap">Control</kbd>+click on macOS, any grid slot to bring up the <code>Grid</code> menu. Choose a block and it will be placed on the grid. Blocks already on the grid are shown as disabled in this menu. You can also select <code>Insert</code> on the top-level Block menu or press <code>Quick Build</code>. | ||
| + | * A keyboard shortcut can be used to place <q>shunts</q>: <kbd class="keycap">Command</kbd>+<kbd class="keycap">U</kbd> on macOS or <kbd class="keycap">Ctrl</kbd>+<kbd class="keycap">U</kbd> on Windows. | ||
| + | * You can use the Grid menu to replace any block with another of a different type. | ||
| + | |||
| + | [[image:gridmenu.png|250px|link=]] [[image:blockmenu.png|175px|link=]] | ||
| + | |||
| + | |||
| + | '''Delete''' | ||
| + | * Select a block and press the <kbd class="keycap">DELETE</kbd> on Windows or <kbd class="keycap">BACKSPACE</kbd> on macOS key on your keyboard. Or select <code>Delete</code> in the top-level <code>Block</code> menu or by selecting <code>Grid menu > Edit</code>. | ||
| + | |||
| + | '''Bypass / Engage''' | ||
| + | * Double-click or select the block and press the <kbd class="keycap">SPACEBAR</kbd> key. You can also click <code>Bypass</code>/<code>Engage</code> in the top-level <code>Block</code> menu or the <code>Grid</code> menu. | ||
| + | * You can bypass or engage a block across ALL scenes at once, using a shortcut key listed near the end of this document. | ||
| + | |||
| + | '''Swap''' | ||
| + | * Drag and drop one block onto another (or on a shunt) to swap their grid positions. All connections to and from each block will be preserved when you perform a swap. | ||
| + | * Hold <kbd class="keycap">Command</kbd> on macOS or <kbd class="keycap">Ctrl</kbd> on Windows while dragging or dropping to force a block to replace instead of swap. | ||
| + | |||
| + | '''Move''' | ||
| + | * Drag a block to an empty grid space to move it. | ||
| + | |||
| + | '''Cut / Copy / Paste''' | ||
| + | * Select a block and press a keyboard shortcut. This also appears on the top-level <code>Block</code> menu or by selecting <code>Grid menu > Edit</code>. Respectively, for <q>cut</q>, <q>copy</q> and <q>paste</q>: | ||
| + | ** on macOS these are: | ||
| + | *** <kbd class="keycap">Command</kbd>+<kbd class="keycap">X</kbd> | ||
| + | *** <kbd class="keycap">Command</kbd>+<kbd class="keycap">C</kbd> | ||
| + | *** <kbd class="keycap">Command</kbd>+<kbd class="keycap">V</kbd> | ||
| + | ** on Windows these are: | ||
| + | *** <kbd class="keycap">Ctrl</kbd>+<kbd class="keycap">X</kbd> | ||
| + | *** <kbd class="keycap">Ctrl</kbd>+<kbd class="keycap">C</kbd> | ||
| + | *** <kbd class="keycap">Ctrl</kbd>+<kbd class="keycap">V</kbd> | ||
| + | * You can copy/paste blocks across presets. | ||
| + | * Copy a block, then select another block of the same type before pasting and all settings of the first block will be transferred to the second. For example, DELAY 1 and DELAY 2. | ||
| + | |||
| + | '''Reset''' | ||
| + | * Right-click a block and choose <code>Edit > Reset Channel</code> from the menu. Or select the block and press <kbd class="keycap">Command</kbd>+<kbd class="keycap">I</kbd> on macOS or <kbd class="keycap">Ctrl</kbd>+<kbd class="keycap">I</kbd> on Windows or choose <code>Block menu > Reset Channel</code>. This sets the parameters in the current channel to their default values. | ||
| + | * Resetting applies to the current channel only. To reset an entire block (all channels) the reset has to be executed per channel. | ||
| + | |||
| + | '''Disconnect''' | ||
| + | * Select a block and press <kbd class="keycap">Command</kbd>+<kbd class="keycap">D</kbd> on macOS or <kbd class="keycap">Ctrl</kbd>+<kbd class="keycap">D</kbd> on Windows to remove all connector cables from its input and output. Or select the equivalent command in the <code>Block</code> menu or <code>Grid menu > Edit</code>. | ||
| + | * You can also drag a block to any empty grid slot in another column with the same effect. | ||
| + | |||
| + | '''Library''': discussed later. | ||
| + | |||
| + | '''Select a Channel''' | ||
| + | * Select a block’s channel by pressing <kbd class="keycap">A</kbd>, <kbd class="keycap">B</kbd>, <kbd class="keycap">C</kbd> or <kbd class="keycap">D</kbd> on the keyboard, or <kbd class="keycap">X</kbd> for the next channel, or the bottom-left <code>Channels</code> dropdown menu, or in the top-level <code>Block</code> menu or in the <code>Grid</code> menu. The <code>Channels</code> dropdown menu also lets you copy and paste channels. | ||
| + | |||
| + | [[image:left.png|110px|link=]] | ||
| + | |||
| + | '''Move row or column''' | ||
| + | * Use the sliders at the bottom and left borders of the grid to move an entire row or column. Or select <code>Block menu > Move</code>. | ||
| + | |||
| + | '''Grid Navigation Mode''' | ||
| + | * When working with blocks on the grid, the editor will load and display settings from the hardware device. If displaying the settings of the block's parameters isn’t necessary, you can speed grid operations by enabling Grid Navigation Mode by pressing <kbd class="keycap">Command</kbd>+<kbd class="keycap">Shift</kbd>+<kbd class="keycap">G</kbd> on macOS or <kbd class="keycap">Ctrl</kbd>+<kbd class="keycap">Shift</kbd>+<kbd class="keycap">G</kbd> on Windows. A border will appear around the grid. To quit Grid Navigation Mode, press <kbd class="keycap">Escape</kbd> on your keyboard. | ||
| + | |||
| + | '''Quick Build''' | ||
| + | * Pressing <code>Quick Build</code>, or press the <kbd class="keycap">Q</kbd> key, lets you insert a block from a graphical list of blocks. See the example below. | ||
| + | |||
| + | [[image:quickbuild.png|700px|link=]] | ||
| + | |||
| + | ==Connect blocks== | ||
| + | |||
| + | The editor makes it easy to add and remove block connections. | ||
| + | |||
| + | * When you select a block, notice that it displays Input and Output <q>jacks</q> — small circular objects labeled <q>I</q> and <q>O</q>. These are used to create or remove connections to/ from the selected block. | ||
| + | * When you click a jack, it becomes selected and all valid destination jacks are highlighted in green. | ||
| + | * Click the desired jack, and the connection appears. | ||
| + | * You can make connections in either direction, even spanning multiple columns as desired in a single click. Just as on the device itself, if you make a connection to the jack of an empty grid location, a shunt will be inserted automatically. | ||
| + | * Destination jacks shown with a red X indicate that an existing connection can be removed. | ||
| + | * Click the red <q>X</q> and a connection will be removed. | ||
| + | |||
| + | Tips: | ||
| + | * You can double-click any existing connection to remove it instantly. | ||
| + | * To connect across an entire row, connect the output of the first block to the input of the last block. | ||
| + | |||
| + | [[image:cables.png|100px|link=]] | ||
| + | |||
| + | ==Edit blocks== | ||
| + | |||
| + | When a grid block is selected, its parameters are shown below the grid in the editor. The editor section will have a different number of <q>pages</q>, in vertical order. | ||
| + | |||
| + | With Grid Navigation Mode enabled (see above), the parameters of blocks will not be fetched and displayed to speed things, but you can still change the positions of blocks on the grid. Press <kbd class="keycap">Command</kbd>+<kbd class="keycap">Shift</kbd>+<kbd class="keycap">G</kbd> on macOS or <kbd class="keycap">Ctrl</kbd>+<kbd class="keycap">Shift</kbd>+<kbd class="keycap">G</kbd> on Windows to enable Grid Navigation Mode and <kbd class="keycap">Escape</kbd> to quit. | ||
| + | |||
| + | ==Parameter Batch Set== | ||
| + | |||
| + | The editors provide a <q>hidden</q> Parameter Batch Set function. Right-click on a parameter while holding down <kbd class="keycap">Shift</kbd> to display a context menu, then select <code>Set In Multiple Presets</code>. Selecting a sub-menu item will display the Preset Picker from which you can select one (like the current one) or multiple presets to batch set the parameter value. | ||
| + | |||
| + | Note that the Batch Setter only saves the current parameter value and dismisses other edits which haven't been saved yet. | ||
| + | |||
| + | ==Working with channels== | ||
| + | |||
| + | Channels give most block types four fully independent sets of parameter values that can be used to toggle sound changes at will. Read this: [[Channels]] | ||
| + | |||
| + | Click the <code>A B C D</code> control in the editor to select the desired channel. Remember that the active channel can be set differently for each SCENE within a preset. | ||
| + | |||
| + | Click on the dropdown menu for copy and paste options. You can copy/paste states between blocks of the same type, even across presets. The channel can also be toggled in the Grid menu and the top-level Block menu, and by simply pressing the <kbd class="keycap">A</kbd>, <kbd class="keycap">B</kbd>, <kbd class="keycap">C</kbd>, or <kbd class="keycap">D</kbd> key on your keyboard, or <kbd class="keycap">X</kbd> for next channel. You also reset a channel and set a block to a specific channel across all scenes in the <code>Block</code> menu. | ||
| + | |||
| + | Some of these actions can also be accomplished in the dedicated Scene Manager tool. | ||
| + | |||
| + | [[image:left.png|100px|link=]] | ||
| + | |||
| + | [[image:scenemgr.png|700px|link=]] | ||
| + | |||
| + | =Library= | ||
| + | |||
| + | ==About the library== | ||
| + | |||
| + | The Library is one of the most powerful features of the editor. It allows you to create a library on disk containing your favorite settings. A block or channel saved in the Library includes all parameter settings for all four channels of the block or just a single channel plus modifier assignments. | ||
| + | |||
| + | To use the Library, you might dial in a Delay block and then save it as <q>My No.1 Delay</q>. Then, when working later in another preset, you could recall the saved block and all its settings with just a few clicks. | ||
| + | |||
| + | It's important to note that modifiers assigned in the block are only saved when the <u>entire block</u> is saved, ''NOT'' for an individual channel. | ||
| + | |||
| + | [[Image:block_library_save_options.png|400px]] | ||
| + | |||
| + | Also, it's important to note that when you recall a block or channel from the Library, it does ''NOT'' have a connection (no dynamic link) to the master copy on your computer, only the settings of the channel(s) are passed to the block. | ||
| + | |||
| + | Block and channel files are interchangeable between the editors for the various current generation amp modeling guitar processors, but not between the VP4 and the amp modelers. Parameters which are not supported by a specific guitar processor are ignored. | ||
| + | |||
| + | Note: This used to be called <q>Block Library</q>. These days it's just <code>Library</code> because the library can also contain stored single channels. | ||
| + | |||
| + | ==Working with the library== | ||
| + | |||
| + | There are multiple ways to save blocks and channels to the Library. The easiest is perhaps the Library control which appears in the lower left corner of the editor whenever a block is selected. Click on the arrow and choose <code>Save</code>. Name the block or channel, choose between saving just the channel or the entire block, press <code>Save</code> and you will have created a new entry! | ||
| + | |||
| + | [[image:library.png|link=|150px]] | ||
| + | |||
| + | You can also press the keyboard shortcuts, <kbd class="keycap">Command</kbd>+<kbd class="keycap">B</kbd> on macOS, <kbd class="keycap">Ctrl</kbd>+<kbd class="keycap">B</kbd> on Windows, or select <code>Library</code> from the Block menu or the Grid menu. | ||
| + | |||
| + | Once you’ve recalled a block (see below) you can make and save changes, or use <code>Save As...</code> to create a totally new entry from the current settings. You can rename or delete an entry, or force the editor to re-read all data from disk. | ||
| + | |||
| + | Selecting <code>Preset > Save as Blocks in Library</code> lets you export all blocks for the current preset to the Library folder with a single command. The blocks are saved in a timestamped directory with the format <q><samp>YYYYMMDD-HHMMSS</samp></q>, i.e. <q>20210709-093339</q> for example, under which will be folders for each preset. You need to provide a name, unique within the category, whenever you save a new library entry. | ||
| + | |||
| + | Tip: When naming, keep in mind that the library is organized by type. For example, if you were saving Multidelay block settings as <q>Shimmer</q>, you could simply call it <q>Shimmer</q> instead of <q>Multidelay Shimmer</q>. | ||
| − | + | Blocks are saved as individual <samp>.blk</samp> files to your computer in: <samp>~/Documents/Fractal Audio/(name editor)/Blocks </samp>. You can change the location of this directory in <code>Settings > Preferences > Workspace</code>. You can rename a <samp>.blk</samp> file on disk, but this won’t change its name in the Library. | |
| − | + | To recall an entry from the Library use the Library control, the <code>Block</code> or the <code>Grid</code> menus. You can also drag and drop a <samp>.blk</samp> file from your computer into the editor’s grid. | |
| − | + | Library blocks are completely interchangeable with any numbered instance of the block. For example: You can save <q>FILTER 1</q> and recall it into any of the Filter blocks 1-4. | |
| − | + | You can use your operating systems’ file management to manage items in your Library or share them with other owners. Entries are automatically organized in subfolders by type, for instance <q>AMP</q>, <q>CAB</q>, <q>DELAY</q> etc., but this is for only for your convenience as the editor will recognize all valid files found anywhere inside the Library folder. | |
| − | + | ==Library and controllers/modifiers== | |
| − | == | + | Entire blocks saved into the library can modifier/controller settings. When importing the block, it includes all channels of the block. |
| + | |||
| + | Single channels saved into the library do NOT included modifier/controller settings. | ||
| + | |||
| + | ==Share a library between editors== | ||
| − | The | + | The FM3, FM9 and Axe-Fx III can share libraries, the VP4 doesn't. Where minor technical inconsistencies exist between blocks, the editors do a good job of interpreting the settings across the devices. |
| − | + | To best take advantage of this, you need to configure each of your editors to point to shared folders for holding blocks and other things. You do this in <code>Settings > Preferences > Workspace</code>. | |
| − | + | '''Export a block for sharing''' | |
| − | + | Here are instructions for exporting a single block file for sharing: | |
| − | + | # Select the block you want to save settings for in the grid area of the editor. With the block selected, in the lower left corner of the editor you will see the block library management area for the block. It has the header <code>Library</code> -- it should be quite obvious. | |
| + | # Press the down arrow next to the <code>Library</code> header to bring up the library management menu. Select the <code>Save</code> option from the menu. You'll be presented with a dialog box. Name the block settings something descriptive. Whatever you enter here for the name of the block is what you'll see in the library selection dialog in the editor. You can also chose to save just the settings for a single channel (which can then later be loaded back into any channel on a block) or all the channels for the block. Once you've named your block and picked your save option, press the <code>Save</code> button. The block is now saved to disk. | ||
| + | # To find the file that was created, press the down arrow next to the <code>Library</code> header once again and select <code>Show Folder</code> from the menu. A system folder dialog will open to the exact location where the block files are being saved for this effect block type. | ||
| − | + | You can use whatever mechanism you like to share <samp>.blk</samp> files. For example, the forum allows you to drag these files into posts where it attaches them to the post for others to download. | |
| − | + | '''Import a shared <samp>.blk</samp> file''' | |
| − | You can | + | You can bring <samp>.blk</samp> files shared by others into your editor so you can create instances of that block with shared, saved settings in your own presets. You'll need to know the path where your editor is looking for block settings and can find this using the <code>Preferences... > Workspace</code> menu on the editor. Download the <samp>.blk</samp> file to your computer. Using your computer's file browser, locate the downloaded <samp>.blk</samp> file on disk. Copy that file from the download location to the location where your editor is looking for block files. |
| − | + | You don't need to put the file in a subfolder, but it is advantageous if you have a lot of block files saved to organize things into subfolders. By default the editor will create a subfolder for each effect block type when saving settings, i.e., Chorus blocks will have their settings saved into a <code>Chorus</code> subfolder. | |
| − | + | When the editor scans for block settings it scans the entire folder tree starting from the <code>Library</code> setting you tell it to look in. This lets you organize block files in any way that makes sense to you, with as much subfolder hierarchy as you like. | |
| − | + | For example, forumite iaresee likes to create a subfolder named after the forumite who shared the block settings and then, under there, a folder named after the block. This lets him remember who created the settings in addition to what block the settings apply to (and conveniently, the block file names already include the date and time stamp by default in their file name). | |
| − | + | Example: | |
| − | + | <nowiki> | |
| + | Editor/ | ||
| + | blocks/ | ||
| + | austinbuddy/ | ||
| + | Flanger/ | ||
| + | Deluxe Electric Mistress_20190513_231434.blk | ||
| + | fremen/ | ||
| + | Amp/ | ||
| + | fremen ultra-clean_20210501_231434.blk | ||
| + | Chorus/ | ||
| + | Standard Chorii_20210616_204455.blk | ||
| + | </nowiki> | ||
| − | + | Note, after you've saved a block file to your folder you need to refresh the block settings in the editor. You can do this by selecting any block in the grid, pressing the down arrow next to the <code>Library</code> header, and selecting <code>Refresh Library</code> from the menu. The editor will rescan all the block settings for all the blocks found under the library path. | |
| − | + | =Global blocks= | |
| − | + | Axe-Edit III includes full support for [[Global blocks]], a feature found exclusively on the Axe-Fx. All operations are all supported through the control in the bottom-left corner of the editor. | |
| − | == | + | Press <code>Block Info</code>, or hold <kbd class="keycap">Alt</kbd> on Windows or <kbd class="keycap">Option</kbd> on macOS, to see which blocks on the grid are Global blocks. |
| − | + | Select <code>Preset > Unlink All Links</code> from Global to unlink all Global blocks in the current preset, which is handy when sharing a preset or when creating backups. | |
| − | + | For more information about Global blocks, see the [https://www.fractalaudio.com/axe-fx-iii-downloads Owner’s Manual]. | |
| − | + | [[image:globalblocks.png|200px|link=]] | |
| − | = | + | =Working with scenes= |
| − | + | Scenes provide every preset with sets of saved settings for a limited set of parameters. See [[Scenes]] for more information. | |
| − | + | ; Select : To select a scene in the editor, simply press one of the Scene buttons at the top. You can also hold <kbd class="keycap">Command</kbd> on macOS or <kbd class="keycap">Ctrl</kbd> on Windows and press any scene’s number on your keyboard for direct selection, or click on Scene 1-8 below the grid, shown after loading a preset or when selecting an empty block on the grid. | |
| − | + | [[image:scene3.png|200px|link=]] [[image:scene2.png|150px|link=]] | |
| − | + | ; Scenes dropdown menu : The Scenes dropdown menu provides handy options, such as copy/paste, swapping, engaging or bypassing all blocks. Note: The clipboard for scenes is cleared when you change presets or “revert” the current preset. | |
| − | + | [[image:scene1.png|150px|link=]] | |
| − | + | ; Rename : To rename a scene, click and edit the scene name at the top, or double-click the scene name below the grid (displayed after loading a preset or when selecting an empty block on the grid). | |
| + | ; Scene Manager : Many of these actions can be also accomplished in the dedicated Scene Manager tool. | ||
| − | = | + | [[image:scenemgr.png|700px|link=]] |
| − | + | The Scene Revert setting in SETUP is ignored when switching scenes in the editor. So, if you change the bypass states of blocks and use the editor to switch to other scenes and then return to the earlier scene, those blocks’ bypass states will still be the same (not reverted to their initial stored states). | |
| − | = | + | =Working with presets= |
| − | + | ==Preset menu== | |
| − | + | Commands in the Preset menu: | |
| − | + | ; Revert Preset : Discards all changes and reverts to the last saved version of the preset. | |
| + | ; Clear Preset : Removes all blocks and clears the preset name. A warning will be displayed first. | ||
| + | ; Unlink All Blocks from Global : See the section about Global Blocks. A warning will be displayed first. | ||
| + | ; Save Preset : Saves the preset, the same action as pressing the Save button. | ||
| + | ; Save to New Preset Number : Saves the current preset to any memory location in the guitar processor. | ||
| + | ; Save Snapshot : See the section about Snapshots. | ||
| + | ; Save All Blocks in Library : See the section about the Library. | ||
| + | ; Import Preset : See the section about importing presets. | ||
| + | ; Export Preset : See the section about exporting presets. | ||
| + | ; Export Preset+Cab Bundle : See above. | ||
| + | ; New from Template : See the section about preset templates. | ||
| + | ; Save as Template : See the section about preset templates. | ||
| + | ; Recent Presets : Quickly recall one of the last 10 presets you were working on. For a shortcut on Mac computers, hold <kbd class="keycap">Command</kbd> and click on Presets. | ||
| − | + | The Tools menu also provides handy stuff:<br> | |
| + | * Get information about MIDI SysEx files through Get Sysex File Information. | ||
| + | * Select <code>Tools > Export As Text</code> to generate handy lists (see picture). | ||
| − | |||
| − | = | + | [[image:exportmenu.png|300px|link=]] |
| − | + | ==Load== | |
| − | + | In addition to loading presets from the guitar processor itself, you can also import (load) individual presets from disk. This allows you to load files you’ve backed up, downloaded, or saved as Snapshots. | |
| − | + | Choose <code>Preset > Import</code> to display a file browser dialog. Or press <kbd class="keycap">Control</kbd>+<kbd class="keycap">Shift</kbd>+<kbd class="keycap">Command</kbd>+<kbd class="keycap">I</kbd> on macOS or <kbd class="keycap">Ctrl</kbd>+<kbd class="keycap">Shift</kbd>+<kbd class="keycap">Alt</kbd>+<kbd class="keycap">I</kbd> on Windows. Navigate to a folder, select any valid preset SysEx (<samp>.syx</samp>) file for your guitar processor and open the file. The preset is instantly imported to both the guitar processor itself buffer and the editor, so you can audition and edit as desired. You can also drag and drop a preset file from your computer onto the preset area of the editor. | |
| − | + | ''NOTE: Imported presets are <u>NOT</u> stored in the guitar processor until you '''manually save''' the preset!'' | |
| − | + | You can also open a saved Bank file (<samp>.bnk</samp>) and import a single preset from that bank, which contains up to 127 presets. The process is the same. | |
| − | + | Select <code>Preset > Recent Presets</code> to quickly return load one of the last 10 presets you’ve saved or loaded. On macOS computers hold <kbd class="keycap">Command</kbd> and click on <code>Presets</code> as a shortcut. | |
| − | + | Tip: <q>Pin</q> the picker window and you can audition presets before importing one. | |
| − | + | ==Save== | |
| − | + | As on the hardware, you will be notified of any unsaved changes to the preset by the yellow <code>Edited</code> LED in the Save button. | |
| − | + | Click <code>Preset > Save Preset</code>, or press <kbd class="keycap">Command</kbd>+<kbd class="keycap">S</kbd> on macOS or <kbd class="keycap">Ctrl</kbd>+<kbd class="keycap">S</kbd> on Windows, to save the current preset to the current preset slot in the guitar processor. | |
| − | + | Click <code>Preset > Save a Copy</code>, or press <kbd class="keycap">Command</kbd>+<kbd class="keycap">Shift</kbd>+<kbd class="keycap">S</kbd> on macOS or <kbd class="keycap">Ctrl</kbd>+<kbd class="keycap">Shift</kbd>+<kbd class="keycap">S</kbd> on Windows, to save the current preset to another memory location in the guitar processor. | |
| − | + | As a safeguard, the editor displays a warning when quitting or when changing or importing a preset without saving the changes first. You can disable this in <code>Settings > Preferences > Options</code>. | |
| − | + | You can specify in <code>Setup > Config</code> whether switching scenes should be marked as <q>Edited</q> or not. | |
| − | == | + | ==Export== |
| − | + | Exporting presets allows you to save backup copies on disk, share them with others, post them on our preset sharing site Axe-Change, etc. | |
| − | + | To export the current preset as a SysEx (<samp>.syx</samp>) file on your computer, choose <code>Preset > Export</code>. Or press <kbd class="keycap">Control</kbd>+<kbd class="keycap">Shift</kbd>+<kbd class="keycap">Command</kbd>+<kbd class="keycap">X</kbd> on macOS or <kbd class="keycap">Ctrl</kbd>+<kbd class="keycap">Shift</kbd>+<kbd class="keycap">Alt</kbd>+<kbd class="keycap">X</kbd> on Windows. When the file browser dialog is shown, navigate to the desired location and save the preset. | |
| − | + | Presets may include Global Blocks. Exporting a preset does NOT include the linked global data. To share the linked global data, you need to back up your System data with Fractal-Bot and include that data with the preset. Or you can unlink the Global Blocks in the preset through <code>Preset > Unlink All Links from Global</code> before exporting. | |
| − | + | Exporting presets can also be accomplished in Manage Presets. When exporting from Manage Presets, the preset number will be added to the start of the filenames on disk and the preset title. | |
| − | |||
| − | |||
| − | |||
| − | + | ==Preset+Cab bundle== | |
| − | + | A Preset+Cab bundle contains one preset plus any User Cab Impulse Responses (IRs) used by that preset. Bundles make it easier to share sounds and are easy to export and import. | |
| − | + | See [[Presets#Preset-Cab_bundle|Preset-Cab Bundle]] for more information. | |
| − | + | ==New from template== | |
| − | + | Like many other types of programs such as office, graphics, etc., the editor allows you to create new presets from a template. Choose <code>Preset > New from Template</code>. The <q>working copy</q> is not the original template. When you save, you’ll be storing a preset in the guitar processor while the template file on your computer will remain unmodified. | |
| − | + | Templates are stored in a dedicated directory which defaults to <q><samp>~/Documents/Fractal Audio/(name editor)/Presets/Templates</samp></q>. You can change the location of the Templates directory in <code>Settings > Preferences > Workspace</code>. | |
| − | + | Create new templates using <code>Preset > Save as Template</code>, or by copying exported or downloaded preset files to your Templates directory. Use the operating system’s file management to delete or rename templates, but remember that the file name is independent of the name stored in the template. | |
| − | |||
| − | |||
| − | |||
==Snapshots== | ==Snapshots== | ||
| − | + | Snapshots provide one-click export to disk functionality. This is especially handy for fast backups during editing. | |
| + | |||
| + | When you press the Snapshot button, or press <kbd class="keycap">Control</kbd>+<kbd class="keycap">Shift</kbd>+<kbd class="keycap">Command</kbd>+<kbd class="keycap">S</kbd> on macOS or <kbd class="keycap">Ctrl</kbd>+<kbd class="keycap">Shift</kbd>+<kbd class="keycap">Alt</kbd>+<kbd class="keycap">S</kbd> on Windows, a copy of your current preset (including unsaved changes) is saved as a file to the Snapshots folder on your computer: <code>~/Documents/Fractal Audio/(name editor)/Presets/Snapshots</code> | ||
| + | |||
| + | You can change the location of the Snapshots directory in <code>Settings > Preferences > Workspace</code>. An on-screen indicator confirms that the snapshot has been saved. | ||
| + | |||
| + | Previous snapshots can be brought into the editor using <code>Preset > Import</code> or by selecting the dropdown menu below the Snapshot button. | ||
| + | |||
| + | Presets may include Global Blocks. Pressing Snapshot will create a backup of the preset but the linked global data will not be saved with the snapshot. | ||
| + | |||
| + | [[image:snapshots.png|link=|100px]] | ||
| + | |||
| + | ==Import presets from other devices== | ||
| + | |||
| + | See [[Presets#Import_from_other_devices|Import from other devices]] for more information. | ||
| + | |||
| + | ==Leveling presets== | ||
| + | |||
| + | This tool in the <code>Tools</code> menu lets you monitor the level of the current preset, and provides parameters to adjust the level which is handy when matching preset levels. The tool can also be activated by pressing <kbd class="keycap">Command</kbd>+<kbd class="keycap">L</kbd> on macOS or <kbd class="keycap">Ctrl</kbd>+<kbd class="keycap">L</kbd> on Windows. The meters displayed are the same as the VU meters on the zoomed-out Layout Grid on the hardware itself. | ||
| + | |||
| + | Read more about leveling in: | ||
| + | * [[Owners Manuals]] | ||
| + | * [[Presets#Preset_levels|Preset Levels]] | ||
| + | |||
| + | [[image:leveling.png|300px|link=]] | ||
| + | |||
| + | ==Filter by color== | ||
| + | |||
| + | The Preset picker and Cab picker windows let you assign a color to entries thus creating categories and marking personal favorites, for instance: | ||
| + | |||
| + | [[image:filtercolor.png|150px|link=]] | ||
| + | |||
| + | =Tools= | ||
| + | |||
| + | ==Fractal-Bot== | ||
| + | |||
| + | Read this: [[Fractal-Bot]]. It's available as a standalone program, or as a built-in tool in the editor. | ||
| + | |||
| + | ==Manage Presets and Manage Cabs== | ||
| + | |||
| + | [[image:managetool.png|link=|300px]] | ||
| + | |||
| + | The editor’s Manage Presets and Manage Cabs tools allow you to rearrange, delete, move, swap, duplicate, rename and more. Select <code>Tools > Manage Presets</code> or <code>Tools > Manage Cabs</code>, or press <kbd class="keycap">Command</kbd>+<kbd class="keycap">M</kbd> on macOS or <kbd class="keycap">Ctrl</kbd>+<kbd class="keycap">M</kbd> on Windows for <code>Manage Presets</code>, or <kbd class="keycap">Command</kbd>+<kbd class="keycap">Shift</kbd>+<kbd class="keycap">M</kbd> on macOS or <kbd class="keycap">Ctrl</kbd>+<kbd class="keycap">Shift</kbd>+<kbd class="keycap">M</kbd> on Windows for <code>Manage Cabs</code>. <u>SAVE any unsaved changes first!</u> | ||
| + | |||
| + | The interface should feel familiar as it is based on the <q>picker</q> view used to select presets, amps, tempos, etc. The tools can also be launched from within the Preset Picker and Cab Picker. | ||
| + | |||
| + | Note that these tools have two panes. If the left pane, the Browser, doesn’t appear, ensure that it is enabled in the Browser menu or click the button next to the menu, or use the key sequence <kbd class="keycap">Ctrl</kbd>+<kbd class="keycap">B</kbd> on Windows or <kbd class="keycap">Command</kbd>+<kbd class="keycap">B</kbd> on macOS. If it is enabled but still not clearly visible, look for the vertical divider and drag it to the right. | ||
| + | |||
| + | By default, Manage Presets and Manage Cabs display a warning about making backups at startup. This can be disabled in <code>Settings > Preferences > Options</code>. | ||
| + | |||
| + | Note: The Manage Cabs tool shows the names of UltraRes impulse responses, i.e. cabs, in italics. Read more about <q>UltraRes</q> in the Owner’s Manual. | ||
| + | |||
| + | ; Refresh names : The Refresh button forces Manage Presets or Manage Cabs to fetch the names of all presets or user cabs from the guitar processor. This ensures that the data is synced. | ||
| + | ; Select : | ||
| + | * To select or undo a single entry: Click any preset or cab. | ||
| + | * To select or undo a range: Click any preset or cab, hold <kbd class="keycap">Shift</kbd> and then click another preset or cab. | ||
| + | * To select or undo multiple individual presets or cabs in any location : Hold <kbd class="keycap">Command</kbd> on macOS or <kbd class="keycap">Ctrl</kbd> on Windows key and click multiple presets or cabs. | ||
| + | * To select ALL presets or cabs: Press <kbd class="keycap">Command</kbd>+<kbd class="keycap">A</kbd> on macOS or <kbd class="keycap">Ctrl</kbd>+<kbd class="keycap">A</kbd> on Windows. | ||
| + | |||
| + | ; Browser menu : The Browser menu lets you configure the use of Manage Presets and Manage Cabs. | ||
| + | ; Context menu : Right-click or Control-click on a Preset or Cab to select actions for the selected entry. | ||
| + | |||
| + | ; Reset AMP blocks : This is a special command in the context menu. As of firmware 26.06, this resets all amp parameters in the Amp block(s) in the preset or presets, except the controls that are present on the original amp. So gain, tone controls, master, depth, presence, speaker parameters, output EQ, etc. are left unchanged. This single command makes it much easier to make sure that an amp model uses the latest parameters values (visible and hidden), but doesn't touch the specific settings that the user has dialed in. | ||
| + | |||
| + | ; Drag and drop : Manage Presets and Manage Cabs support drag-and-drop operations. When you drag and drop one or more selected items, they will be swapped with those in the target location. If you hold <kbd class="keycap">Command</kbd> on macOS or <kbd class="keycap">Ctrl</kbd> on Windows, they will be moved, leaving one or more empty locations. If you hold the <kbd class="keycap">Shift</kbd> key, the selected items will be copied. | ||
| + | |||
| + | : You can also drag and drop presets or cabs from your computer into Manage Presets or Manage Cabs. | ||
| + | |||
| + | ; Save changes : Manage Presets and Manage Cabs wait to apply changes until you press the <span class="button">Save</span> button. This is both a safety mechanism and an efficiency feature. As unsaved changes are made, the affected entries turn red and are marked with a red dot. Press the <span class="button">Save</span> button to commit changes permanently. Press the <span class="button">Close</span> button to quit without saving. Saved changes turn green and the dot is removed. | ||
| + | |||
| + | ==Performance pages== | ||
| + | |||
| + | The Performance pages on the guitar processors let you quickly access block parameters to easily change settings during a performance. | ||
| + | |||
| + | The editor lets you customize these pages to your personal preferences. You can define a <q>Global Performance</q> page, and <q>Per-Preset</q> pages. | ||
| + | |||
| + | Click <code>Perform</code>, and drag and drop controls from the currently selected block onto the left or right pane by clicking and holding on the control's <u>LABEL</u>. To delete a control from a pane, press <kbd class="keycap">Delete</kbd> on your keyboard. To switch blocks conveniently, use the dropdown menu (arrow) at the top-left of the lower pane. | ||
| + | |||
| + | Tip: Copy your favorite Global Performance controls to a separate preset using <span class="button">Copy <<</span> to the Per-Preset controls. This lets you easily restore the global controls from that preset after a system reset which deletes the Global Performance controls. Additionally, the down arrow to the right of the <q>Per-Preset Performance Controls</q> title lets you easily save and retrieve the controls. | ||
| + | |||
| + | See [[Presets#Performance_Pages|Perform pages]] for more information. | ||
| + | |||
| + | |||
| + | [[image:performp.png|700px|link=]] | ||
| + | |||
| + | ==IR Capture== | ||
| + | |||
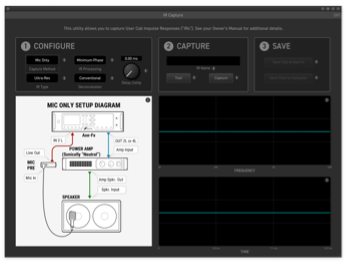
| + | The Axe-Fx III lets you capture impulse responses. This can be done through the user interface on the guitar processor itself or through <code>Tools > IR Capture</code> in the editor. | ||
| + | |||
| + | Read [[IR Capture]] for more information. | ||
| + | |||
| + | [[image:IRcap.png|400px]] | ||
| + | |||
| + | ==Axe-Change== | ||
| + | |||
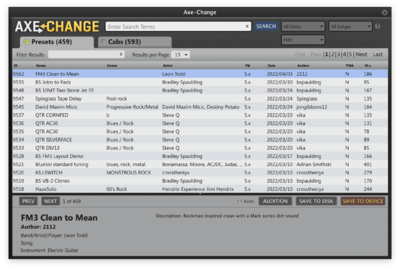
| + | [http://axechange.fractalaudio.com Axe-Change] is the official preset and cab sharing resource for Fractal Audio Systems’ guitar processors. It’s accessible under the <code>Tools</code> menu where you can load presets and cabs directly from Axe-Change into the editor. | ||
| + | |||
| + | [[image:axechangewindow.png|link=http://axechange.fractalaudio.com|400px]] | ||
| + | |||
| + | =FC Edit: working with foot switches= | ||
| + | |||
| + | The FM3, FM9, VP4, and the FC-6 and FC-12 foot controllers let you control many of the features of the modelers using your feet. | ||
| + | |||
| + | Press <code>FC Edit</code> and <code>FC Per-Preset</code> in the editor for configuration options. | ||
| + | |||
| + | For more information see: | ||
| + | * [[FC-6 and FC-12 foot controllers]] | ||
| + | * The [https://www.fractalaudio.com/downloads/manuals/fas-guides/Fractal-Audio-Footswitch-Functions-Guide.pdf Fractal Audio Footswitch Functions Guide] | ||
| − | = | + | [[image:FC Edit.png|500px|link=]] |
| + | |||
| + | ==Main window== | ||
| + | |||
| + | '''LAYOUTS''' | ||
| + | |||
| + | At the top of the FC-Edit window you can select the layout. A layout is a set of switch assignments for the FM3, FM9 and/or FC-controller.<br> | ||
| + | ''Always make sure you know which layout you are currently editing by checking the layout number or name!'' | ||
| + | |||
| + | Many users combine FC controllers, or an FM3/FM9 with a FC controller, so FC-Edit lets you select the device to work with. | ||
| + | |||
| + | The Edit menu lets you import and export layouts. <u>Use this for backup purposes.</u> | ||
| + | |||
| + | '''SWITCHES and VIEW''' | ||
| + | |||
| + | Under Layouts, there's the Switches section with the View buttons. | ||
| + | |||
| + | A layout has twelve switches, corresponding with the number of switches on an FC-12. But, you have no direct access to twelve switches on an FM3, FM9 or FC-6, so, to access them, you can make of use of Views. These shift the range of accessible switches within a single layout. For example, Views on an FM3 let you access four sets of switches without having to switch layouts. | ||
| + | |||
| + | '''FUNCTIONS''' | ||
| + | |||
| + | This lets you assign functions to the switches, as described in the [https://www.fractalaudio.com/downloads/manuals/fas-guides/Fractal-Audio-Footswitch-Functions-Guide.pdf Fractal Audio Footswitch Functions Guide]. | ||
| + | |||
| + | '''Buttons''' | ||
| + | |||
| + | In the top right corner there are three buttons, described below: | ||
| + | |||
| + | [[image:FC Edit buttons.png|200px|link=]] | ||
| + | |||
| + | ==Devices button== | ||
| + | |||
| + | This shows the current switch layout and view, which layout and view should be loaded at startup and if a device is mirrored as a 1:1 copy. | ||
| + | |||
| + | [[image:FC Edit Devices.png|400px|link=]] | ||
| + | |||
| + | ==CS MIDI button== | ||
| + | |||
| + | This lets you make use of the MIDI capabilities of [[Control Switches]]. | ||
| + | |||
| + | [[image:FC Edit CS MIDI.png|400px|link=]] | ||
| + | |||
| + | ==FC CONFIG button== | ||
| + | |||
| + | This lets you adjust the general settings of the foot switches. | ||
| + | |||
| + | [[image:FC Edit Config.png|400px|link=]] | ||
| + | |||
| + | ==Layout links== | ||
| + | |||
| + | This instructs the switch to change to another layout after having pressed it. | ||
| + | |||
| + | (Note: Giving away a magic trick… Layout Links are how the OMG9 layout on the FM3 works.) | ||
| + | |||
| + | [[image:FC Edit Links.png|200px|link=]] | ||
| + | |||
| + | ==Per-preset override== | ||
| + | |||
| + | The switches in layouts operate across all presets. | ||
| + | |||
| + | Per-Preset Override allows assigning actions to a switch that only applies to the current preset. | ||
| + | |||
| + | [[image:FC Edit Links.png|200px|link=]] | ||
| + | |||
| + | ==Tips, tricks and troubleshooting== | ||
| + | |||
| + | * Go to <code>Settings > Preferences > Options</code> to enable or disable a warning when editing the FC controller’s Master Layout Menu. | ||
| + | * Press the <code>10</code> button to mask characters in Preset and Scene names that do not fit on the scribble strips of the foot switches. | ||
| + | * To avoid the display of the assigned <q>hold</q> function message when tapping a switch, select <q>Custom</q> for the label and leave the field blank. | ||
| + | |||
| + | ==Songs and setlists== | ||
| + | |||
| + | Current firmware for the processors and FC controllers let you create and manage songs and setlists. This can be done on the hardware or in the editor. | ||
| + | |||
| + | See these for more information: | ||
| + | * [[FC-6_and_FC-12_foot_controllers#Songs_and_setlists|Songs and Setlists]] | ||
| + | * [https://www.fractalaudio.com/downloads/manuals/fas-guides/Fractal-Audio-Footswitch-Functions-Guide.pdf Fractal Audio Footswitch Functions Guide] | ||
| + | * [https://www.fractalaudio.com/downloads/manuals/fas-guides/Fractal-Audio-Setlists-Songs-Mini-Manual.pdf Fractal Audio Setlists Songs Mini Manual] | ||
| + | |||
| + | =FAQ= | ||
| + | |||
| + | ; The editor won’t change presets, or changes presets erratically. : Verify that Preset Mapping isn’t enabled on the guitar processor’s Setup > MIDI/Remote menu. | ||
| + | ; The tuner won’t work. : Ensure that the tuner on the guitar processor is set to page 1 (tuner display). | ||
| + | ; How do I back up or restore Preset Banks? : Use Fractal-Bot. Fractal-Bot is available as a standalone application or in the editor’s Tools menu. | ||
| + | ; How do I update the firmware of my guitar processor? : Use Fractal-Bot to update the firmware. Fractal-Bot is available as a standalone application or in the editor’s Tools menu. When launched, Fractal-Bot checks for official updates and when available provides the option to download and install an update. | ||
| + | ; Typing values doesn’t work for MIN and MAX fields on the modifier screen. : This is a limitation of how the editor works with the hardware. It only affects MIN and MAX on the modifier screen. | ||
| + | ; When I double-click a parameter, it is set to a generic default value which may not be the same value as resetting a channel or the entire block. Why? : It is a limitation of the architecture at this time. | ||
| + | ; Can I use the editor to create and edit presets, without being connected to the guitar processor? : The editor works in tandem with the hardware unit in a client-server type relationship, with the modeler acting as the host, almost like a mainframe, and the editor acting as the terminal. The editor requires the modeler to be connected for any operations. | ||
| + | |||
| + | :Offline editing is not supported and will <u>NOT</u> be added to future versions. The client-server relationship brings a host of benefits to the editor, most importantly, it can never corrupt a preset as only the hardware itself ever owns the data. This means you can program presets with the confidence that what you see and hear is what you'll save. | ||
| + | |||
| + | ; I can't resize the editor’s window. How do I solve this? : Close the editor, delete its settings file, and restart the editor. | ||
| + | :The settings file is found in Windows at <q><samp>C:\Users\<user name>\AppData\Roaming\Fractal Audio\(editor name)</samp></q> and in macOS at <q><samp><user name>/Library/Application Support/Fractal Audio/(editor name)</samp></q>. | ||
| + | |||
| + | :Note: The settings file's path is system specific and can not be changed. | ||
| + | |||
| + | ; Are iOS and Android versions of the editors available? : So far, no such versions of the editor have been released. | ||
| + | ; My computer doesn’t have a touchscreen. How can I still use the editor with a touchscreen? : Connect a tablet to your computer and use the operating system’s built-in support for displaying a second screen or a third-party solution. | ||
| + | |||
| + | =Editing on a tablet or smartphone= | ||
| − | + | Currently there are no official editors available for iOS or Android tablets and smartphones. | |
| − | + | Alternative options are: | |
| − | = | + | * Extend the computer screen to a separate tablet, either wired or wireless, using tools built in the OS, or a software utility such as [http://itunes.apple.com/nl/app/duet-display/id935754064?mt=8 Duet Display (Mac/iOS)], or a combined hardware and software solution such as [https://lunadisplay.com/ Luna Display]. This lets you move the editor screen to the tablet and use its touchscreen for editing. |
| + | * Run [[FracPad and FracTool|FracPad]], forum member AlGrenadine's mobile app for Fractal Audio's processors. It runs on Android and iOS devices. It's not officially supported by Fractal Audio. | ||
| + | * Use wireless MIDI connections with Macs and Windows PCs, with the computer acting as the interface between the app on the tablet or phone and the Fractal Audio device. See <q>[http://coffeeshopped.com/2015/05/using-wireless-midi-to-connect-your-ipad-or-iphone-to-your-computer-and-hardware-synths Using Wireless MIDI to Connect Your iPad or iPhone to Your Computer and Hardware Synths]</q> for more information. | ||
| − | + | [[image:ipad.jpg|link=|200px]] [[image:FracPad.jpg|link=https://wiki.fractalaudio.com/wiki/index.php?title=FracPad|200px]] | |
| − | = | + | =FracTool= |
| − | + | Forum member AlGrenadine's [[FracPad and FracTool|FracTool]] utility, for Windows and Mac, offers functionality not provided by the official editors. | |
| − | = | + | =Videos= |
| − | + | [[video:Leon-Library]] | |
| + | [[video:Matt-Library]] | ||
| + | [[video:FAS-SeriesParallel]] | ||
[[category:Axe-Fx2]] | [[category:Axe-Fx2]] | ||
[[category:Axe-Fx3]] | [[category:Axe-Fx3]] | ||
| + | [[category:FM3]] | ||
| + | [[category:FM9]] | ||
| + | [[category:VP4]] | ||
[[category:AX8]] | [[category:AX8]] | ||
[[category:FX8]] | [[category:FX8]] | ||
[[category:Remote]] | [[category:Remote]] | ||
| − | [[category: | + | [[category:All]] |
Latest revision as of 17:31, 30 May 2025
Contents
- 1 Software editors
- 2 Install and connect
- 3 Editor preferences
- 4 User interface controls
- 5 Keyboard shortcuts
- 6 Main editor window
- 7 Working with blocks
- 8 Library
- 9 Global blocks
- 10 Working with scenes
- 11 Working with presets
- 12 Tools
- 13 FC Edit: working with foot switches
- 14 FAQ
- 15 Editing on a tablet or smartphone
- 16 FracTool
- 17 Videos
Software editors
Axe-Edit III, FM3-Edit and FM9-Edit are the software editors for Fractal Audio's Axe-Fx III, FM3 and FM9 guitar processors. You can download the latest versions from Fractal Audio's support page.
VP4-Edit is the editor for the VP4. While it shares many features with the other editors, there are also differences. Parts of the information supplied below may not apply to VP4-Edit.
System requirements:
- Mac OS 10.7 or newer (Intel or M1 processors)
- Windows 7 or newer (32-bit or 64-bit)
- On Windows computers, Fractal Audio's USB driver has to be installed first. It can be downloaded from the support link above.
- If you get an error message about a missing
MSVCP140.dll
file install the MS Visual C++ Redistributable Update. - Older versions of the editors can be downloaded from the unofficial archive.
- The Fractal-Bot utility is built into the editors, and is found under the Tools menu.
Install and connect
Install
The installer is packaged in a *.zip on Windows or *.dmg on macOS, archive file. Double-click, or select and open the file, and follow the on-screen instructions.
Release notes
Release Notes are included with each installer download. Read them! They include information about new features, changes, and what you should be aware of before updating and using the new version. Release notes are also displayed after installation and can be found under Help > View Release Notes.
Click on the top-left program logo, or select Help > About to see the installed version.
Connect
The software editors depend on USB 2.0 or greater to connect to the hardware. Operation without an USB connection to the guitar processor is NOT supported; there is no offline
editing. The connection uses the USB-B port on the hardware (VP4: USB-C). On the FM3 we cannot connect using the USB-A port.
On Windows computers, Fractal Audio's USB driver has to be installed first, and can be downloaded from the Fractal Audio support page.
To confirm that the editor is communicating with your Axe-Fx II, look for a green check mark with the word Connected!
in the upper left corner of the program window. If the message does not appear, don’t panic, instead, go to Settings > Preferences to select the ports of the device, or read the Troubleshooting section below.
The editor relies on intensive two-way communication which can cause audio gaps or stutters when operating the guitar processor through its onboard user interface or through a foot controller like the Fractal Audio Systems FC-6 and FC-12. The Settings > Pause Communications menu, or press the F8 key on your keyboard, puts communications on hold between the editor and modeler so you can test performance without glitches.
The editor can control multiple guitar processors of the same model. Select Tools > Show Available Devices to see which connected devices are detected and available. The dialog box provides and options.
Tip: When using a USB-C to female USB-A adapter on a newer Apple computer, plug the USB-C adapter into a USB port on the Mac first, allow it several seconds to wake up
and then connect the USB cable to the unit into the adapter.
Startup processes
Refresh After New Firmware AKA (RANF
)
When you first launch the editor, or for the first time after having updated your guitar processor’s firmware, the editor will likely need to refresh the information it stored locally about the device, the so-called definitions
. The editor detects such changes and will start the refresh process automatically. The process may run for a while.
You can manually force the editor to re-read block definitions by selecting Settings > Refresh After New Firmware or Settings > Preferences > Refresh. Among forum members this is referred to as RANF
.
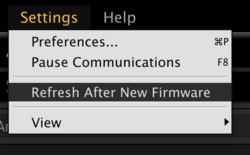
Automatic updates
At startup, the editor checks automatically if an official update for the editor is available and if so, offers the option to download and install the update. This process can be disabled in Settings > Preferences > Options. You can also click Help > Check for Updates. Or download the latest version of the editor manually from Support.
Preset and cab names
Also, at each startup the editor will fetch all Presets names and Cab names from the guitar processor. This ensures that the editor and the guitar processor are in sync. You can disable this in Settings > Preferences > Options.
When disabled, you can still refresh Preset and Cab names manually by pressing the Refresh icon (![]() ) in
) in picker
windows (explained later).
Troubleshooting connectivity issues
Running Fractal-Bot and the software editor at the same time can cause conflicts. Try to avoid this.
The editor should generally detect your guitar processor and connect automatically. If a problem occurs, you will see a Disconnected
indicator (above the program logo) or a Communication failure unable to complete the communication request due to time-out
warning.
Some steps to resolve possible connection issues are:
- Try manually setting or re-setting the two ports under
Settings > Preferences > Ports. - Try another USB cable that you know is good. Cables from BTPA.com are often recommended in the forum for their reliability and quality.
- Ensure that the device is connected through USB.
- If your guitar processor has multiple USB ports, ensure that you’re using the USB Type-B port on the guitar processor.
- If using Windows verify that you’ve installed the drivers for your model. Verify the installed drivers in Windows’ Control Panel. macOS uses universal drivers so doesn't have a separate driver for the computer.
- The editor requires compatible firmware running on the Fractal Audio Systems guitar processor. The version of the installed firmware of the connected guitar processor is displayed in the top-left area of the editor window.
- Reboot! Shut down the editor, shut down your device, and shut down your computer. Re-start your computer, wait for it to finish booting then power on your device and re-start the editor.
- Ensure that your guitar processor is connected directly to your computer or a powered USB hub. Do not use a cable extender. A REAR panel USB port on the computer is sometimes preferable as front panel ports may utilize a passive/non-powered integrated USB hub. Also, try a different USB port or different USB cable.
- If using Windows, try right-clicking the editor’s shortcut icon and choosing
Run as Administrator. - Try the following steps to reset your port selections:
- Power on your guitar processor.
- Launch the editor and go to
Settings > Preferences. - Set both ports to <<none>>.
- Close the Preferences dialog and quit the editor.
- Re-launch the editor.
- Open
Settings > Preferencesand select the appropriate ports. You should see a greencheck
next to each port selection. - Close the dialog. The editor should now communicate with the hardware.
- Apple's Energy Saver options in some Macs can cause issues like dropped USB connections when the Mac hardware sleeps; You can set them in the System Preferences.
- Google Chrome can cause issues with older editors.
If you are experiencing issues running the Axe-Fx III, Axe-Edit III and Apple Logic or Pro Tools read Axe-Fx III and Logic Pro MIDI
and Axe Edit partially freezes shortly after opening Pro Tools
.
FRACTAL AUDIO QUOTES
[1] There is a known issue with Chrome seizing MIDI ports (both physical and virtual MIDI-over-USB ports) as part of some misguided MIDI over the internet idea. Since the AX-8 is USB 1.1 it only allows one connection so if Chrome grabs it then AX-8 Edit won't be able to use it. Unfortunately Google seems uninterested in fixing it.
[2] Chrome definitely can hijack the MIDI over USB port on the AX8. When that happens, it's not enough to just close the browser, you have to ensure that it is not running in the background. Fractal Audio has tested and confirmed this.
[3] Anything that "grabs" the MIDI ports on the Axe-Fx will prevent Axe-Edit form working. This is a known issue with Logic and Pro Tools as they grab any detected MIDI ports by default. You need to go into SETUP for these products and disable the Axe-Fx MIDI ports in order for Axe-Edit to be able to use them.
[4] There's a general setting in Logic that allows you to disable MIDI Inputs for external USB/Audio products that have editor software. Make this change and see if it helps.
Editor preferences
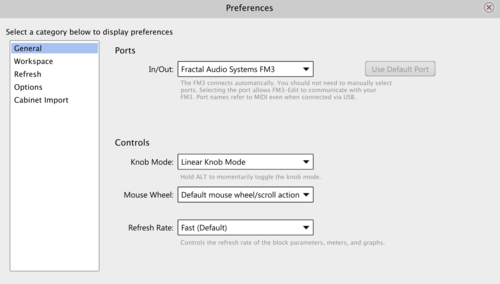
You can set personal preferences for the editor in Settings > Preferences, or press Command+P on macOS or Ctrl+P on Windows.
General menu
- Ports
- Shows the input and output ports used by the editor. The program automatically selects the USB ports of a connected guitar processor, so you should not need to manually select ports. Note that port names refer to MIDI even when connected via USB.
Controls menu
- Knob Mode
- Determines how knobs respond to mouse motion. Linear (default): the values of knob parameters increase as click and drag the mouse away from the center of the knob. Move up or to the right to increase, down or to the left to decrease. The fastest response occurs when you move in a
northeast
orsouthwest
direction. Circular: the knob pointer follows your mouse pointer as you click and drag in a circular motion. - Mouse Wheel
- Typically, you won’t need to change this setting, but if the action of your touchpad or the wheel of a connected mouse/trackball seems backwards, change this value to Reverse, or you can disable the wheel altogether.
- Refresh Rate
- Controls the display refresh rate of block parameters, meters and graphs. The default is
Fast
.
Workspace menu
- Snapshots
- Sets the location where Snapshot files are saved on disk.
- Library
- Sets the root of the Library where blocks and channels are stored on disk. The editor monitors the root folder and all subfolders for valid entries (blocks and channels) to build the library.
- Preset Templates
- Sets the location for loading and saving preset templates.
- Global Settings
- The editor stores its settings in this folder. It’s specific to the computer’s operating system and can’t be changed.
Refresh menu
- Preset Names
- Updates the editor with the names of all presets stored in the guitar processor.
- Cab Names
- Updates the editor with the names of all User Cabs stored in the guitar processor and and Scratchpad names.
- Block Definitions
- Updates the editor with information about all blocks (block definitions) and all factory cab names. Block definitions are refreshed automatically when you install a new firmware version on the hardware. This option is for troubleshooting only.
Options menu
- Automatically check for a new version at startup
- At startup, the editor checks automatically if an official update for the editor is available and if so, offers the option to download and install the update. This setting lets you disable this process.
- Show tooltips when the mouse hovers over buttons
- This controls the display of tooltips when hovering over screen elements.
- Search returns matches from number and name fields in picker windows
- Picker windows include a Search field which helps you filter the list to find a desired entry. You can search on item names or numbers. This behavior can be changed here.
- Warn about making backups before Manage Presets or Cabs
- By default, Manage Presets and Manage Cabs display a warning about making backups at startup. This setting lets you disable this.
- Prompt on edited presets when changing or importing a preset from the editor
- This setting enables or disables a safeguard against quitting or switching / importing presets without saving changes first.
- Default to <All Banks> when launching the Cabinet Picker
- This setting lets you choose your favorite startup option when launching the Cabinet Picker: display cabs from all Cab banks, or a single one.
- Warn when editing the FC Master Layout Menu
- The Master Layout Menu (MLM) is an important element of operating the foot switches on an FM3, FM9 or FC controller. This setting enables or disables a warning message when editing the MLM.
- Default the Amp block to
Ideal
upon initial view - The Amplifier block can be displayed in Ideal or Authentic mode. In AUTHENTIC mode only the controls which are present on the modeled amp are displayed on the main page. In IDEAL mode all controls are displayed.
- Default the Amp block to
- Refresh the Scratchpad names each time the CAB block is selected
- When selecting a Cabinet block on the grid, the editor fetches the names of the Scratchpads from the guitar processor to ensure that the editor and the guitar processor are in sync. This setting allows you to disable this to speed operations.
- Read the Preset names at startup
- At startup, the editor fetches the names of all presets from the guitar processor to ensure that the editor and the guitar processor are in sync. This setting allows you to disable this to speed the launch process. When disabled, you can still refresh preset names manually by pressing the Refresh icon in the Preset Picker or the Manage Presets tool.
- Read the User Cab names at startup
- At startup, the editor fetches the names of all User Cabs from the guitar processor to ensure that the editor and the guitar processor are in sync. This setting allows you to disable this to speed the launch process. When disabled, you can still refresh the cab names manually by pressing the Refresh icon in the Cabinet Picker or the Manage Cabs tool.
Cabinet Import
- IR Processing
- The built-in (factory) cabs in the guitar processor are processed with proprietary minimum phase transformation (MPT) which guards against phase problems when you mix multiple cabs. This setting allows you to disable or enable MPT when importing external cabs (impulse responses), or when you prefer to use Auto Trim instead which removes superfluous silence from the start of the cab (without applying MPT).
- IR Output
- This setting determines the format of the user cab (impulse response) that’s created when importing an .ir or .wav file.
- WAV Import
- Determines which channels are imported when stereo .WAV files are added to the Manage browser menu.
Other personal preferences which affect the editor can be set in SETUP. For example, select Setup > Config to be able to assign a custom name to your connected guitar processor.
User interface controls
The various knobs, sliders, dropdowns and switches are used to control sound parameters in the guitar processor. Changes are heard in real time while you work. Note that stuttering or light clicking can occasionally be heard while you adjust certain parameters.
Knobs:
- Click a knob and drag up/right to increase, or down/left to decrease. Fastest response is obtained with 45° northeast/southwest motion. Hold Command on macOS or Ctrl on Windows for finer mouse resolution.
- The default knob mode is LINEAR. You can momentarily invoke CIRCULAR knob mode by holding the Alt key. You can also change the default knob mode under Settings > Preferences > General.
- Double-click the knob or its label to set a generic default value. Important: Generic knob values will not necessarily be the same as those obtained when you reset an entire block, change its type, etc.
- Scroll (mouse wheel, trackpad, etc.) over a knob to edit parameter values. Hold Command on macOS or Ctrl on Windows for fine resolution, giving each wheel click has the same precise action as a single
tick
of the VALUE wheel on the guitar processor. The UP and DOWN arrow keys are equivalent to using the mouse scroll wheel.
Faders:
- Click and drag the fader handle. Double-click, wheel and arrow keys work the same as when operating a knob.
Switches:
- Click the switch. Double-click the label to set it to a default value (see above). Some switches may disengage automatically.
Dropdown menus:
- Click the text area of the dropdown to display a list of all options. Double-click the label to set a generic default. Click the UP or DOWN arrows to select the previous or next value.
Tip: Turn any dropdown menu into a picker window (see below) by holding Shift and clicking the dropdown control. [5]
Picker windows:
- This is a special selection window presented when a dropdown would be too small for the available options. Picker windows normally close once you click a selection. Tip: Turn any dropdown menu into a picker window (see below) by holding Shift and clicking the dropdown control.
- Use the
Pushpin
button in the upper right corner (shown at left) to keep the window pinned open. This allows you to audition multiple options before manually closing the window. - Picker windows include a Search field which helps you filter the list to find a desired entry. You can search on item names or numbers, and number matching can be disabled in
Settings > Preferences > Optionsas desired. You can also use ARROW KEYS to navigate and the Enter key to make selections in a picker window. - The Cab Picker shows the names of UltraRes cabs in italics. Read more about UltraRes in the Blocks Guide.
Keyboard shortcuts
Presets
Preset Manager = Command/Control+M
Preset Picker = P
Preset up/down = Command/Control+PgUp/PgDn. On a MacBook hold Fn too.
Refresh preset = F5
Save preset = Command/Control+S
Save preset to new preset number = Shift+Command/Control+S
Revert preset = Shift+Command/Control+F12
Clear preset = Shift+Command/Control+Backspace
Save snapshot = Shift+Control (Alt)+Command/Control+S
Import preset = Shift+Control (Alt)+Command/Control+I
Export preset = Shift+Control (Alt)+Command/Control+X
Recent presets = Command+click on Presets button.
Scenes
Select a scene = Command/Control+1/2/3/4/5/6/7/8
Blocks
Show Block Info = Alt or F1
Show Quick Build panel = Q
Insert a shunt = Command/Control+U
Bypass or engage the selected block, or toggle X/Y (old editors) = Spacebar
Set state of block across all scenes to engage = Shift+Spacebar
Set state of block across all scenes to bypass = Shift+Command/Control+Spacebar
Disconnect all cables from selected block = Command/Control+D
Delete block = Backspace
Open the Edit field of the selected control = Enter
Display the menu associated with the +
button on the selected dropdown control = +
Toggle the “Global” button for the selected control = G
Value up/down = cursor up/down
Save block to Block Library = Command/Control+B
Fine Tune Parameter Value
Command/Control+Mouse, Scroll Wheel or Up/Down arrows
Channels
Select channel (E and F apply to the MUX block only) = A/B/C/D/E/F
Next channel = X
Reset channel = Command/Control+I
Tuner
Command/Control+T
Devices
Show devices = Command/Control+K
Communications
F8 = pause communications
Preferences
Command/Control+P
Undo, Redo
Undo = Command/Control+Z
Redo = Command/Control+Y
Cut, copy, paste = Command/Control+X/C/V
Preset Manager, Cab Manager
Manage Presets = Command/Control+M
Manage Cabs = Shift+Command/Control+M
Search bar = F3
Grid Navigation Mode
Shift+Command/Control+G
Window size
Full screen = Shift+Command/Control+W
Normal size = Shift+W
FRACTAL AUDIO QUOTES
Undo works on most block edit action — in other words, when you are editing a block and you change a parameter. A few parameters don't support undo. It does not work on grid or other operations — in other words, when you change the layout grid, change a system setting, edit a footswitch, etc.
Main editor window
The editor’s window can be scaled by dragging a border. Select Settings > View to snap the editor to Normal Size or Full Screen. Note that the editor has a fixed width/height ratio, so the editor may not fill your computer’s entire display in Full Screen mode.
Top

Many of the controls and commands described below have keyboard shortcuts:
Pause Communications- See above.
Program logo- Displays the version of the installed editor.
Name- If you have given the guitar processor a custom name in
Setup > Config, that name will appear in the upper left corner. Scenes- Press one of the numbered buttons at the top to select a Scene. Or select a Scene from a dropdown menu, or scroll through Scenes using the
+/-buttons. The name of the scene is displayed next to the dropdown menu, where it can be renamed too. Presets- Select a Preset from a dropdown menu next to the preset name. Or scroll through Presets using the
+/-buttons. The number and name of the preset are displayed next to the dropdown menu, where it can be renamed too. Preset name- Once a preset is loaded in the editor, its name is displayed and its contents are displayed on the grid — the structure where blocks are placed and interconnected. The current scene name is displayed too.
Snapshot- Create a Snapshot, or use its dropdown menu to show the Snapshot folder contents, clear the list or load a Snapshot.
Save- Save the preset. The yellow LED lights when changes to the preset have not yet been saved.
Setup- Enter the menu to set global parameters for the guitar processor, including audio I/O, Global EQ, USB levels and more. Read Setup menu for additional information.
Tuner- Displays the Tuner.
Tap- Tap to set the Tempo.
BPM- Shows the Tempo of the current preset in BPM (
Beats Per Minute
). CPU- Shows the current CPU usage as a number and meter. When the CPU usage exceeds a threshold, a red
Warning
message is displayed here. Controllers- Configure Internal Controllers, Scene controllers and Tempo settings. Set the state of Control Switches per scene. See where Modifiers are being used. Read more about these functions in the guitar processor’s Owner’s Manuals. Read
Controllers and modifiers
for more information. Quick Build- This lets you insert a block from a graphical interface.
Block Infobutton- Changes the way blocks are displayed on the grid. By default, the full name and the block instance are shown. Pressing
Block Info(or holding Alt) will abbreviate the block name, show the active channel and show Global Blocks. Scene Mgr- Scene Manager lets you view and set the state of blocks across scenes, (re)name scenes, copy and swap scenes, etc.
Perform- Configure the Performance pages, globally as well as per preset.
(i)- Shows the currently being used Amp Type(s) and Amplifier block channel(s).
10- Configures Preset and Scene names to mask characters that do not fit on the scribble strips of the foot switches.
FC Edit- Configure the onboard switches of the FM3 and FM9, and the FC foot controllers.
FC Per-Prst- Same as above, but this applies to the current preset only.
Sets/Songs- Create songs and sets for use with an FC controller. Axe-Fx III only.
Middle
The lay-out grid, in the middle section, shows the layout of the preset blocks. Click any block on the grid to display its settings in the editor area below the grid.

Bottom
The editor area (bottom) displays either the names of the scenes, or block parameters and controls.
If there's no block selected, or an empty block is selected, this area shows the names of all eight scenes. Click on a number to switch scenes. Double-click the scene name to rename the scene.
Note: this list disappears when a block is selected on the grid. Click on an empty spot on the grid to show the list again.
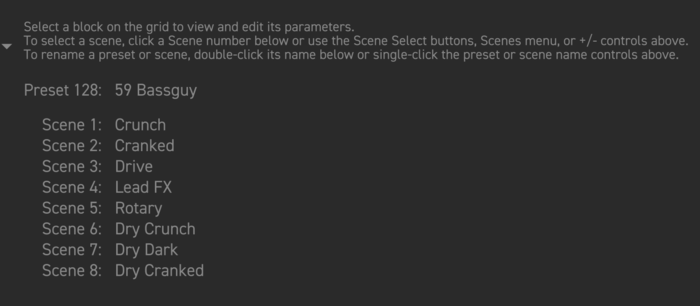
Click on a effect block to display parameters and controls.
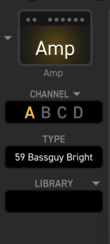
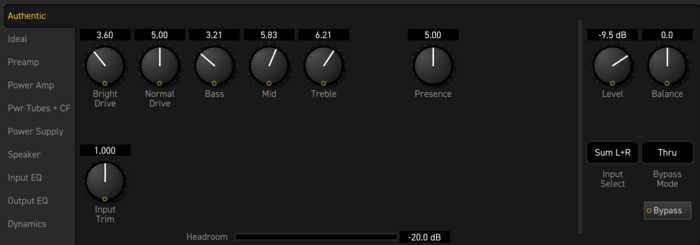
The icon at the left shows the name of the currently viewed or edited block.
Channel- This lets you select a channel of the currently selected block and lets you manage channels through its dropdown menu.
Type- When supported by a block, this lets you select a specific type of the effect. This acts as a kind of super parameter, and changing it can cause other parameters to appear, disappear or change their values.
Library- This menu lets you save blocks and channels to your personal library on disk, recall them at will, and provides other functions.
Global Block- Link, load and unlink blocks as Global Blocks. This is only available in Axe-Edit.
Working with blocks
Manage blocks
Insert
- Right-click, or Control+click on macOS, any grid slot to bring up the
Gridmenu. Choose a block and it will be placed on the grid. Blocks already on the grid are shown as disabled in this menu. You can also selectInserton the top-level Block menu or pressQuick Build. - A keyboard shortcut can be used to place
shunts
: Command+U on macOS or Ctrl+U on Windows. - You can use the Grid menu to replace any block with another of a different type.
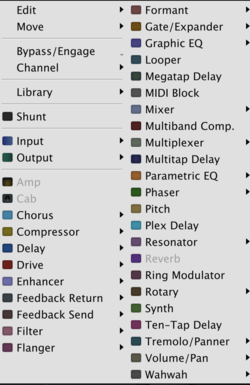
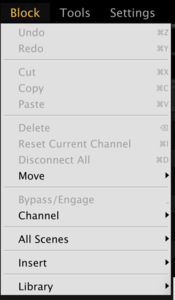
Delete
- Select a block and press the DELETE on Windows or BACKSPACE on macOS key on your keyboard. Or select
Deletein the top-levelBlockmenu or by selectingGrid menu > Edit.
Bypass / Engage
- Double-click or select the block and press the SPACEBAR key. You can also click
Bypass/Engagein the top-levelBlockmenu or theGridmenu. - You can bypass or engage a block across ALL scenes at once, using a shortcut key listed near the end of this document.
Swap
- Drag and drop one block onto another (or on a shunt) to swap their grid positions. All connections to and from each block will be preserved when you perform a swap.
- Hold Command on macOS or Ctrl on Windows while dragging or dropping to force a block to replace instead of swap.
Move
- Drag a block to an empty grid space to move it.
Cut / Copy / Paste
- Select a block and press a keyboard shortcut. This also appears on the top-level
Blockmenu or by selectingGrid menu > Edit. Respectively, forcut
,copy
andpaste
:- on macOS these are:
- Command+X
- Command+C
- Command+V
- on Windows these are:
- Ctrl+X
- Ctrl+C
- Ctrl+V
- on macOS these are:
- You can copy/paste blocks across presets.
- Copy a block, then select another block of the same type before pasting and all settings of the first block will be transferred to the second. For example, DELAY 1 and DELAY 2.
Reset
- Right-click a block and choose
Edit > Reset Channelfrom the menu. Or select the block and press Command+I on macOS or Ctrl+I on Windows or chooseBlock menu > Reset Channel. This sets the parameters in the current channel to their default values. - Resetting applies to the current channel only. To reset an entire block (all channels) the reset has to be executed per channel.
Disconnect
- Select a block and press Command+D on macOS or Ctrl+D on Windows to remove all connector cables from its input and output. Or select the equivalent command in the
Blockmenu orGrid menu > Edit. - You can also drag a block to any empty grid slot in another column with the same effect.
Library: discussed later.
Select a Channel
- Select a block’s channel by pressing A, B, C or D on the keyboard, or X for the next channel, or the bottom-left
Channelsdropdown menu, or in the top-levelBlockmenu or in theGridmenu. TheChannelsdropdown menu also lets you copy and paste channels.

Move row or column
- Use the sliders at the bottom and left borders of the grid to move an entire row or column. Or select
Block menu > Move.
Grid Navigation Mode
- When working with blocks on the grid, the editor will load and display settings from the hardware device. If displaying the settings of the block's parameters isn’t necessary, you can speed grid operations by enabling Grid Navigation Mode by pressing Command+Shift+G on macOS or Ctrl+Shift+G on Windows. A border will appear around the grid. To quit Grid Navigation Mode, press Escape on your keyboard.
Quick Build
- Pressing
Quick Build, or press the Q key, lets you insert a block from a graphical list of blocks. See the example below.

Connect blocks
The editor makes it easy to add and remove block connections.
- When you select a block, notice that it displays Input and Output
jacks
— small circular objects labeledI
andO
. These are used to create or remove connections to/ from the selected block. - When you click a jack, it becomes selected and all valid destination jacks are highlighted in green.
- Click the desired jack, and the connection appears.
- You can make connections in either direction, even spanning multiple columns as desired in a single click. Just as on the device itself, if you make a connection to the jack of an empty grid location, a shunt will be inserted automatically.
- Destination jacks shown with a red X indicate that an existing connection can be removed.
- Click the red
X
and a connection will be removed.
Tips:
- You can double-click any existing connection to remove it instantly.
- To connect across an entire row, connect the output of the first block to the input of the last block.
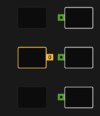
Edit blocks
When a grid block is selected, its parameters are shown below the grid in the editor. The editor section will have a different number of pages
, in vertical order.
With Grid Navigation Mode enabled (see above), the parameters of blocks will not be fetched and displayed to speed things, but you can still change the positions of blocks on the grid. Press Command+Shift+G on macOS or Ctrl+Shift+G on Windows to enable Grid Navigation Mode and Escape to quit.
Parameter Batch Set
The editors provide a hidden
Parameter Batch Set function. Right-click on a parameter while holding down Shift to display a context menu, then select Set In Multiple Presets. Selecting a sub-menu item will display the Preset Picker from which you can select one (like the current one) or multiple presets to batch set the parameter value.
Note that the Batch Setter only saves the current parameter value and dismisses other edits which haven't been saved yet.
Working with channels
Channels give most block types four fully independent sets of parameter values that can be used to toggle sound changes at will. Read this: Channels
Click the A B C D control in the editor to select the desired channel. Remember that the active channel can be set differently for each SCENE within a preset.
Click on the dropdown menu for copy and paste options. You can copy/paste states between blocks of the same type, even across presets. The channel can also be toggled in the Grid menu and the top-level Block menu, and by simply pressing the A, B, C, or D key on your keyboard, or X for next channel. You also reset a channel and set a block to a specific channel across all scenes in the Block menu.
Some of these actions can also be accomplished in the dedicated Scene Manager tool.
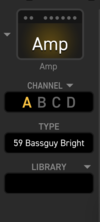

Library
About the library
The Library is one of the most powerful features of the editor. It allows you to create a library on disk containing your favorite settings. A block or channel saved in the Library includes all parameter settings for all four channels of the block or just a single channel plus modifier assignments.
To use the Library, you might dial in a Delay block and then save it as My No.1 Delay
. Then, when working later in another preset, you could recall the saved block and all its settings with just a few clicks.
It's important to note that modifiers assigned in the block are only saved when the entire block is saved, NOT for an individual channel.
Also, it's important to note that when you recall a block or channel from the Library, it does NOT have a connection (no dynamic link) to the master copy on your computer, only the settings of the channel(s) are passed to the block.
Block and channel files are interchangeable between the editors for the various current generation amp modeling guitar processors, but not between the VP4 and the amp modelers. Parameters which are not supported by a specific guitar processor are ignored.
Note: This used to be called Block Library
. These days it's just Library because the library can also contain stored single channels.
Working with the library
There are multiple ways to save blocks and channels to the Library. The easiest is perhaps the Library control which appears in the lower left corner of the editor whenever a block is selected. Click on the arrow and choose Save. Name the block or channel, choose between saving just the channel or the entire block, press Save and you will have created a new entry!
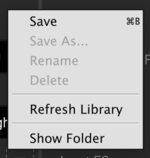
You can also press the keyboard shortcuts, Command+B on macOS, Ctrl+B on Windows, or select Library from the Block menu or the Grid menu.
Once you’ve recalled a block (see below) you can make and save changes, or use Save As... to create a totally new entry from the current settings. You can rename or delete an entry, or force the editor to re-read all data from disk.
Selecting Preset > Save as Blocks in Library lets you export all blocks for the current preset to the Library folder with a single command. The blocks are saved in a timestamped directory with the format YYYYMMDD-HHMMSS
, i.e. 20210709-093339
for example, under which will be folders for each preset. You need to provide a name, unique within the category, whenever you save a new library entry.
Tip: When naming, keep in mind that the library is organized by type. For example, if you were saving Multidelay block settings as Shimmer
, you could simply call it Shimmer
instead of Multidelay Shimmer
.
Blocks are saved as individual .blk files to your computer in: ~/Documents/Fractal Audio/(name editor)/Blocks . You can change the location of this directory in Settings > Preferences > Workspace. You can rename a .blk file on disk, but this won’t change its name in the Library.
To recall an entry from the Library use the Library control, the Block or the Grid menus. You can also drag and drop a .blk file from your computer into the editor’s grid.
Library blocks are completely interchangeable with any numbered instance of the block. For example: You can save FILTER 1
and recall it into any of the Filter blocks 1-4.
You can use your operating systems’ file management to manage items in your Library or share them with other owners. Entries are automatically organized in subfolders by type, for instance AMP
, CAB
, DELAY
etc., but this is for only for your convenience as the editor will recognize all valid files found anywhere inside the Library folder.
Library and controllers/modifiers
Entire blocks saved into the library can modifier/controller settings. When importing the block, it includes all channels of the block.
Single channels saved into the library do NOT included modifier/controller settings.
The FM3, FM9 and Axe-Fx III can share libraries, the VP4 doesn't. Where minor technical inconsistencies exist between blocks, the editors do a good job of interpreting the settings across the devices.
To best take advantage of this, you need to configure each of your editors to point to shared folders for holding blocks and other things. You do this in Settings > Preferences > Workspace.
Export a block for sharing
Here are instructions for exporting a single block file for sharing:
- Select the block you want to save settings for in the grid area of the editor. With the block selected, in the lower left corner of the editor you will see the block library management area for the block. It has the header
Library-- it should be quite obvious. - Press the down arrow next to the
Libraryheader to bring up the library management menu. Select theSaveoption from the menu. You'll be presented with a dialog box. Name the block settings something descriptive. Whatever you enter here for the name of the block is what you'll see in the library selection dialog in the editor. You can also chose to save just the settings for a single channel (which can then later be loaded back into any channel on a block) or all the channels for the block. Once you've named your block and picked your save option, press theSavebutton. The block is now saved to disk. - To find the file that was created, press the down arrow next to the
Libraryheader once again and selectShow Folderfrom the menu. A system folder dialog will open to the exact location where the block files are being saved for this effect block type.
You can use whatever mechanism you like to share .blk files. For example, the forum allows you to drag these files into posts where it attaches them to the post for others to download.
Import a shared .blk file
You can bring .blk files shared by others into your editor so you can create instances of that block with shared, saved settings in your own presets. You'll need to know the path where your editor is looking for block settings and can find this using the Preferences... > Workspace menu on the editor. Download the .blk file to your computer. Using your computer's file browser, locate the downloaded .blk file on disk. Copy that file from the download location to the location where your editor is looking for block files.
You don't need to put the file in a subfolder, but it is advantageous if you have a lot of block files saved to organize things into subfolders. By default the editor will create a subfolder for each effect block type when saving settings, i.e., Chorus blocks will have their settings saved into a Chorus subfolder.
When the editor scans for block settings it scans the entire folder tree starting from the Library setting you tell it to look in. This lets you organize block files in any way that makes sense to you, with as much subfolder hierarchy as you like.
For example, forumite iaresee likes to create a subfolder named after the forumite who shared the block settings and then, under there, a folder named after the block. This lets him remember who created the settings in addition to what block the settings apply to (and conveniently, the block file names already include the date and time stamp by default in their file name).
Example:
Editor/
    blocks/
        austinbuddy/
            Flanger/
                Deluxe Electric Mistress_20190513_231434.blk
        fremen/
            Amp/
                fremen ultra-clean_20210501_231434.blk
        Chorus/
            Standard Chorii_20210616_204455.blk
Note, after you've saved a block file to your folder you need to refresh the block settings in the editor. You can do this by selecting any block in the grid, pressing the down arrow next to the Library header, and selecting Refresh Library from the menu. The editor will rescan all the block settings for all the blocks found under the library path.
Global blocks
Axe-Edit III includes full support for Global blocks, a feature found exclusively on the Axe-Fx. All operations are all supported through the control in the bottom-left corner of the editor.
Press Block Info, or hold Alt on Windows or Option on macOS, to see which blocks on the grid are Global blocks.
Select Preset > Unlink All Links from Global to unlink all Global blocks in the current preset, which is handy when sharing a preset or when creating backups.
For more information about Global blocks, see the Owner’s Manual.
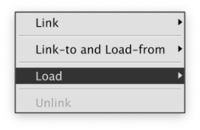
Working with scenes
Scenes provide every preset with sets of saved settings for a limited set of parameters. See Scenes for more information.
- Select
- To select a scene in the editor, simply press one of the Scene buttons at the top. You can also hold Command on macOS or Ctrl on Windows and press any scene’s number on your keyboard for direct selection, or click on Scene 1-8 below the grid, shown after loading a preset or when selecting an empty block on the grid.

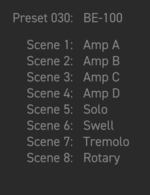
- Scenes dropdown menu
- The Scenes dropdown menu provides handy options, such as copy/paste, swapping, engaging or bypassing all blocks. Note: The clipboard for scenes is cleared when you change presets or “revert” the current preset.
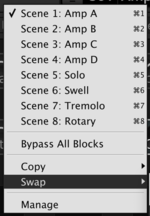
- Rename
- To rename a scene, click and edit the scene name at the top, or double-click the scene name below the grid (displayed after loading a preset or when selecting an empty block on the grid).
- Scene Manager
- Many of these actions can be also accomplished in the dedicated Scene Manager tool.

The Scene Revert setting in SETUP is ignored when switching scenes in the editor. So, if you change the bypass states of blocks and use the editor to switch to other scenes and then return to the earlier scene, those blocks’ bypass states will still be the same (not reverted to their initial stored states).
Working with presets
Commands in the Preset menu:
- Revert Preset
- Discards all changes and reverts to the last saved version of the preset.
- Clear Preset
- Removes all blocks and clears the preset name. A warning will be displayed first.
- Unlink All Blocks from Global
- See the section about Global Blocks. A warning will be displayed first.
- Save Preset
- Saves the preset, the same action as pressing the Save button.
- Save to New Preset Number
- Saves the current preset to any memory location in the guitar processor.
- Save Snapshot
- See the section about Snapshots.
- Save All Blocks in Library
- See the section about the Library.
- Import Preset
- See the section about importing presets.
- Export Preset
- See the section about exporting presets.
- Export Preset+Cab Bundle
- See above.
- New from Template
- See the section about preset templates.
- Save as Template
- See the section about preset templates.
- Recent Presets
- Quickly recall one of the last 10 presets you were working on. For a shortcut on Mac computers, hold Command and click on Presets.
The Tools menu also provides handy stuff:
- Get information about MIDI SysEx files through Get Sysex File Information.
- Select
Tools > Export As Textto generate handy lists (see picture).
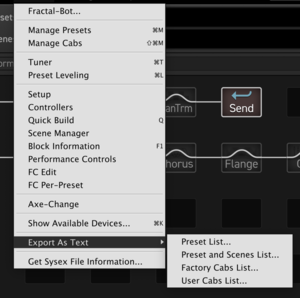
Load
In addition to loading presets from the guitar processor itself, you can also import (load) individual presets from disk. This allows you to load files you’ve backed up, downloaded, or saved as Snapshots.
Choose Preset > Import to display a file browser dialog. Or press Control+Shift+Command+I on macOS or Ctrl+Shift+Alt+I on Windows. Navigate to a folder, select any valid preset SysEx (.syx) file for your guitar processor and open the file. The preset is instantly imported to both the guitar processor itself buffer and the editor, so you can audition and edit as desired. You can also drag and drop a preset file from your computer onto the preset area of the editor.
NOTE: Imported presets are NOT stored in the guitar processor until you manually save the preset!
You can also open a saved Bank file (.bnk) and import a single preset from that bank, which contains up to 127 presets. The process is the same.
Select Preset > Recent Presets to quickly return load one of the last 10 presets you’ve saved or loaded. On macOS computers hold Command and click on Presets as a shortcut.
Tip: Pin
the picker window and you can audition presets before importing one.
Save
As on the hardware, you will be notified of any unsaved changes to the preset by the yellow Edited LED in the Save button.
Click Preset > Save Preset, or press Command+S on macOS or Ctrl+S on Windows, to save the current preset to the current preset slot in the guitar processor.
Click Preset > Save a Copy, or press Command+Shift+S on macOS or Ctrl+Shift+S on Windows, to save the current preset to another memory location in the guitar processor.
As a safeguard, the editor displays a warning when quitting or when changing or importing a preset without saving the changes first. You can disable this in Settings > Preferences > Options.
You can specify in Setup > Config whether switching scenes should be marked as Edited
or not.
Export
Exporting presets allows you to save backup copies on disk, share them with others, post them on our preset sharing site Axe-Change, etc.
To export the current preset as a SysEx (.syx) file on your computer, choose Preset > Export. Or press Control+Shift+Command+X on macOS or Ctrl+Shift+Alt+X on Windows. When the file browser dialog is shown, navigate to the desired location and save the preset.
Presets may include Global Blocks. Exporting a preset does NOT include the linked global data. To share the linked global data, you need to back up your System data with Fractal-Bot and include that data with the preset. Or you can unlink the Global Blocks in the preset through Preset > Unlink All Links from Global before exporting.
Exporting presets can also be accomplished in Manage Presets. When exporting from Manage Presets, the preset number will be added to the start of the filenames on disk and the preset title.
Preset+Cab bundle
A Preset+Cab bundle contains one preset plus any User Cab Impulse Responses (IRs) used by that preset. Bundles make it easier to share sounds and are easy to export and import.
See Preset-Cab Bundle for more information.
New from template
Like many other types of programs such as office, graphics, etc., the editor allows you to create new presets from a template. Choose Preset > New from Template. The working copy
is not the original template. When you save, you’ll be storing a preset in the guitar processor while the template file on your computer will remain unmodified.
Templates are stored in a dedicated directory which defaults to ~/Documents/Fractal Audio/(name editor)/Presets/Templates
. You can change the location of the Templates directory in Settings > Preferences > Workspace.
Create new templates using Preset > Save as Template, or by copying exported or downloaded preset files to your Templates directory. Use the operating system’s file management to delete or rename templates, but remember that the file name is independent of the name stored in the template.
Snapshots
Snapshots provide one-click export to disk functionality. This is especially handy for fast backups during editing.
When you press the Snapshot button, or press Control+Shift+Command+S on macOS or Ctrl+Shift+Alt+S on Windows, a copy of your current preset (including unsaved changes) is saved as a file to the Snapshots folder on your computer: ~/Documents/Fractal Audio/(name editor)/Presets/Snapshots
You can change the location of the Snapshots directory in Settings > Preferences > Workspace. An on-screen indicator confirms that the snapshot has been saved.
Previous snapshots can be brought into the editor using Preset > Import or by selecting the dropdown menu below the Snapshot button.
Presets may include Global Blocks. Pressing Snapshot will create a backup of the preset but the linked global data will not be saved with the snapshot.

Import presets from other devices
See Import from other devices for more information.
Leveling presets
This tool in the Tools menu lets you monitor the level of the current preset, and provides parameters to adjust the level which is handy when matching preset levels. The tool can also be activated by pressing Command+L on macOS or Ctrl+L on Windows. The meters displayed are the same as the VU meters on the zoomed-out Layout Grid on the hardware itself.
Read more about leveling in:
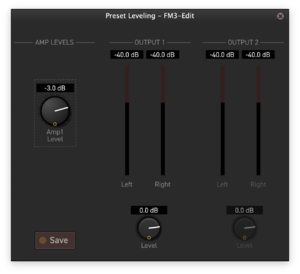
Filter by color
The Preset picker and Cab picker windows let you assign a color to entries thus creating categories and marking personal favorites, for instance:
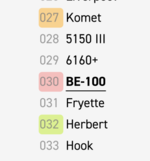
Tools
Fractal-Bot
Read this: Fractal-Bot. It's available as a standalone program, or as a built-in tool in the editor.
Manage Presets and Manage Cabs
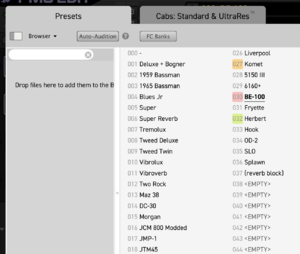
The editor’s Manage Presets and Manage Cabs tools allow you to rearrange, delete, move, swap, duplicate, rename and more. Select Tools > Manage Presets or Tools > Manage Cabs, or press Command+M on macOS or Ctrl+M on Windows for Manage Presets, or Command+Shift+M on macOS or Ctrl+Shift+M on Windows for Manage Cabs. SAVE any unsaved changes first!
The interface should feel familiar as it is based on the picker
view used to select presets, amps, tempos, etc. The tools can also be launched from within the Preset Picker and Cab Picker.
Note that these tools have two panes. If the left pane, the Browser, doesn’t appear, ensure that it is enabled in the Browser menu or click the button next to the menu, or use the key sequence Ctrl+B on Windows or Command+B on macOS. If it is enabled but still not clearly visible, look for the vertical divider and drag it to the right.
By default, Manage Presets and Manage Cabs display a warning about making backups at startup. This can be disabled in Settings > Preferences > Options.
Note: The Manage Cabs tool shows the names of UltraRes impulse responses, i.e. cabs, in italics. Read more about UltraRes
in the Owner’s Manual.
- Refresh names
- The Refresh button forces Manage Presets or Manage Cabs to fetch the names of all presets or user cabs from the guitar processor. This ensures that the data is synced.
- Select
- To select or undo a single entry: Click any preset or cab.
- To select or undo a range: Click any preset or cab, hold Shift and then click another preset or cab.
- To select or undo multiple individual presets or cabs in any location : Hold Command on macOS or Ctrl on Windows key and click multiple presets or cabs.
- To select ALL presets or cabs: Press Command+A on macOS or Ctrl+A on Windows.
- Browser menu
- The Browser menu lets you configure the use of Manage Presets and Manage Cabs.
- Context menu
- Right-click or Control-click on a Preset or Cab to select actions for the selected entry.
- Reset AMP blocks
- This is a special command in the context menu. As of firmware 26.06, this resets all amp parameters in the Amp block(s) in the preset or presets, except the controls that are present on the original amp. So gain, tone controls, master, depth, presence, speaker parameters, output EQ, etc. are left unchanged. This single command makes it much easier to make sure that an amp model uses the latest parameters values (visible and hidden), but doesn't touch the specific settings that the user has dialed in.
- Drag and drop
- Manage Presets and Manage Cabs support drag-and-drop operations. When you drag and drop one or more selected items, they will be swapped with those in the target location. If you hold Command on macOS or Ctrl on Windows, they will be moved, leaving one or more empty locations. If you hold the Shift key, the selected items will be copied.
- You can also drag and drop presets or cabs from your computer into Manage Presets or Manage Cabs.
- Save changes
- Manage Presets and Manage Cabs wait to apply changes until you press the button. This is both a safety mechanism and an efficiency feature. As unsaved changes are made, the affected entries turn red and are marked with a red dot. Press the button to commit changes permanently. Press the button to quit without saving. Saved changes turn green and the dot is removed.
Performance pages
The Performance pages on the guitar processors let you quickly access block parameters to easily change settings during a performance.
The editor lets you customize these pages to your personal preferences. You can define a Global Performance
page, and Per-Preset
pages.
Click Perform, and drag and drop controls from the currently selected block onto the left or right pane by clicking and holding on the control's LABEL. To delete a control from a pane, press Delete on your keyboard. To switch blocks conveniently, use the dropdown menu (arrow) at the top-left of the lower pane.
Tip: Copy your favorite Global Performance controls to a separate preset using to the Per-Preset controls. This lets you easily restore the global controls from that preset after a system reset which deletes the Global Performance controls. Additionally, the down arrow to the right of the Per-Preset Performance Controls
title lets you easily save and retrieve the controls.
See Perform pages for more information.
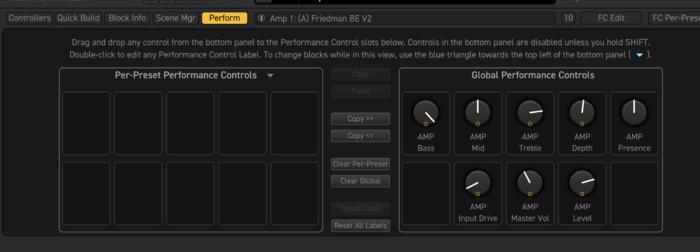
IR Capture
The Axe-Fx III lets you capture impulse responses. This can be done through the user interface on the guitar processor itself or through Tools > IR Capture in the editor.
Read IR Capture for more information.
Axe-Change
Axe-Change is the official preset and cab sharing resource for Fractal Audio Systems’ guitar processors. It’s accessible under the Tools menu where you can load presets and cabs directly from Axe-Change into the editor.
FC Edit: working with foot switches
The FM3, FM9, VP4, and the FC-6 and FC-12 foot controllers let you control many of the features of the modelers using your feet.
Press FC Edit and FC Per-Preset in the editor for configuration options.
For more information see:
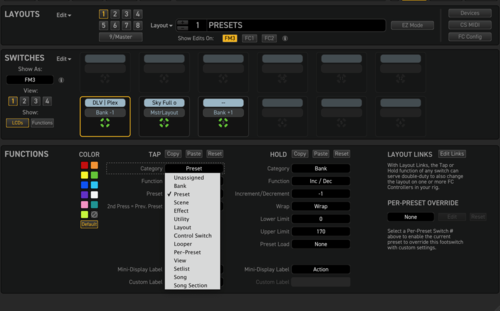
Main window
LAYOUTS
At the top of the FC-Edit window you can select the layout. A layout is a set of switch assignments for the FM3, FM9 and/or FC-controller.
Always make sure you know which layout you are currently editing by checking the layout number or name!
Many users combine FC controllers, or an FM3/FM9 with a FC controller, so FC-Edit lets you select the device to work with.
The Edit menu lets you import and export layouts. Use this for backup purposes.
SWITCHES and VIEW
Under Layouts, there's the Switches section with the View buttons.
A layout has twelve switches, corresponding with the number of switches on an FC-12. But, you have no direct access to twelve switches on an FM3, FM9 or FC-6, so, to access them, you can make of use of Views. These shift the range of accessible switches within a single layout. For example, Views on an FM3 let you access four sets of switches without having to switch layouts.
FUNCTIONS
This lets you assign functions to the switches, as described in the Fractal Audio Footswitch Functions Guide.
Buttons
In the top right corner there are three buttons, described below:
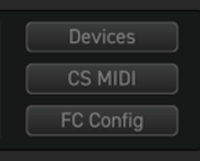
Devices button
This shows the current switch layout and view, which layout and view should be loaded at startup and if a device is mirrored as a 1:1 copy.

CS MIDI button
This lets you make use of the MIDI capabilities of Control Switches.

FC CONFIG button
This lets you adjust the general settings of the foot switches.
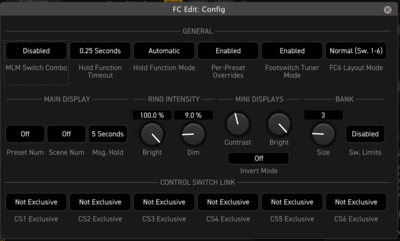
Layout links
This instructs the switch to change to another layout after having pressed it.
(Note: Giving away a magic trick… Layout Links are how the OMG9 layout on the FM3 works.)
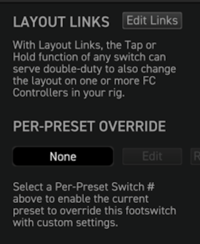
Per-preset override
The switches in layouts operate across all presets.
Per-Preset Override allows assigning actions to a switch that only applies to the current preset.

Tips, tricks and troubleshooting
- Go to
Settings > Preferences > Optionsto enable or disable a warning when editing the FC controller’s Master Layout Menu. - Press the
10button to mask characters in Preset and Scene names that do not fit on the scribble strips of the foot switches. - To avoid the display of the assigned
hold
function message when tapping a switch, selectCustom
for the label and leave the field blank.
Songs and setlists
Current firmware for the processors and FC controllers let you create and manage songs and setlists. This can be done on the hardware or in the editor.
See these for more information:
- Songs and Setlists
- Fractal Audio Footswitch Functions Guide
- Fractal Audio Setlists Songs Mini Manual
FAQ
- The editor won’t change presets, or changes presets erratically.
- Verify that Preset Mapping isn’t enabled on the guitar processor’s Setup > MIDI/Remote menu.
- The tuner won’t work.
- Ensure that the tuner on the guitar processor is set to page 1 (tuner display).
- How do I back up or restore Preset Banks?
- Use Fractal-Bot. Fractal-Bot is available as a standalone application or in the editor’s Tools menu.
- How do I update the firmware of my guitar processor?
- Use Fractal-Bot to update the firmware. Fractal-Bot is available as a standalone application or in the editor’s Tools menu. When launched, Fractal-Bot checks for official updates and when available provides the option to download and install an update.
- Typing values doesn’t work for MIN and MAX fields on the modifier screen.
- This is a limitation of how the editor works with the hardware. It only affects MIN and MAX on the modifier screen.
- When I double-click a parameter, it is set to a generic default value which may not be the same value as resetting a channel or the entire block. Why?
- It is a limitation of the architecture at this time.
- Can I use the editor to create and edit presets, without being connected to the guitar processor?
- The editor works in tandem with the hardware unit in a client-server type relationship, with the modeler acting as the host, almost like a mainframe, and the editor acting as the terminal. The editor requires the modeler to be connected for any operations.
- Offline editing is not supported and will NOT be added to future versions. The client-server relationship brings a host of benefits to the editor, most importantly, it can never corrupt a preset as only the hardware itself ever owns the data. This means you can program presets with the confidence that what you see and hear is what you'll save.
- I can't resize the editor’s window. How do I solve this?
- Close the editor, delete its settings file, and restart the editor.
- The settings file is found in Windows at
C:\Users\<user name>\AppData\Roaming\Fractal Audio\(editor name)
and in macOS at<user name>/Library/Application Support/Fractal Audio/(editor name)
.
- Note: The settings file's path is system specific and can not be changed.
- Are iOS and Android versions of the editors available?
- So far, no such versions of the editor have been released.
- My computer doesn’t have a touchscreen. How can I still use the editor with a touchscreen?
- Connect a tablet to your computer and use the operating system’s built-in support for displaying a second screen or a third-party solution.
Editing on a tablet or smartphone
Currently there are no official editors available for iOS or Android tablets and smartphones.
Alternative options are:
- Extend the computer screen to a separate tablet, either wired or wireless, using tools built in the OS, or a software utility such as Duet Display (Mac/iOS), or a combined hardware and software solution such as Luna Display. This lets you move the editor screen to the tablet and use its touchscreen for editing.
- Run FracPad, forum member AlGrenadine's mobile app for Fractal Audio's processors. It runs on Android and iOS devices. It's not officially supported by Fractal Audio.
- Use wireless MIDI connections with Macs and Windows PCs, with the computer acting as the interface between the app on the tablet or phone and the Fractal Audio device. See
Using Wireless MIDI to Connect Your iPad or iPhone to Your Computer and Hardware Synths
for more information.
FracTool
Forum member AlGrenadine's FracTool utility, for Windows and Mac, offers functionality not provided by the official editors.
