First editor
NOTE: this information is outdated.
Preface
The Axe-FX Editor is the result of countless hours of work by Lars Barstad (LarsB on the forum) in conjunction with Cliff Chase and with contributions by Brian Hickey.
Disclaimer: Of considerable importance is the fact that the Editor is officially in it's beta stage for the Standard and Ultra version of the Axe. It is also important to match Editor version with firmware version to insure function compatibility. Further understanding that since the Axe itself is in constant refinement and development stage therefore so is the Editor. As would be expected you use this product at your own risk preferrably with proper backup strategy.
Concept
You will sometimes hear this editor referred to as The Editor for good reason. Each user will find their own favorite use for the Editor and it will fill a variety of useful purposes. Here are just a few:
1. Transfer firmware to the Axe.
2. Upload/Download Banks to/from the Axe.
3. Upload/Download Presets to/from the Axe.
4. Upload/Download Custom Presets to AxeChange website.
5. Deep drill down editing of Axe presets.
6. Bank preset rearrangement, clearing, deleting, copying.
7. Installing custom user cabinets.
8. Education: Learning the concepts of the Axe structure.
This Editor is literally the Swiss Army Knife of Axe Tools.
Installation
The editor may be downloaded for free by visiting AxeChange.net and is cross platform (Mac & PC) friendly. The axefx-win-install.jar file you will be downloading has a .jar extension. It is necessary that you have Java installed on your computer for the .jar file to install and for the Editor to function. You may download the most recent Java software. If you double-click the .jar file and it does not auto-install chances are good that you do not have the proper Java installed. Please read the current Notes on AxeChange website for up to the minute tech notes and links for both Mac & PC use.
By default the editor will install in a path as follows:
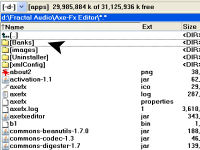
C:\Program Files\Fractal Audio\Axe-Fx Editor\
It will place an icon on the desktop and a submenu in startup (if checkboxed). The option is also given to install to a custom location as shown in these examples of an installation to:
D:\Fractal Audio\Axe-Fx Editor\
![]() Tip: All photos enlarge when clicked if so desired. Then use browser back button to return to article.
Tip: All photos enlarge when clicked if so desired. Then use browser back button to return to article.
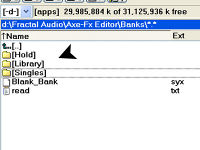
Consider deleting any .sysx files you find in the editor root directory as it sometimes downloads with test files. Creating a folder right away to hold your banks and presets, as indicated by mouse pointer, is a good way to start off organized and safe. This also makes your working data easy to find by separating it from the program data.
Inside your work folder you can create additional subfolders. This is particularly useful to store your original banks for backup, or individual presets, custom presets or banks. It can be organized to the degree you wish. For safety sake don't ever edit the only copies you have. Always make backups and these folder examples are just suggestions for keeping organized.
If at this point you are not able to load the Axe-FX Editor it is suggested you head to the forums Editor Software Thread and ask for assistance.
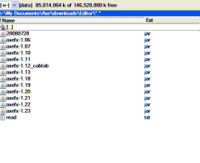
![]() Tip: When downloading Editor to your directory consider renaming the file to reflect which version it is. It is helpful if you keep an archive of versions for rollback purposes. Also consider renaming the desktop icon to reflect your current version.
Tip: When downloading Editor to your directory consider renaming the file to reflect which version it is. It is helpful if you keep an archive of versions for rollback purposes. Also consider renaming the desktop icon to reflect your current version.
Hookup
Once The Editor is initialized it is necessary to let it communicate with multiple devices. It will chain in the following manner: From Computer to MIDI Interface to Axe-FX via a MIDI out cable. Please familiarize yourself with MIDI Interface devices and hook it up accordingly. Traditionally you would be installing a MIDI driver (included with your device or available for download) onto your PC and making connections exampled as follows:
1. MIDI Interface to PC via USB.
2. MIDI Out from Interface to MIDI In on Axe-FX.(Out to In)
3. MIDI In from Interface to MIDI Out on Axe-FX.(In to Out)
After completing these connections it is not unusual to have to reboot computer to initialize MIDI driver.
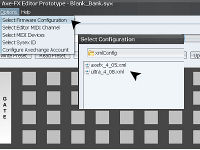
At this point your MIDI throughput should be complete and it's time to set specific configurations. First select the firmware version and model of your Axe.
(version numbers in this photo may be outdated).
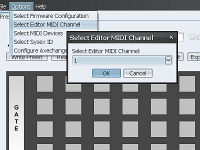
MIDI offers 16 channels to communicate on. This allows a multitude of power and devices to communicate via one path. You should now select the channel that your software and Axe will communicate on.
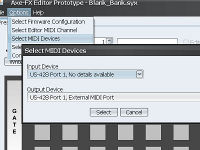
Now select your MIDI In and Out Device. Your computer usually offers some type of MIDI offerings. You do not want these you want your interface. Many interfaces have more than one set of sockets. This device is offering two. Here is shown a Port 1 selection on both In/Out.
You are now installed and connected and ready to experience the features of The Editor.
Define
Since we are dealing with MIDI traveling in both directions to the Axe, to the Editor, to the Web it will become very easy to get lost in the terms. For the purpose of this article only it would be good to establish some guides to allow us all to be on the same page.
Since this article is about The Editor then it is our primary focal point.
Generally:
Upload meaning From: Editor.
Download meaning To: Editor.
Further:
Upload: meaning from Editor to Web.
Download: meaning from Web to Editor.
Send: meaning from Editor to Axe (aka upload to Axe)
Receive: meaning from Axe to Editor (aka download from Axe)
Important: There is another concept that requires understanding and definition.
Buffer: In both the Axe and Editor there is a buffer. It could be known as a scratch pad or work area. Imagine you type a letter in your email and don't hit send. You just close it and it's gone. Or you type a letter with NotePad or Word and then just close it without saving. It's gone.
The Axe and Editor are the same way.
On the Axe: You recall a preset and it is loaded into the buffer. Once you edit it the edit light blinks but it is not yet saved. You could roll the spin wheel 1 step off then back on to the preset and it cancels your edit and you are back to where you were.
On the Editor: When you download a Bank or modify a preset it is not yet saved. Unless you choose File: Save: (choice) then your changes will be lost when the Editor is closed.
It is imperative that the Buffer Process is understood else risk losing your work.
Banks
Receive
The receive sub-section is placed first because that is probably the first thing you need to do. Receive (download) from the Axe your Bank A/B/C presets. Further it is probably best to make a copy of them to work on and save these originals for backup purposes. You might have been provided originals from Fractal Audio. A Back folder inside your Bank folder is a good thing to have.
After establishing MIDI connections and Opening Editor:
1. On Axe: Utility: Page Right: Nav Down to Bank of Choice: (and wait).
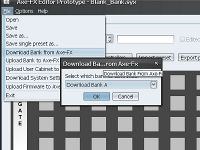
2. On Editor: File: Download Bank from Axe: Choose Bank.
3. On Axe: Press Enter.
4. On Editor: After file has loaded into editor then File: Save As: (name and locate it).
5. On Axe: Press Exit to return to Preset.
Note: You have two devices waiting on each other to make a move. The Editor may time-out if you take too long. You can always switch steps 2 and 3 if it is easier for you.
Arrange
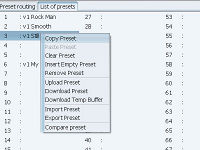
When we engage the Preset Tab screen and start right clicking on presets we are presented with a new menu and many choices. We should cover the different terminology and functions of each choice prior to bank rearrangement:
- Copy Preset: Right click/copy loads preset into computer clipboard.
- Paste Preset: Right click/paste dumps preset from computer clipboard.
- Clear Preset: Clears preset slot and leaves slot blank.
- Insert Empty: Inserts a blank preset slot in between presets and shifts presets. If Bank was full then then preset 128 will dissapear.
- Remove Preset: Removes a preset and shifts presets up with no blank slot. If Bank was full then you will now have a blank slot at 128.
- Upload Preset: Uploads preset to Axechange.net.
- Download Preset: Downloads preset from Axechange.net
- Download Temp Buffer: Press Recall on Axe. Download Temp Buffer will import what is in the Axe buffer.
- Import Preset: Will load any single preset file from computer into current Editor Bank.
- Export Preset: Will take any preset in Editor and save it as a single preset to computer.
- Compare Preset: Compares preset on the Axe to the Editor and returns Presets Are or Not Equal.
With these definitions in mind here is a simple bank rearrangment on the Editor. If you have manually created a custom preset on the Axe that doesn't exist in the current Editor Bank and you upload from the Editor to the Axe... that preset will be gone. It is important to keep your Axe and Editor syncronized.
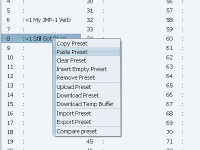
1. Right Click on the Preset you wish to move and choose Copy.
2. Choose new locations for Preset, Right Click and Paste.
3. Highlight original preset and choose Clear Preset.
4. File: Save or Save As to save new Bank layout.
5. Upload to Axe if desired.
Send
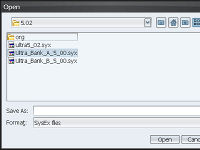
1. On Editor: File: Upload Bank to Axe-FX: Choose Bank.syx file to upload.
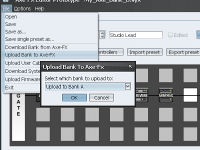
2. Choose the Bank you want to upload to A/B/C and press OK.
3. The Editor will upload your chosen Bank to your chosen location.
Presets
There are some very important premises that must be understood prior to utilizing the Read/Write functions.
- The Editor must be thought of as the master device when in use. Do not change setting on the Editor and on the Axe simultaneously.
- The window on the Editor is of critical importance. This is the preset that you are working on regardless of what preset the Axe is setting on.
- When using Read/Write functions you are working on Bank A only on the Axe. The Editor only has access to the first 128 presets.
- The Axe potentially has presets numbered 000 to 127 the Editor 001 to 128. Always recognize this offset by 1 before Writing a preset.
Tip: Aligning the presets between the Axe and Editor before you start an edit may help reduce any confusion.
Ex: You want to add some reverb and set the volume on preset Crazy Train. You align Preset 23 on Editor to Preset 22 on Axe. This will take care of any offset worries and will syncronize the read/write functions therefore what you see is what you get on both the Axe and the Editor. You can also change the Axe from default preset mapping of 000 to 383 to 001 to 384 which will perfectly align with the Editor.
Read
There are basically two ways to read a Preset from the Axe to the Editor. The first way is particularly useful for reading presets outside Bank A. It is fairly simple.
Method One
- On Editor: List of Presets Tab: Highlight Preset to Replace or Empty Slot.
Note: You must select the target location within the Editor first. Editor build .86 automatically dumps the Preset into the Axe-Fx Temp Buffer whenever a Preset is selected from the Editor's "List of presets" page. - On Axe: Set on any preset desired and hit recall to load into buffer.
- On Editor: Right Click and Download Temp Buffer.
Whatever is in the Axe Temp Buffer will be transferred to the location you chose on the Preset List.
Method Two:
- On Axe: Forget the Axe for the moment and concentrate on the Editor.
- On Editor: Dial the preset you wish to work on. Do it by preset number and remember the offset. Formula is Editor Number minus One Equals Axe Number.
- On Editor: Press Read Preset Button. The Editor will read the Preset Number listed. So if the number on the Editor is 21 then it will read Preset 20 from the Axe. This will go into the Editor Temp Buffer. If you were to shut down the Editor nothing will be saved. You must Save the preset after reading it in order to have a copy.
Write
When you have edited a preset and wish to send it to the Axe it is a matter of pressing Write Preset. There are, however, some things to understand. First and foremost you will be sending your preset to the number on the Editor Window (minus one).
It does not matter what the Axe Preset is diplaying your preset will go to Editor number -1 on the Axe. Therefore it is entirely possible you will not see anything change on the Axe nor see a blinking edit light. This is basically a transparent operation.
Edit
The depth of drill down editing is far beyond the scope of this short section.
We are possibly better served by opening a separate section covering this topic in detail.
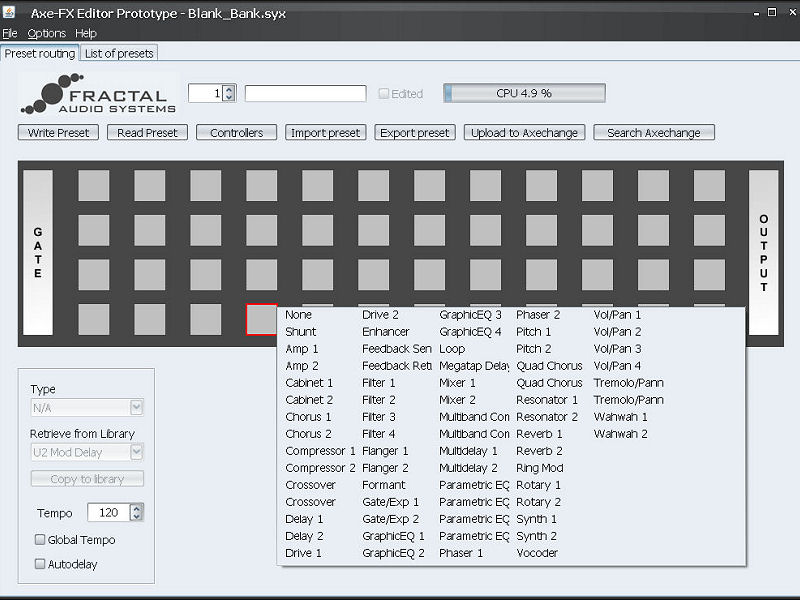
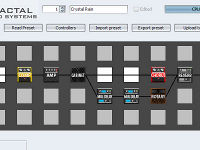
A blank slate portraying the power of the Editing Maxtrix Layout.
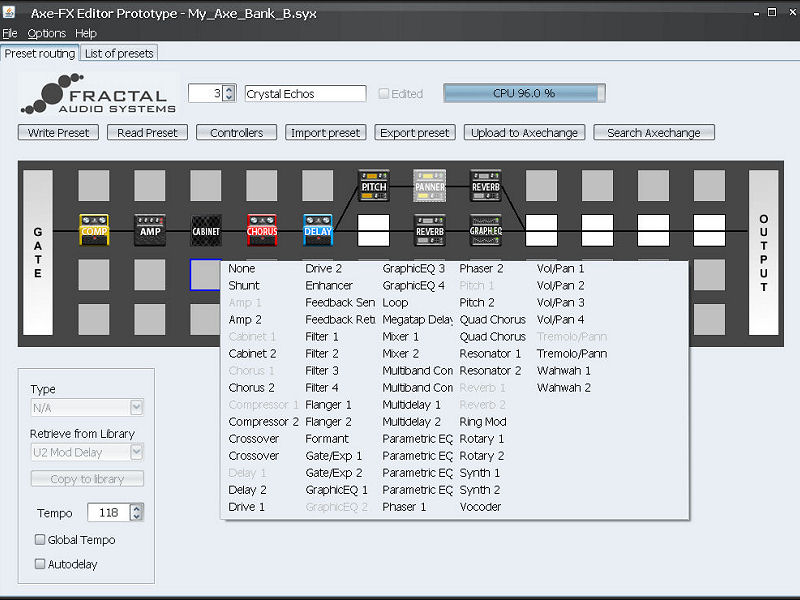
A small sampling of the Editing Maxtrix in use.
Rename
The Editor has an awesome function in just simply renaming a preset. Sometimes when we are experimenting with alternate versions or slightly modified presets all we want to do is rename the current preset on the Axe.
Many time it will take a lot of wheel spinning to get the name we desire. Here is a simple way to Rename Only a preset. This seems to be firmware independent in that it is not really editing anything but the name.
- On Axe: Dial in any preset you want to rename.
- On Editor: Highlight and delete what is in the Preset Window.
- On Axe: Check if Edit light is blinking. If so roll dial 1 off then back to clear edit light.
- On Editor: Type name of choice in window and watch it appear on Axe.
- On Axe: The edit light will not light. Hit Store and Enter to enter new name.
Upload
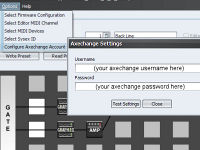
1. On Editor: Options: Configure Axechange Account: Enter User Name and Pass for Axechange.
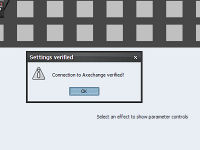
2. Verifies that you have internet and connectivity to Axechange.net.
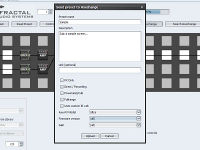
3. Name your Preset, give a description, optional link and desired options.
4. Click Upload.
Your preset will be uploaded and available to the public on Axechange.net
Download
1. On Editor: Choose Search Axechange.
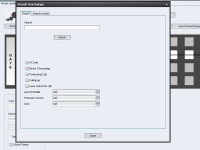
2. Enter search parameters or leave blank to see all availabilities.
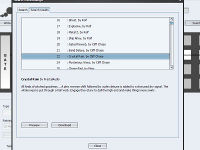
3. Check various presets, Preview and Download if desired.
4. Preset will now reside in Temp Buffer on Axe.
5. On Editor: Save Preset (if desired).
Firmware
The Home page always has the most up to date firmware for both the Axe Standard and Ultra. You can either click the link or right click/save target as and choose a location on your computer to save file. The file will be downloaded in a zip format and will require un-zipping prior to use. Once this is accomplished:
1. Hook MIDI cable from Interface MIDI Out to Axe-FX MIDI In.
2. Hook MIDI Interface to computer via USB or Firewire as applicable.
3. Power On MIDI Interface.
4. Reboot computer (some MIDI drivers require this).
5. Turn On Axe-FX.
6. Load Editor.
7. On Editor: File: Upload Firmware to Axe-FX.
8. On Editor: Browse to correct .syx file and open: Pause
9. On Axe: Utility: Page Right 4X to Firmware page and Press Enter.
10. On Editor: Press OK
Note: You can reverse the sequence and Press Enter on Axe first and then Editor. The Axe will say Awaiting File when done this way. Either way one waits for the other.
Note: While updating firmware probably a good idea plug in to AC if you are using a laptop for updates. Not a good time to hibernate, screen save or multi-task if possible.
The Axe Display Reads: File Transfer In Progress. This is a fairly slow process taking 20 to 30 minutes. When done the display will read:
Good Checksum
Erasing...
Programming Flash
Since firmware revision 5.11 the unit will auto reboot.
On Axe: Utility: Page Right 4x to Firmware Page and view new version.
On Axe: Exit
On Axe: Jam
Glossary
Function by function definition of each aspect and choice on the editor starting with top toolbar.
File: Open: Opens a window to select a bank or preset stored on your computer.
File: Save: Saves the current file you are working on without option to rename or relocate.
File: Save As: Saves a copy of the current file with options to rename and/or relocate.
File: Save Single Preset As: Although you may have a bank of presets loaded this will save the current preset you are working on (aka: export).
File: Download Bank from Axe-FX: Exports Bank A/B or C from Axe to Computer for backup or further processing purposes.
File: Upload Bank to Axe-FX: Imports a complete bank of presets into Axe after modifications or upon release of new Factory Banks.
File: Upload User Cabinet to Axe-FX: Upload custom user cabinets to User Locations on Axe.
File: Download System Settings From Axe-FX: Downloads custom settings you have made to the Axe (hidden Bank D).
File: Upload Firmware to Axe-FX: Uploads new versions of firmware released by Fractal Audio.
File: Exit: Closes and quits The Editor application.
Options: Select Firmware Configuration: Chooses the firmware version and Axe model you are using.
Options: Select Editor MIDI Channel: Selects the Channel of signal communication.
Options: Select MIDI Devices: Selects the In/Out Ports on the MIDI Interface you are using.
Options: Select Sysex ID: ID number for two MIDI entities to communicate. Much like channels.
Options: Configure Axechange Account: Test for connectivity to Axechange.net.
Help: About: Tells about the contributors to the Editor Project.
Preset Routing Tab: Master page for drill down editing.
List of Presets Tab: Shows the preset layout, and allows selection and manipulation, of the currently loaded bank.
- Copy Preset: Right click/copy loads preset into computer clipboard.
- Paste Preset: Right click/paste dumps preset from computer clipboard.
- Clear Preset: Clears preset slot and leaves slot blank.
- Insert Empty: Inserts a blank preset slot in between presets and shifts presets. If Bank was full then then preset 128 will dissapear.
- Remove Preset: Removes a preset and shifts presets up with no blank slot. If Bank was full then you will now have a blank slot at 128.
- Upload Preset: Uploads preset to Axechange.net.
- Download Preset: Downloads preset from Axechange.net
- Download Temp Buffer: Press Recall on Axe. Download Temp Buffer will import what is in the Axe buffer.
- Import Preset: Will load any single preset file from computer into current Editor Bank.
- Export Preset: Will take any preset in Editor and save it as a single preset to computer.
- Compare Preset: Compares preset on the Axe to the Editor and returns Presets Are or Not Equal.
Preset No. Window: Allows tick up/down or enter preset number from Main Editor screen.
Name Window: Shows current preset name.
Edited Box: Shows check when currently loaded preset has been edited.
CPU Window: Calculates an estimated CPU% usage of current preset based on parameter selections.
Write Preset Button: Writes currently buffered Editor preset to current preset slot buffer on Axe.
Read Preset Button: Editor reads currently buffered preset from Axe and loads into Editor buffer.
Controllers Button: Changes control modifiers [ ] in various blocks (Ex: Wah).
Import Preset Button: Imports a preset from your computer to current preset.
Export Preset Button: Exports current preset to a location on your computer.
Upload to Axechange Button: Will send your current preset to Axechange.net
Search Axechange Button: Providing you are internet connected will load Axechange.net for preset search.
Editor Grid: This is the matrix where drill down editing, effect selection and preset design takes place.
Tips
- If you just want to level out your presets use: Output Tab: Main Mix. This will change your volume without changing your tone.
- Roll the Spin wheel 1 step left or right and then back to cancel a blinking Edit Light on the Axe and leave your preset unchanged.
- A grayed out device in the Editor means it's bypassed. Alt + left click toggles it.
- Many MIDI problems come from cables. Check the cables and the routing and make sure to select your MIDI device in your application.
- You can pop up 2 (or more) instances of the Editor at once. Set one to actually communicate via MIDI and set dummy settings in the other. Great on dual monitors and great for comparing before and after preset changes or side by side A/B preset list.
