Always consult the official Owners Manuals first
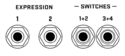
Expression pedals and external switches
Contents


Remote control of Fractal Audio's processors
Fractal Audio's hardware processors can be remotely controlled in various ways. The possibilities depend on the processor:
- onboard switches on the FM3, AX8, FX8
- USB, for control with Editors, DAW etc.
- MFC-101 MIDI foot controller
- FC-6 and FC-12 foot controllers
- FracPad
- expression pedals and external switches, such as the EV-1 and EV-2 pedals, connected directly to the processor or to a floor controller
- MIDI, for 3rd-party controllers such as the RJM Mastermind MIDI foot controller
Modifiers and external controllers
Pedals and switches can be connected directly to parameters (depending on the processor), or through a so-called External Controller or Control Switch, which operates as the source of a Modifier.
Read this: Modifiers, Controllers and Control Switches
About TRS and TS cables
From the Axe-Fx III Owner's Manual:
"TRS” stands for TIP-RING-SLEEVE and describes the configuration of a 1/4" end plug or jack with three connectors. Normal guitar cables are “TS” (Tip-Sleeve) since they lack the ring required for a third contact. Expression pedals require TRS cables because full control voltage is transmitted to them on one contact (the tip), while less than full voltage is returned to on another (the ring) so the host device is able to sense and utilize the pedal position. The third contact (sleeve) is connected to ground."
Using an expression pedal
Set up an expression pedal
A pedal that's connected directly to the processor, can be configured on the Pedal page of the I/O menu.
If the pedal is connected through another connected device, such as an FC or MIDI controller, use that device's configuration to setup the pedal, including calibration.
Calibration
It's very important to always calibrate an expression pedal for proper operation.
What happens if the pedal is not connected
If the expression pedal is not connected, the processor needs to know what value to use. Disconnecting a pedal that operates as a Volume pedal should not mute the device, for example. The desired “initial” value can be set in the MIDI menu, through the Initial Value parameter.
This applies only to pedals that have been assigned using an "external controller" inbetween, not to pedals that are directly connected to the device.
Set up a global volume pedal
This is covered in the Owner's Manual.
Note: the FX8 lets you specify the exact position of the Volume control.
Control the wet level of effects
You can use an expression pedal to control the overall "wetness" (effect level of multiple/all effect blocks):
- Connect and calibrate your expression pedal
- In I/O set one of the EXTERNAL controllers to "PDL" (let's use EXT1 in this example)
- Create your preset with the reverb and delay at their most extreme (wet) settings
- Open the DELAY block for editing
- Select the INPUT GAIN parameter and press ENTER to show the MODIFIER screen
- Set the SOURCE of the modifier to EXT1. Press EXIT 2x to return to the grid
- Select the REVERB block and repeat steps 4, 5, and 6
- Save the preset
- The pedal will now blend between full wet and full dry (source)
Morph between clean and dirty tones
Tutorial by Cooper Carter for G66
Use a single pedal for multiple tasks
Method 1 (i.e. control either Wah or Whammy):
- Insert a Wah block.
- Insert a Pitch block, directly above or below the Wah in a parallel row. Connect it back to to the main row.
- In the Modifier menu of BOTH effects (Wah: Frequency; Pitch: Control): set Source to External 1. Enable Auto-engage.
- Add a Mixer block to the main row, just after Wah and Pitch.
- Edit Mixer: enter the Modifier menu of the Gain parameter for the row that connects to the Wah. Set Source to another external controller (which will be attached to an IA-switch to switch between Wah and Whammy). Set Start Value to 100% and End Value to 0.
- Do the same for the row that connects to the Pitch block. But: set Start Value to 0% and End Value to 100%.
- Program an IA switch to switch between Wah and Whammy, using the Mixer rows. Use the CC of the external controller that you specified while editing the Mixer block, and send "127" for the Wah, and "0" for the Whammy.
- That's all. Moving the pedal should activate both the Wah and the Pitch block. But thanks to the Mixer block you'll only hear one of these effects. If you're hearing the Wah and the Whammy effects simultaneously, you need to press the IA-switch to get the Mixer block to work
Method 2 (i.e. control Volume and Wah): (source: Bakerman)
- Place a Volume block on the grid.
- Assign an IA switch to an external controller's CC.
- Assign another external controller the Wah and Volume control knobs.
- Set the first external controller as a Bypass modifier for both blocks and reverse the slope of one (start 100, end 0).
- Now the IA switch will toggle between Wah/Volume and the pedal will control both.
Method 3 (use scenes to switch the pedal to another effect, i.e. Wah, Whammy and Volume):
- Put Wah and Pitch and Volume in one column (parallel).
- Assign an external controller (pedal) to the effects. Set to Auto-Engage in Wah and Pitch.
- In Wah and Pitch turn down Level in the block's Y state.
- Scene 1 is for Wah. Set Wah to X, set Pitch to Y, bypass Volume.
- Scene 1 is for Whammy. Set Wah to Y, set Pitch to Y, bypass Volume.
- Scene 3 is for Volume. Set Wah to Y, set Pitch to Y, engage Volume.
- To make this work with effcts without X/Y support, use a Scene Controller.
Method 4 (use the Multiplexer block in firmware Ares):
- Read this: Multiplexer block
Using an external switch
Tap Tempo or Tuner
An external switch can be used for tapping the Tempo or to activate the Tuner.
Effect block state: ignore scene and preset switching
You can use an external switch to maintain its bypass state when switching presets and scenes.
- Connect the switch to a pedal port
- Assign that pedal to an External Controller
- Assign the Bypass Mode parameter of the effect to that External Controller (modifier menu: Source). Repeat this in each preset which you want to control
- Now the switch will control the effect's engaged/bypass state, regardless of the effect's stored state, and stay in sync
Control multiple effects simultaneously
It's possible to use your expression pedal for multiple purposes while staying in the same preset. Suppose you have one expression pedal and you want it to use as a wah as well as a Whammy, without switching presets:
- Insert a Wah block.
- Insert a Pitch block, directly above or below the Wah in a parallel row. Connect it back to to the main row.
- In the Modifier menu of BOTH effects (Wah: Frequency parameter; Pitch: Control parameter): set Source to the External controller that's attached to your expression pedal. Set auto-engage to Fast, Medium or Slow.
- Add a Mixer block to the main row, just after Wah and Pitch.
- Editing the Mixer: enter the Modifier menu of the Gain parameter for the row that connects to the Wah. Set Source to the external controller that is or will be attached to an IA-switch (which switches between Wah and Whammy). Set Start Value to 100% and End Value to 0.
- Do the same for the row that connects to the Pitch block. But: set Start Value to 0% and End Value to 100%.
- Program an IA-switch on your MIDI controller to switch between Wah and Whammy, using the Mixer rows. Use the CC of the external controller that you specified while editing the Mixer block, and send "127" for the Wah, and "0" for the Whammy.
- This is it. Moving the pedal should activate both the Wah and the Pitch block. But thanks to the Mixer block you'll only hear one of these effects. To bypass the effect hold the pedal in toe-down position. If you're hearing the Wah and the Whammy effects simultaneously, you need to press the IA-switch to get the Mixer block to work.
You don't have to use a Mixer block (available on the Axe-Fx only). Here's how, or read this for another solution:
- Do the same as above but leave out the Mixer block.
- Set Bypass mode of one block to Thru and the other block to Mute.
- Assign an External controller (attached to a switch) to the Balance parameter in each block. Set Start Value to 100% and End Value to 0 in one block, andvice versa in the other.
- Set Input Select in Drive and Amp blocks after Wah and Pitch to Left or Right, instead of Sum L+R.
Example of a preset where a single pedal controls Wah, Whammy and Volume
Switch presets
You can use an external switch to switch presets. This works fine if you have just a few presets to switch between. If the processor has more than one PEDAL jack, you can assign one to increment presets and the other to decrement presets. You can also use a switch to switch scenes, see Scenes.
Engage or bypass an effect
You can use an external switch to engage or bypass a specific effect. In the I/O menu assign the effect block to the switch (or pedal).
Switch an effect between X/Y or channels
An external switch can be used to switch an effect between X and Y or between Channels.
Expand the switching options of an FC controller or FM3
Connect external switches to an FC controller or FM3 to expand their switching possibilities.
Read this:
Troubleshooting
ADC levels of the pedal ports
The Axe-Fx III and FM3 let you to check the ADC (Analog-to-Digital Converter) levels of the pedal ports (Utility menu).
Zipper noise
If moving the expression pedal creates choppy sounds or zipper noise, increase the Damping parameter in the Modifier menu.
AxeForLemur
AxeForLemur is a Lemur Template designed by David Sorlien to control the Axe-Fx. The Template runs on the Lemur APP by Liine, and connects wirelessly through a logical midi connection to the AxeFx.
This page is intended for users and developers of this template.
Usage
AxeForLemur is a JZML script, licensed by Creative Commons to be a non-commercial, free to use script. The script runs on IOS and Android devices with the Lemur Application from Liine. The Lemur Application communicates with the Axe-Fx either through direct MIDI connection, or through Wifi to a Host Computer, that is connected either through USB or MIDI to the Axe-Fx.
To configure an IOS/Android Patch Editor for the AxeFx:
- Purchase the Lemur App ( $20-$35 ) and install it on your Tablet or iPAD.
- Go to the Liine Website and register yourself as a user, then download, the Lemur Editor and Daemon Software.
- Connect your Tablet to your computer's IP network. Verify IP address, and ping your tablet to verify.
- Start the Lemur App on your Tablet or IPad.
- Download an AxeForLemur.jzml script. Current version is 3.08.
- On your PC run the LemurEditor and load the AxeForLemur.jzml script, Click Connect to send the script to your Tablet or IPAD.
- You should see the AxeForLemur Script on your IPAD, on the Default AMP page.
- If your AxeFx is connected to your PC/MAC through a USB cable, run the LIINE LEMUR DAEMON on your machine. This DEAMON will provide an IP Socket on the Network for MIDI and OSC communications from the IPAD to any MIDI devices on your PC/MAC.
- Within Lemur on your Tablet Open the Settings drop down list and select "More Settings...", Setup Midi Targets, From: and To:. You may need tap Add Target. You should see a list of network computers, with MIDI devices high lit. Choose AxeFx from the computer that is running the LEMUR DAEMON, for both "From: and "To:. If no devices show up, please verify the IPAD is connected to the IP network, and that the Lemur Daemon is running, and the AxeFX is turned on, and it is connected with USB or MIDI cable.
- On the Preset Select page of the AxeForLemur script, configure the midi settings to match your setup. Example, Column-A should Device should be set to AxeFxII or AxeFxXL+ etc, midi channel to '1' to match your MIDI settings, and Lemur target set to the Target within the Lemur Menu.
- Test by Tapping the Preset Up/Down.
- Troubleshooting can be a bit challenging and might require a bit of system debug and tweaking.
Design
Design background into key elements of the AxeToLemur script:
Axe For Lemur is a comprehensive Lemur script based in Quasi XML, Objector based C-Script with out pre-processor, structures, pointers etc. The Script is object based, and exists in the JazzInterface tab object AxeForLemur. Global references exist in this scope.
Design Initialization
Design Device Selection
The preset page (AxeForLemur/dlgProgChange/T1) Contains a Matrix of Midi settings for up to 4 target devices.
For each 'Target Device' The user can select and increment/decrement (cTargets/padUpDn) the following (cTargets/swSettings):
- Type : { AxeFx, AxeFx II, Gen Midi, No Bank, Eclipse } = aUser.cMidi.devtypes[ ]
- Display Offset : { 0 or 1 } = aUser.cMidi.dispoffset[ ]
- MIDI Channel : { 1 .. 16} = aUser.cMidi.chans[ ]
- Lemur Target : { 0.. 3 } = aUser.cMidi.targets[ ]
The user can select one of A,B,C, or D target devices; only one is active at a time.
The objective is to integrate AxeFxXL and AxeFxXL+ into the list of supported Device Types.
Since this template was last updated by David Sorlien, two new AxeFx devices have been created. The XL and XL+ have more or less the same SysEx protocols as the AxeFx ( subject to change ), but have New SysEx device ID codes. The following is a break down of work required to make AxeForLemur support other Fractal Audio Devices.
Essentially the T1/cTargets/swSettings is a 4 x 4 Switch matrix. Pressing a button will provide a 0..16 button index within the T1/cTargets/swSettings/x variable. Pressing one of the T1/cTargets/padUpDn will cause the selected T1/cTargets/swSettings/x indexed value to be Incremented/decremented. The padUpDn/tap() changesbutton matrix.
Add two more values to devtypes
 change:
   aUser.cMidi.devtypes[a] = clamp(aUser.cMidi.devtypes[a]+1, 0, 4);
   aUser.cMidi.devtypes[a] = clamp(aUser.cMidi.devtypes[a]-1, 0, 4);
 to:
   aUser.cMidi.devtypes[a] = clamp(aUser.cMidi.devtypes[a]+1, 0, 6);
   aUser.cMidi.devtypes[a] = clamp(aUser.cMidi.devtypes[a]-1, 0, 6);
Add two more strings to button objet lablels
 swSettings/updatelabels()
 for(i=0;i<4;i++){
   if(aUser.cMidi.devtypes[i]==0) a[i] = 'AxeFX';
   else if(aUser.cMidi.devtypes[i]==1) a[i] = 'AxeFX II';
   else if(aUser.cMidi.devtypes[i]==2) a[i] = 'Gen MIDI';
   else if(aUser.cMidi.devtypes[i]==3) a[i] = 'No Bank';
   else if(aUser.cMidi.devtypes[i]==4) a[i] = 'Eclpse';
   else if(aUser.cMidi.devtypes[i]==5) a[i] = 'AxeXL';
   else if(aUser.cMidi.devtypes[i]==6) a[i] = 'AxeXL+'; }
Change Device ID's within SysEx messages to include devie ids { 6 and 7 }
 <SCRIPT name="IsAxeSysex(msg)" ..
 if(msg[0]==0 && msg[1]==1 && msg[2]==0x74 && ( msg[3]<=3 || msg[3]==6 || msg[3]==7 )
 ...
 else if(msg[3]==3) st = 'Axe-FX II';
 else if(msg[3]==6) st = 'Axe-FX XL';
 else if(msg[3]==7) st = 'Axe-FX XL+';
and change all hard coded device id's "0x74,3" with "0x74,6" or "0x74,7" in
 SendSetParam(b, p, v)
 SendGetParam(b, p)
 SendGetPresetName()
 SendGetBypState()
 SendGetPresetNumber()
 SendLooperMonEn(en)
 SendGetSceneState()
 SendSetModifier(b, p, m, v)
 SendGetModifier(b, p, m)
 SendPlaceEffect(b, pos, flag)
 SendConnectEffect(p1, p2, f)
 SendSetPresetName(name)
 SynthMidiNoteOnIn(MIDI_ARGS)
 SendSavePatch(program, bank)
 SendGetCabName(cabnum)
It makes sense to define a class variable like cV.DevID, and make sure it is set on startup by the AxeFx device ID selected by the A,B,C,D device selector.
Design Modifiers
Modifiers provide a means to dynamically change a subset of the block parameters with automatic, and external functions. The AxeToLemur Script has a partial implementation of Modifiers. The AxeToLemur.pdf describes 'double tapping' the intended modify-able' control to enable modifier, but this doesn't appear to be within the implementation.
Within the 'control's bps[] array, for hw==0, element at index==6 is the Modifier number, if this value is >= 0, then the control should have modify-able values. This applies to 'bps' of sliders, custom buttons, muxed-sliders. If the 'control's bps[8] is set to 1, then there is an active modifier on the control.
It is assumed that 'double tapping' the 'Zoom' button will enable a RED "MOD" feature on the Zoom button. cS.DoubleTap() captures double tap event. This sets cV.dbltapzoom[2] = 1; A parameter that is 'Modify-able' has a Green 'txt' value.
As of 3.08, the repainting logic within the APP did not support GREEN 'txt' labels.
cS.psmxfdr(obj, p, p, m, t), and cS.psmxcb(obj,b,p,m,t) used to set/map a 'muxed fader' to an AxeFx control. This function also sets the colour of the text of a control
Notes:
ResetModifierText(..), called when changing pages in Lemur, to clear out cV.modlistlast
(cV.rState==5) modifiers are being queried SendGetModifier(..)
(cV.rState==6) modifiers are being queried SendGetModifier(mbps[hw], mbps[hw+6], a[i]); response in HandleModifierValMsg(msg), calls UpdateModifier(b, p, m, v);
(cV.rState==7) modifiers are being reset SendSetModifier(..)
buildModCtlList() saves cV.modlist[] to cV.modlistlast[], iterates through all objects in cMain. To find build a cV.modlist[] of modifyable parameters within objects that 1. contain a bps[], 2. are in a visible block, 3. the block is active in the preset, the bps[6] is >= 0. cV.dbltapzoom[] is filled with same array of objects
cS.DoubleTap() appears to be implemented to open a Modifier Dialog: dlgModifiers.showme(1); but it is not called within the Script. This function will trigger a 'DoEveryFrame' midi query of the Modifier setting.
3.09 TODO List:
1. confirm all modifier indexes on Fractal Parameters
2. call cS.DoubleTap() when Zoom == MOD and a modifyable control is Tapped.
3. verify control's txt value is rendered RED when control modified control is active (previously engaged, polled through DoEveryFrame())
Project Globals
Var blkd=
Var blksq=
Var blok=
Var blx=
Var debugflag=
Var hw= 'hardware version =0 AxeFx, =1 others, Ultra etc.
Var Querying=
tidx=
Script BuildParamList()
- Sets cV.bpobj to first object in cMain, and iterates through all objects to build cV.BlocksToRefresh list. For Block numbers (99..200) that are in the preset values are added to a refresh list
Script RefreshSequencer()
Script SendCCAxe(ccnum, ccval)
Script SendConnectEffect(p1, p2, f)
Script SendGetByState()
Script SendGetCabName(cabnum)
Script SendGetModifier(b, p, m)
Script SendGetParam(b,p)
Script SendGetPresetName()
Script SendGetPresetNumber()
Script SendGetRoutingGrid()
Script SendGetSceneState()
Script SendLooperMonEn(en)
Script SendPG2Axe(pgnum)
Script SendPlaceEffect(b,pos,flag)
Script SendSavePath(program, bank)
Script SendSetModifier(b, p, m, v)
Script SendSetParam(b, p, v)
Script SendSetPresetName(name)
Script SynthMidiNoeOffIn(MIDI_ARGS)
Script SynthMidiNoteOnIn(MIDI_ARGS)
Script sxoutHandler(b,p, s, val)
Script UserMidiCCIn(MIDI_ARGS)
Script UserMIDINOTEIn(MIDI_ARGS)
Objects
Major AxeForLemur Objects:
aUser
User specific settings, like favorite presets, midi channel. These can be persistent if the user re-saves the script after mondifications are made through the script itself. Global midi CC's are stored in gen1.cc*
Querying : set to 1 during referesh, most likely to prevent re-triggering
aUser.cMidi.gen2 :: MIDI CC # numbers for different MIDI CC parameters
..scenescc[0] : MIDI CC # number for 'scene select'
cMain
User interface for Axe-Fx blocks.
cMain contains UI design and configuration for each Block (pair) Tab within AxeForLemur script
IntState3(..) macro, configures button labels within the UI interface. Typically these buttons are for Block instance selection, but some are for selecting other aspects of each' block Tab.
Each AxeForLemur Block Tab contains multiple containers, one for each UI element. These containers more or less contain a symetrical set of attributes, functions and UI controls that allow for support from a common set of functions (else where in the code).
Each UI Element contains:
 bps: Midi / UI control structure
 ctl: the lemur screen object
    x : Primary value for this control
    z : ???
 txt:  A screen description of the parameter. Example ('volume')
 txtval: text object on screen to describe the object parameter value.  Example (0..127)
 Optional:
    cbDlg: a pop up dialog object
       x : value for the selected value of the dialog
       tap(..) : function called to initialize the dialog
When a control changes a 'magic' must be called to send the ctl's value to the bps[..] defined midi destination
cS
Common Scripting Object.
Common Script Object Container
addRefreshParam( b, p) : Adds a parameter to one of:
 (cV.blist[0..249],    cV.plist[0..249]),
 (cV.blist2[250..499], cVplist2[250..499]),
 (cV.blist3[500..749], cV.plist3[500..749]) at position cV.numcontrols,
But doesn't appear to increase cV.numcontrols, called from Project.BuildParamList()
cS.psmxfdr(obj, b, p, -1, 'label')
cScanX
AxeForLemur cShow
Group of scripts to refresh Axe Block Tabs.
cTabSel
cV
Group of global variables.
blist, plist, blist2, plist2, blist3, plist3 250 entry lists of active 'b==block id's and p==parameter ids. each list has a physical limit of 250 elements. These 6 arrays constitute a 2D array of 750 items.
AxeForLemur ...
Pop Up Dialogs.
Lesser Objects (for now)
cbHideRoutes :
cbHideRoutes :
cbProgName : Button on bottom of UI to display dlgProgChange.showme(x)
cbRefresh :
cbTapTempo : Sends a CC 14 value 127 to currently selected Axe target, method cbTapTempo.hdlSxin(..) sets the lemur Tap button different colors
cbZoom: A double tap 'Zoom' function for sliders, dont know how this works.
aUser.cMidi.gen2.ccTapTempo
Global Functions
SendCC2Axe(..)
Development Tools
firstobject XML Editor Application. This is a light weight free XML editor that doesnt get confused by the Lemur script. The Editor has a good dual view ( one view is an XML object tree, the other side is the pure text. Using F7 allows you to sync between the two.
KDIFF3 http://kdiff3.sourceforge.net Since the AxeForLemur is a large monolithic text file, having a good DIFF tool allows you to see the changes LemurEditor and text editors have applied to your file. The LemurEditor does some strange things to this template when it is edited, the preference is to make clean edits with FirstObject Editor, and not use the Lemur Editor directly, as it has a habit of changing many unintended parameters throughout the script.
SVN or Git are good tools to manage progressive changes to the script.