Always consult the official Owners Manuals first
Difference between revisions of "RJM Mastermind MIDI foot controller"
| (434 intermediate revisions by the same user not shown) | |||
| Line 1: | Line 1: | ||
| − | + | __TOC__ | |
| + | =Introduction= | ||
| − | + | This page walks you through setting up the RJM Mastermind GT controller to work with your Axe-Fx II or III. This will also work with the FM3 and FM9 guitar processors. | |
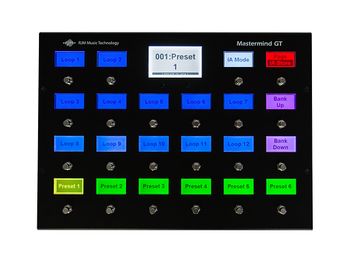
| − | + | The RJM Mastermind GT is an advanced powerful MIDI controller with a graphical display for each switch (a.k.a. ‘scribble strip’ or ‘mini display’). There are models with 10, 16 and 22 buttons. The GT is a viable option if you want something different from Fractal Audio’s controllers. | |
| − | + | * [http://www.rjmmusic.com RJM website] | |
| + | * [http://www.rjmmusic.com/forum RJM forum] | ||
| + | * [http://www.rjmmusic.com/downloads/ GT manual] | ||
| + | * [http://www.rjmmusic.com/wiki/index.php RJM wiki] | ||
| + | * [https://rjmmusic.freshdesk.com RJM support solutions] | ||
| − | The | + | The recommendations on this page are based on the writer’s (Yek) experiences and personal preferences, and information provided by RJM on [http://www.rjmmusic.com/forum RJM's forum]. |
| − | [http://www.rjmmusic.com | + | [http://www.rjmmusic.com/mastering-the-mastermind/ Mastering The Mastermind, videos by RJM] |
| − | = | + | [[image:GT22_Overhead_WEB.jpg|350px|link=]] |
| − | + | =Connecting= | |
| − | + | ==Connect GT to Axe-Fx III== | |
| − | + | See also: [http://www.rjmmusic.com/forum/index.php?threads/using-the-mastermind-gt-with-an-axe-fx-iii.3400/#post-16806 Using the Mastermind GT with an Axe-Fx III (RJM forum)] | |
| − | + | Connect the GT and Axe-Fx III with MIDI cables. Alternatively, the GT/22 lets you use a 6-pin XLR cable, see below. | |
| − | + | Some connection methods require the use of an additional box or cable to allow running a single cable to the GT, as explained below. | |
| − | + | '''3 pin cables:''' | |
| + | :Two 3-pin cables connect the MIDI IN and OUT ports on your Axe-Fx III to the GT’s MIDI OUT and MIDI IN ports, allowing full MIDI communication. | ||
| − | + | '''5 pin and 7-pin cables:''' | |
| + | :Unlike the Axe-Fx II, you can’t use a single 5-pin or 7-pin cable between the GT and the Axe-Fx III for bidirectional MIDI communications, because the Axe-Fx III does not support this. | ||
| − | + | :The workaround is to add RJM’s phantom power box to the connection, which lets you run a single cable to your GT and provide power. This requires the version of this box with '''two''' MIDI IN ports. Connect the power supply to the box. Connect the box with two 3-pin MIDI cables to the Axe-Fx III and with a 7-pin MIDI cable to the GT. The parameter BIDIRECTIONAL MIDI on the GT needs to be turned on. | |
| − | + | :Instead of the phantom power box, [http://btpa.com/AS-MSTRMBIP-XX.html a special bi-directional cable] can be used, made by Best-Tronics. | |
| − | + | '''6-pin XLR:''' | |
| + | :Only the GT with 22 buttons allows the use of a single 6-pin XLR connection at the GT-side. This connection is more rugged than MIDI and also carries power. It requires RJM’s 6-pin XLR phantom power box with '''two''' MIDI IN ports. Connect the power supply to the box. Connect the box with two 3-pin MIDI cables to the Axe-Fx III and with a 6-pin XLR cable to the GT. The parameter BIDIRECTIONAL MIDI on the GT needs to be turned on. | ||
| − | [ | + | :When using the GT/22's XLR port, you can use its separate MIDI OUT port as a secondary MIDI output, for example to echo MIDI PCs to your tablet, computer or MIDI device. And you can still use the MIDI In port, as long as you're using bidirectional MIDI on the XLR MIDI Out to connect to the Axe-Fx. The only limitation is that you can't use the XLR MIDI In port and MIDI In port at the same time. [https://www.rjmmusic.com/forum/index.php?threads/how-to-integrate-another-midi-device.5960/post-31570] |
| − | + | If the GT is connected to the Axe-Fx III and "Polling" is enabled on the GT (see below), the MIDI LED on the III will flash all the time. | |
| − | + | Power: the GT takes either polarity, no polarity flip needed. [https://www.rjmmusic.com/forum/index.php?threads/mm-gt-10-and-power-brick.2764] | |
| − | = | + | ==Connect GT to Axe-Fx II== |
| − | + | You connect the GT and Axe-Fx II with MIDI cables. Alternatively, the GT/22 lets you use a 6-pin XLR cable, see below. | |
| − | The | + | The number of (connected) pins on the MIDI cables determine what’s possible, so choose wisely. |
| − | + | Some connection methods require an additional box to provide phantom power, as explained below. | |
| − | + | '''3 pin cables:''' | |
| − | + | :Two 3-pin cables connect the MIDI IN and OUT ports on your Axe-Fx II to the GT’s MIDI OUT and MIDI IN ports, allowing full MIDI communication. | |
| − | |||
| − | |||
| − | |||
| − | + | '''5 pin cable:''' | |
| + | :A single 5-pin cable can be used instead of two 3-pin cables, to connect the MIDI IN port on your Axe-Fx II to the GT’s MIDI OUT port and allow MIDI communication in both directions. The parameter BIDIRECTIONAL MIDI on the GT needs to be turned on. | ||
| − | + | '''7 pin cable:''' | |
| + | :A 7-pin cable can be used instead of a 5-pin cable, to additionally provide power through the MIDI cable to your GT. This is known as phantom power. This requires RJM’s power supply. You can’t connect the power supply to the phantom power port at the rear of the Axe-Fx, because the GT’s power consumption is too high for the Axe-Fx. RJM’s offers a phantom power box for this purpose (alternatives are available from other sources). The version of the box with a '''single''' MIDI IN port suffices. Connect the power supply to the box. Connect the box with a 5-pin MIDI cable to the Axe-Fx II and with a 7-pin MIDI cable to the GT. The parameter BIDIRECTIONAL MIDI on the GT needs to be turned on. | ||
| − | + | '''6 pin XLR:''' | |
| + | :Only the GT model with 22 buttons allows an alternative connection method: 6-pin XLR. This connection is more rugged than MIDI and also carries power. It requires RJM’s 6-pin XLR phantom power box. The version of the box with a '''single''' MIDI IN port suffices. Connect the power supply to the box. Connect the box with a 5-pin MIDI cable to the Axe-Fx II and with a 6-pin XLR cable to the GT. The parameter BIDIRECTIONAL MIDI on the GT needs to be turned on. | ||
| − | : ' | + | :Tip: when using the GT/22's XLR port, you can use its separate MIDI OUT port as a secondary MIDI output, for example to echo outgoing MIDI PCs to your tablet, computer or MIDI device. |
| − | + | ==Turn MIDI IN or REMOTE IN into an output== | |
| − | + | The MIDI IN and REMOTE IN ports on your Mastermind GT are bidirectional, meaning that they can be used as a secondary MIDI ''output'', provided you have the required special cable. Turn on BIDIRECTIONAL MIDI on the GT and set MIDI PORT to ‘MIDI In’ or ‘Remote In’. The special cable needed for this purpose looks like a standard MIDI cable, but is wired differently. [https://rjmmusic.freshdesk.com/support/solutions/articles/233660-how-do-i-use-the-midi-input-of-my-mastermind-gt-lt-pbc-as-a-second-output Look up the wiring here] | |
| − | + | ==Use the USB B port for MIDI== | |
| − | + | The GT’s USB B port is used to connect the editor but it also supports MIDI-over-USB. This means it can be used to transmit MIDI data to another device (like your computer or tablet) through a USB connection. | |
| − | : | + | For incoming data: set the parameter MIDI RECEIVE CHANNEL on the GT to the correct channel to allow communications with the other device. Incoming commands through the USB port will be merged with incoming MIDI data through the MIDI IN port and processed by the GT. If you want this data to be transmitted through the MIDI OUT port again, turn on the parameter MIDI MERGE. |
| − | + | For outgoing data: add a separate device in Setup > Devices, with MIDI OUTPUT set to ‘USB’. | |
| − | + | =First steps= | |
| − | == | + | ==Checklist== |
| − | + | Verify this: | |
| − | + | * Your GT has the latest firmware installed. | |
| + | * You’re using the most recent version of RJM's software editor. | ||
| + | * The GT connects to the Axe-Fx, allowing incoming and outgoing MIDI traffic. | ||
| + | * The GT connects to the software editor. | ||
| + | * You have a backup of previous GT settings, if applicable. | ||
| − | == | + | ==Starting fresh== |
| − | + | Perform a full factory reset of your GT. This can be done on the hardware only: Setup > System Functions. A factory reset prevents compatibility issues. | |
| − | Make sure to select the correct model | + | In the Devices menu, replace the first entry ‘Effect Gizmo’ with your Fractal Audio Axe-Fx model. Make sure to select the correct model, and don’t select a ‘Slave’ type. Your selection makes sure that the GT sets critical parameters to correct settings. |
| − | = | + | =Important parameters= |
| − | + | ==With the Axe-Fx III== | |
| − | + | ===GT settings=== | |
| − | + | Verify that the GT has the following Setup and MIDI settings: | |
| − | : | + | MIDI CHANNEL = 1 (default)<BR> |
| + | :Required. Change this only if the Axe-Fx uses another MIDI channel. | ||
| − | : | + | BANK TYPE = MSB (default)<BR> |
| + | :Required. This explains that preset banks are addressed by specifying the Most Significant Byte (MSB) method (default). Remember this when configuring a MIDI app on your tablet, like SetListMaker or BandHelper. | ||
| − | : | + | FLAT NUMBERING = on (default)<BR> |
| + | :Recommended. When checked, you can specify preset numbers for this device as a single preset number. When not checked, you select presets using a Program Change and Bank number. Axe-Fx models support flat numbering, so it’s turned on by default for Axe-Fx devices. | ||
| − | + | MAX PC = 127 (default)<BR> | |
| + | :Required. | ||
| − | : | + | NUMBER OF PRESETS = 1024 (default)<BR> |
| + | :Required. This is set automatically for the selected Axe-Fx device. Axe-Fx III Mark I: 512, Axe-Fx III Mark II / Turbo: 1024. Be aware that while the GT can access all 1024 presets on the Mark II, it can only store 768 presets in the GT. | ||
| − | : | + | SEND PCs = on (default)<BR> |
| + | :Required. This makes sure that the GT sends Program Changes to the Axe-Fx to switch presets. | ||
| − | : | + | IGNORE INCOMING CC = off (default)<BR> |
| + | :Required. See above. This must be turned off for the GT to recognize changes in effect blocks on your Axe-Fx III. | ||
| − | : | + | SEND REDUNDANT PCs = on (default)<BR> |
| + | :RJM recommends to turn this on. | ||
| − | : | + | IGNORE INCOMING PC = off (default)<BR> |
| + | :Required. This determines if the GT processes or ignores MIDI Program Changes within incoming Sysex messages. This must be turned off for the GT to recognize preset and scene changes on your Axe-Fx III and in Axe-Edit III. | ||
| − | : | + | SEND CCs ON PRESET CHANGE = on/off<BR> |
| + | :When turned off, the Axe-Fx will only receive CC messages from the GT when an IA button is pressed. When turned on, the Axe-Fx will also receive CC messages from the GT when switching presets. This doesn’t need to be turned on to engage/bypass effect blocks on the Axe-Fx. But it is important for IA buttons which control External Controllers on the Axe-Fx and have SEND ON PRESET CHANGE and UPDATE ON PRESET CHANGE enabled. Example: a button which is assigned to External Controller 4, which is controlling Input Boost in the Amp block in your preset. To make such a button stay in sync when switching presets on the Axe-Fx, turn on this parameter. | ||
| − | : | + | DIRECT SEND PCs/CCs = off (default)<BR> |
| + | :When turned off, the GT will attempt to reduce the number of MIDI messages sent to the Axe-Fx. It eliminates duplicate messages and sorts CC messages into numerical order before sending. When turned on, the GT will send messages in the order requested by each action list, and it will not filter out duplicate messages. Set this to OFF with the Axe-Fx III, unless specific situations require it to be turned on. | ||
| − | : | + | POLL STATE = on (default)<BR> |
| + | :Recommended. This enables the GT’s polling mechanism for the Axe-Fx III. This makes the GT aware of changes and adjustments on the Axe-Fx III hardware and in Axe-Edit III: preset changes, scene changes, effect block bypass states and effect block channels. Note: when polling is enabled, the MIDI LED on the III will flash all the time. | ||
| − | : | + | SYNC NAMES = off (default)<BR> |
| + | :Do not turn this on with Fractal Audio devices. [https://www.rjmmusic.com/forum/index.php?threads/sync-update-fm3-preset-names-apparently-not-working-for-me.5332/post-27943] | ||
| − | : | + | MIDI RECEIVE CHANNEL = none (default)<BR> |
| + | :This sets the MIDI channel for incoming MIDI messages. A value is not required to enable bidirectional MIDI communication. It defaults to ‘none’, which means that your GT will NOT respond to incoming Bank or Program Change messages through the MIDI IN or USB B ports. Best to NOT set it to the Axe-Fx's MIDI channel, because that can cause problems. Change the value only to enable the GT to process incoming MIDI preset and bank messages from another device (not an Axe-Fx), separately from bidirectional MIDI, but beware of creating a MIDI loop. | ||
| − | : | + | MIDI MERGE = off (default)<BR> |
| + | :Required. This needs to be off when using two cables, otherwise it's sending the Axe-Fx's own messages back to itself. | ||
| − | + | MIDI BIDIRECTIONAL = on <BR> | |
| + | :Required. | ||
| − | + | ===Axe-Fx III settings=== | |
| − | + | Verify that the Axe-Fx III has the following MIDI settings: | |
| − | + | MIDI CHANNEL = 1 (default)<BR> | |
| + | :Required. Only change this if your Axe-Fx III uses another MIDI channel than 1. | ||
| − | : | + | SCENE REVERT = on/off |
| + | :Set as desired. By default the Axe-Fx III remembers which block states are manually bypassed/engaged after having selected a scene. When you select another scene and return to the previous scene (without changing presets), the device will recall those effect block states. If you prefer always recalling a scene in its initial stored state (keeping blocks to their saved states), turn on this parameter. Note that this parameter applies only to scene switching via MIDI or FC controllers; it is ignored when switching scenes on the hardware or in the editor. Also, it is not compatible with PC Mapping. | ||
| − | : | + | EFFECT BYPASS MODE = VALUE |
| + | :This setting instructs the Axe-Fx III to engage/bypass its effect blocks through MIDI CC values, and not by toggling. | ||
| − | : | + | SEND REALTIME SYSEX = on (not default)<BR> |
| + | :Required. See above. This ensures that 3rd party MIDI controllers such as the GT receive some of the MIDI information they need to support the Axe-Fx III. This information is specified in: [http://www.fractalaudio.com/downloads/misc/Axe-Fx%20III%20MIDI%20for%203rd%20Party%20Devices.pdf Axe-Fx III MIDI for Third-Party Devices] | ||
| − | : | + | PROG CHANGE = on (default)<BR> |
| + | :Required. This makes sure that your Axe-Fx III processes incoming MIDI Program Changes from the GT. | ||
| − | : | + | IGNORE REDUNDANT PC = off (default)<BR> |
| + | :If set to ON, this parameter tells the Axe-Fx III to ignore an incoming MIDI Program Change if that preset is already active. This prevents unnecessary reloading and the audio gap that comes with that. My preference is: off. | ||
| − | = | + | SEND MIDI PC = off<BR> |
| + | :When turned on, the Axe-Fx III sends a MIDI program Change through its MIDI OUT port when switching presets, which may be useful to control other MIDI devices. This should not need to be turned on for the GT to recognize presets changes. | ||
| − | : | + | PC MAPPING = off |
| + | :Required. This turns off the feature that lets the Axe-Fx III map incoming MIDI Program Changes to scenes within presets. This feature is not compatible with the way the GT controls the Axe-Fx III. | ||
| − | + | ==With the Axe-Fx II== | |
| − | + | ===GT settings=== | |
| − | : | + | Verify that the GT has the following Setup and MIDI settings: |
| − | : | + | SEND PCs = on<BR> |
| + | :Required. This makes sure that the GT sends Program Changes to the Axe-Fx to switch presets. | ||
| − | : | + | MIDI CHANNEL = 1<BR> |
| + | :Required. Change this only if the Axe-Fx uses another MIDI channel. | ||
| − | = | + | SEND REDUNDANT PCs = on/off<BR> |
| + | :When turned off, the GT won’t transmit a MIDI Program Change if it’s the same one as the last one that was sent, which prevents unnecessary preset changes. But since the Axe-Fx has its own method of dealing with incoming redundant Program Changes (see below), it doesn't really matter. | ||
| − | + | IGNORE INCOMING PC = on<BR> | |
| + | :Recommended. This determines if the GT processes or ignores MIDI Program Changes within incoming Sysex messages. For the Axe-Fx II, this doesn’t need to be turned on to make the GT recognize preset changes on the hardware or in Axe-Edit. | ||
| − | : | + | IGNORE INCOMING CC = off<BR> |
| + | :Required. This determines if the GT processes or ignores MIDI Control Changes within incoming Sysex messages. This must be turned on for the GT to recognize changes in effect blocks on the Axe-Fx II or in Axe-Edit. | ||
| − | : | + | DIRECT SEND PCs/CCs = off<BR> |
| + | :Recommended. When turned off, the GT will attempt to reduce the number of MIDI messages sent to the Axe-Fx. It eliminates duplicate messages and sorts CC messages into numerical order before sending. When turned on, the GT will send messages in the order requested by each action list, and it will not filter out duplicate messages. | ||
| − | : | + | SEND CCs ON PRESET CHANGE = on/off<BR> |
| + | :When turned off, the Axe-Fx will only receive CC messages from the GT when an IA button is pressed. When turned on, the Axe-Fx will also receive CC messages from the GT when switching presets. This doesn’t need to be turned on to engage/bypass effect blocks on the Axe-Fx. But it is important for IA buttons which control External Controllers on the Axe-Fx and have SEND ON PRESET CHANGE and UPDATE ON PRESET CHANGE enabled. Example: a button which is assigned to External Controller 4, which is controlling Input Boost in the Amp block in your preset. To make such a button stay in sync when switching presets on the Axe-Fx, turn on this parameter. | ||
| − | : ' | + | MIDI RECEIVE CHANNEL = none<BR> |
| + | :Recommended. This sets the MIDI channel for incoming MIDI messages. This parameter is not required (it’s ignored) to enable bidirectional MIDI communication. It defaults to ‘none’, which means that your GT will NOT respond to incoming Bank or Program Change messages through the MIDI IN or USB B ports. Do NOT set it to the Axe-Fx's MIDIO channel, because that will cause problems. Change the value only to enable the GT to process incoming MIDI preset and bank messages from another device (not an Axe-Fx), separately from bidirectional MIDI, but beware of creating a MIDI loop. | ||
| − | : | + | MIDI MERGE = off<BR> |
| + | :Recommended. This needs to be off when using two cables, otherwise it's sending the Axe-Fx's own messages back to itself. | ||
| − | = | + | MIDI BIDIRECTIONAL = <BR> |
| + | :Should be turned on, when there's a single cable running to/from the GT'S MIDI output. | ||
| − | + | ===Axe-Fx II settings=== | |
| − | + | Verify that your Axe-Fx II has the following MIDI settings: | |
| − | |||
| − | |||
| − | : | ||
| − | |||
| − | : | + | MIDI CHANNEL = 1<BR> |
| + | :Required. Only change this if your Axe-Fx uses another MIDI channel than 1. | ||
| − | : | + | PROG CHANGE = on<BR> |
| + | :Required. This makes sure that your Axe-Fx processes incoming MIDI Program Changes from the GT. | ||
| − | : | + | SEND REALTIME SYSEX = all<BR> |
| + | :Required. This makes sure that the GT receives necessary tempo and tuner information from your Axe-Fx. | ||
| − | : | + | IGNORE REDUNDANT PC = on<BR> |
| + | :Recommended. When turned on, your Axe-Fx will not reload a preset if the incoming Program Change is the same as the currently selected preset. This avoids the audio gap that comes with preset changes. The default setting on the Axe-Fx II: on. | ||
| − | : '' | + | SCENE REVERT = on/off<BR> |
| + | :Set as desired. By default the Axe-Fx remembers which block states are manually bypassed/engaged after having selected a scene. When you select another scene and return to the previous scene (without changing presets), the device will recall those effect block states. If you prefer always recalling a scene in its initial stored state (keeping blocks to their saved states), turn on the parameter SCENE REVERT in I/O > MIDI. Note that SCENE REVERT applies only to scene switching via MIDI or FC controllers; it doesn't kick in when switching scenes on the hardware. Furthermore, SCENE REVERT doesn't work with PC Mapping. | ||
| − | : | + | PC MAPPING = off |
| + | :Required. This turns off the feature that lets the Axe-Fx map incoming MIDI Program Changes to scenes within presets. This feature is not compatible with the way the GT controls the Axe-Fx. | ||
| − | + | =Other GT system parameters= | |
| − | + | Only relevant parameters are discussed below. | |
| − | : | + | BOLD FONTS = on<BR> |
| + | :Turn this on in the Display menu for better readable text on the displays. | ||
| − | : | + | SHOW PAGE NAMES = off<BR> |
| + | :Turn this on in the Display menu to make your GT show the name of the current button page in the main display when switching pages. When turned off, the GT shows page numbers. To show nothing: make sure all page names are cleared and turn this on. | ||
| − | : | + | REVERSE MENUS<BR> |
| + | :Turn this on in the Display menu to instruct the GT to start ordered menus (like Preset Menu and Song Menu) at bottom-left instead of at the top. | ||
| − | : | + | SCENE NAMES<BR> |
| + | :Turn this on to see the names of scenes on the main display. Turn it off if the display of scene names on buttons suffices. | ||
| − | : | + | SHOW ONLY SONG NAME<BR> |
| + | :Turn this on in the Display menu to show only the name of the current song in the main display, without the name of the preset(s) being used by the current song. | ||
| − | : | + | START UP ON LAST PRESET<BR> |
| + | :This determines if your GT will recall the last loaded preset after powering on. | ||
| − | : | + | SHOW TEMPO<BR> |
| + | :When turned on, the tempo is displayed briefly on the main display every time the tempo changes by more than 2 BPM. When turned off, the tempo is never displayed on the main screen, only on Tap Tempo buttons you’ve defined. | ||
| − | : | + | PAGE PREVIEW<BR> |
| + | :When turned off, the visible button page does not change until you select a new preset. When turned on, the visible button page changes as you move up and down through the banks. The button page associated with the first preset in a bank is the one that will be displayed for that bank. | ||
| − | + | SYSEX MESSAGES<BR> | |
| + | :You can define custom Sysex messages here and then assign these to IA buttons. | ||
| − | + | MACROS<BR> | |
| + | :You can create custom macros (set of commands) for special tasks here. You can make a macro execute automatically at startup. | ||
| − | + | REMOTE MODE<BR> | |
| + | :This is used only to give your GT control over another GT, or take control. | ||
| − | + | CURRENT SET LIST<BR> | |
| + | :Choose a setlist or All Songs, or set it to NONE to keep the GT in Preset mode on startup. | ||
| − | + | =Import preset names= | |
| − | + | The GT can import the names of your Axe-Fx II / III presets with the GET PRESET NAMES function (Setup > Devices). You’ll want to do this periodically. See Importing Scene Names below for more information. | |
| − | + | Tip: the Axe-Fx III allows this function to be assigned to a button for quick access. | |
| − | + | =Import scene names (Axe-Fx III)= | |
| − | The | + | The Axe-Fx III allows individual scenes of presets to be named. The GT provides two ways to import and display these scene names, both with the GET PRESET NAMES option. |
| − | + | Method 1: GET PRESET NAMES + GET SCENES | |
| + | :When GET SCENES is selected, and not CREATE SONGS, the GT will import and store all scene names, and the names will be displayed on scene buttons. This probably is the most useful method for most users. | ||
| − | + | Method 2: GET PRESET NAMES + CREATE SONGS | |
| + | :When CREATE SONGS is selected, and not GET SCENES, the GT will treat an Axe-Fx preset as a song and its scenes as presets. The GT will run in Song Mode and buttons with scene names will be displayed on the bottom row. Note: this method is limited to the first 127 presets on your Axe-Fx III. | ||
| − | + | =Assign buttons= | |
| − | + | ==Button Pages== | |
| − | |||
| − | |||
| − | + | Your GT has 10, 16 or 22 physical buttons, and even more when using external buttons. Together these make up a single Page. | |
| − | : | + | Your GT can switch between multiple Pages, allowing access to a load of functionality. |
| + | Example: Page 1 provides the buttons you use most, Page 2 provides buttons you use less often, Page 3 provides Looper controls, etc. | ||
| − | : '' | + | These Pages are global, meaning that they are the same for every preset. However, each preset can also have a dedicated Page with preset-specific buttons: the ''Local'' page. This is especially handy with the Axe-Fx II (which does not allow names scenes), because it lets you create song-specific scene buttons with names. |
| − | + | For each preset, you can specify which page should be the default page. | |
| − | + | Turn on AUTO PAGE SELECT to immediately recall the default Page for a preset when switching presets. When turned off, the current button page will not change unless you press a Page button or execute a Page action. | |
| − | + | If you want a button appear on each Page on the same spot, mark the button as GLOBAL. | |
| − | + | You can program a button to scroll through Pages or to display a PAGE MENU. You can also program a button to jump to a specific Page: IA > Actions > System. | |
| − | + | Use the MAX BUTTON PAGE parameter to limit the number of Pages that you can access, to prevent unnecessary scrolling. | |
| − | + | ==How to assign buttons== | |
| − | : | + | Important: when assigning Axe-Fx II or III functions to buttons, always use the available commands on the hardware and in the GT editor to assign the pre-configured Axe-Fx buttons! Do not configure a button manually. This will save you a lot of headaches. |
| − | + | On the hardware, use Setup > Devices > Assign Buttons. In the editor, use Assign CC in the button context menu. | |
| − | + | ==Normal and Hold button modes== | |
| − | + | Beside the regular button mode (Normal), buttons also offer a secondary function when pressed-and-held for a short time. | |
| − | + | As explained below (see Effect buttons), when the GT is controlling an Axe-Fx III, the Hold function of effect buttons is reserved for selecting channels. | |
| − | + | The Setup menu provides timing parameters to finetune the response of the Hold and Repeat functionality. Try this: | |
| + | * Hold mSec: 450 | ||
| + | * 1st Repeat mSec: 1500 | ||
| + | * Repeat mSec: 300 | ||
| − | : | + | Additional options for the Hold function: |
| − | : | + | ACTIVE IN IA MODE ONLY<BR> |
| + | :This option limits the Hold function to work only in IA Mode. It will also only be displayed when IA Mode is active. | ||
| − | : ' | + | SHOW NAME<BR> |
| + | :This allows to you turn on/off the display of the Hold function's name on the button display. | ||
| − | + | ==Button names== | |
| − | + | The following characters have a special purpose in button names: | |
| − | + | :\ (backslash): forces a line break in the text | |
| − | + | :^ (carat): forces a line break and displays the 2nd line inverted | |
| − | + | :| (vertical line): hides subsequent characters | |
| − | : | + | Tip: use the vertical line in your preset titles on the Axe-Fx to force the GT to separate the main title (displayed on the GT) from auxiliary information (not displayed). |
| − | + | ==How the GT handles MIDI CCs with an Axe-Fx III== | |
| − | : | + | Based on information from RJM: |
| − | |||
| − | |||
| − | + | The Axe-Fx III is being controlled through System Exclusive (Sysex) MIDI messages sent from the GT. However, the GT is really designed to work with MIDI CCs - the built-in device database only uses CC numbers, for example. Also, the Axe-Fx III ships without any CC numbers predefined. Using CCs would require you to manually set all of them in the Axe-Fx III. The way the GT gets around this is to use ‘fake’ CC numbers, which are translated into Sysex messages under the hood. This allows you to continue using the typical features in the GT without so much configuration needed on the Axe-Fx III. The CC settings for all effect blocks and everything else on the Axe-Fx are ignored. | |
| − | : | + | About CCs: in addition to value 0 for bypass and value 127 for active, there are values that select the effect channel. Here’s the complete list: |
| − | :: | + | :Value 0: Bypass effect block<BR> |
| + | :Value 1: Select channel A<BR> | ||
| + | :Value 2: Select channel B<BR> | ||
| + | :Value 3: Select channel C<BR> | ||
| + | :Value 4: Select channel D<BR> | ||
| + | :Value 127: Enable effect block | ||
| − | + | This method allows using one CC number that can select effect state and channel. | |
| + | Note: currently the GT does not support switching to channels E and F. | ||
| − | + | The External Controllers are not part of the Fake CC interface. Those have to be done the old way by entering a CC number in the Axe-Fx III’s MIDI/Remote menu. The number must be lower than 27. Start with External 1 as CC #11, and go up sequentially from there. | |
| − | + | Volume Increment/Decrement and Scene Decrement/Increment are not part of the Fake CC interface either. Those also have to be done the old way by entering a CC number in the Axe-Fx III’s MIDI/Remote menu. The number must be lower than 27. Configure the buttons on the GT as momentary buttons. [http://www.rjmmusic.com/forum/index.php?threads/axe-fx-iii-output-1-volume-increment-decrement.3663 More ....] | |
| − | : | + | The GT processes CCs below #34 as normal CCs, anything above that the GT will try to convert to a Sysex message. |
| + | Note: if you’re using other devices to control the Axe-Fx III, through the GT’s MIDI connection (including USB), then you need to enter the required CC data in the III’s MIDI/Remote menu. | ||
| − | + | ==Types of buttons== | |
| − | : | + | OFF<BR> |
| + | :Disables the button. | ||
| − | : | + | BANK UP/DOWN<BR> |
| + | :Selects the next or previous bank of presets. | ||
| − | : | + | GET PRESET NAMES<BR> |
| + | :See above. | ||
| − | : | + | IA<BR> |
| + | :General purpose (instant access) button that can execute a list of button actions, see below. | ||
| − | : | + | IA MODE |
| + | :Switches to IA Mode. | ||
| − | :: | + | IA STORE<BR> |
| + | :This stores the current state of the IA button to the current preset. This works only with buttons which have UPDATE ON PRESET CHANGE enabled. BUT: when working with Axe-Fx presets and scenes, you do NOT want to set and store button states on the GT with IA Store. Just program your presets and scenes on the Axe-Fx itself and don't use this function at all. | ||
| − | : | + | LABEL<BR> |
| + | :Only displays text. | ||
| − | : | + | PAGE/IA STORE<BR> |
| + | :This selects the next button page, or when held, stores the current IA state to the current preset (see above). | ||
| − | : | + | PAGE UP/DOWN<BR> |
| + | :Selects the next or previous button page. | ||
| − | : | + | PAGE MENU<BR> |
| + | :Displays alle pages. | ||
| − | : | + | PRESET -/+<BR> |
| + | :Moves down/up one preset. | ||
| − | : | + | PRESET<BR> |
| + | :Selects a preset. | ||
| − | : | + | PRESET MENU |
| + | :Displays all presets. | ||
| − | : | + | PRESET NUMBER |
| + | :Lets you select a preset by entering its number. | ||
| − | : | + | PREVIOUS PRESET |
| + | :Switches back to the previous preset. | ||
| − | : | + | SCENE MENU |
| + | :Displays all scenes of the preset. | ||
| − | : | + | SETLIST MENU<BR> |
| + | :Pops up a menu of all setlists. | ||
| − | : | + | SETUP MODE<BR> |
| + | :Activates Setup Mode. | ||
| − | + | SONG MENU<BR> | |
| + | :Pops up a menu of all songs. | ||
| − | Preset buttons | + | ==Preset buttons== |
| − | + | Preset buttons allow you to switch to a specific GT preset. You can assign as many as you want on a page. | |
| − | + | Preset buttons are normally linked directly to presets in the Axe-Fx. | |
| − | |||
| − | |||
| − | + | The number of assigned preset buttons determine the size of the Bank. Bank Up and Down buttons let you scroll through Banks. The parameters PAGE PREVIEW and INSTANT BANK SWITCHING let you further customize Bank Up/Down behavior. | |
| − | + | When INSTANT BANK is turned on, the GT will automatically and immediately switch presets when you press the Bank Up or Bank Down buttons. The GT will switch banks and load the preset that appears on the currently selected preset button. Example: if you are on preset 3, and there are 6 presets per bank, pressing Bank Up will automatically switch to preset 9. Turn off INSTANT BANK to make the GT flash the preset buttons and ask you to select a preset in the new bank, after pressing Bank Up/Down. | |
| − | + | Preset buttons display the names from the corresponding Axe-Fx presets, when GETTING PRESET NAMES has been executed, see above. | |
| − | + | Caution: when shuffling presets around on the Axe-Fx, preset and scene names can get out of sync; launch GET PRESET NAMES to import these again. Using Local Pages requires extra caution when shuffling presets around on the Axe-Fx. | |
| − | + | In the properties of a Preset button SEND ON PRESET CHANGE and UPDATE ON PRESET CHANGE should be turned on. | |
| − | + | You can press a Preset button a 2nd time and have it perform a secondary function, specified with the PRESET BUTTON 2nd PRESS parameter: | |
| − | + | :SAME: no action<BR> | |
| + | :PREVIOUS: recalls the previously selected preset<BR> | ||
| + | :GLOBAL: recalls the Global preset<BR> | ||
| + | :RELOAD: recalls the current preset; note that this doesn’t work when IGNORE REDUNDANT PC is turned on on the Axe-Fx<BR> | ||
| + | :IA: executes an IA action<BR> | ||
| + | :ALTERNATE: lets you recall another preset | ||
| − | + | A Preset button can be turned into an IA button by enabling IA Mode. This is similar to Reveal on the MFC-101 controller from Fractal Audio. IA Mode is enabled with a button. | |
| − | + | You can hold a Preset button to execute its Hold function, if programmed. The parameter SHOW NAME for the Hold function tells the GT to show or hide the IA function on the preset button's display. | |
| − | The | + | The functions PRESET BUTTON 2nd PRESS, IA Mode and Hold can make Preset buttons do double-duty, for example to select scenes, to increment/decrement songs or presets by 1, or to display menus. |
| − | + | And there are other ways to switch presets on your GT: | |
| − | + | :PRESET MENU button: displays a list of all GT presets<BR> | |
| + | :PRESET NUMBER button: lets you enter the number of a preset to quickly jump to it<BR> | ||
| + | :PREVIOUS PRESET button: jumps back to the previously selected preset<BR> | ||
| + | :PRESET - or PRESET + button: decrements or increments the current preset with 1 step | ||
| − | IA | + | Additional options are available through IA > IA Actions > System. |
| − | + | If the preset numbers on your Axe-Fx and GT differ by one, adjust the parameters DISPLAY OFFSET on the Axe-Fx and 1st PRESET is NUMBER 0 on the GT, to match the numbering. | |
| − | + | For each preset on the GT you can specify: | |
| + | * which button page should be loaded upon preset recall (any of the 16 general pages, or the Local page)<BR> | ||
| + | * tempo<BR> | ||
| + | * specific behavior of pedals<BR> | ||
| + | * special behavior of switches<BR> | ||
| + | * specific actions | ||
| − | + | The ‘Global Preset’ is a regular GT preset which can be recalled at any time by pressing a Preset button a second time (if configured as such). | |
| − | == | + | ==Scene buttons== |
| − | + | Scene buttons allow you to switch to a specific scene within an Axe-Fx preset. An Axe-Fx preset always has 8 scenes. | |
| − | + | The button action involves CC #34, with value 0 for scene 1 and going up from there. Note that there’s NO need to set the MIDI CC for Scene Select in the Axe-Fx III’s MIDI/Remote menu. | |
| − | + | Scene buttons display the names of the scenes of your Axe-Fx III presets, if GETTING PRESET NAMES with SCENE NAMES has been executed, see above. | |
| − | + | Important: Scene buttons should NOT be 'grouped', and SEND ON PRESET CHANGE and UPDATE ON PRESET CHANGE should NOT be turned on. | |
| − | + | When assigning Scene Increment and Decrement to buttons, using the Axe-Fx III, make sure to enter CCs for these functions in the MIDI/Remote menu of the III. As mentioned earlier, the GT uses actual CCs for Scene Decrement/Increment, not ‘fake’ CCs. The numbers should be lower than '27'. Also, turn on MOMENTARY for these buttons. | |
| − | |||
| − | |||
| − | == | + | ==Effect buttons== |
| − | + | These IA buttons engage or bypass effect blocks on your Axe-Fx. | |
| − | |||
| − | + | Do NOT turn on SEND ON PRESET CHANGE and UPDATE ON PRESET CHAÑGE for these buttons. | |
| − | + | With the Axe-Fx II, you can assign other functions to the Hold mode of these buttons. For example, to switch the effect between X and Y. | |
| − | + | Tip for the Axe-Fx II: to switch between two Amp blocks and switch their X/Y states too, like a traditional amplifier foot switch, configure two buttons as follows: | |
| − | + | * Amp 1: Normal: CC 37, 0-127, assign to a group. Hold: CC 100, 127-0 | |
| + | * Amp 2: Normal: CC 38, 0-127, assign to the same group. Hold: CC 101, 127-0. | ||
| − | + | With the Axe-Fx III, the Hold mode of these buttons is reserved for selecting channels on the effect block. | |
| − | |||
| − | == | + | ==Tempo button== |
| − | + | A Tempo button shows the preset tempo, making use of the Tempo CC. | |
| − | + | If UPDATE ON PRESET CHANGE is turned on, the Tempo button flashes in time with the internal tempo clock. If turned off, the button will only flash when instructed by the connected device. | |
| − | + | ==Tuner button== | |
| − | + | You can assign the GT’s Tuner function to the Normal or Hold Mode of a button. | |
| − | + | A Tuner button contains two button actions: one enables the special Tuner display mode, and the other sets the appropriate CC. | |
| − | + | Turn on UPDATE ON PRESET CHANGE in the Tuner button’s properties to make the button aware of preset changes. | |
| − | + | Tip: people often assign Tuner to the Hold function of a Tempo button. | |
| − | + | ==Adding external buttons== | |
| − | + | You can extend the capabilities of the GT by adding external buttons. | |
| − | + | RJM sells dual-button external switches, which behave just like the onboard buttons, with LEDS instead of mini displays. The GT always keeps the LEDs synced and powers them using a TRS cable. | |
| − | + | Tip: to program an external switch on the GT’s hardware, just press the external button while in the Edit Buttons menu. | |
| − | + | ==More button parameters== | |
| − | + | COLOR<BR> | |
| + | :Choose your button colors wisely. Names of bypassed effects and non-current presets should still be visible, while engaged buttons should jump out. Example: | ||
| − | : | + | :Presets: off = dark red, on = green |
| − | :: | + | :Scenes: off = dark purple, on = purple |
| − | + | :Effects: off = dark aqua, on = green | |
| − | :: | ||
| − | |||
| − | + | BUTTON GROUPS<BR> | |
| + | :Button groups let you set up buttons so that only one button in a group is allowed to be turned on at a time. Activating one button will turn off the other buttons in this group. Note: Scene buttons should NOT be grouped. | ||
| − | + | :General groups setting can be set in Setup and allow fine-tuning of the grouped buttons: | |
| − | The | + | * ALLOW ALL BUTTONS OFF: when turned on, it is possible to turn off ALL buttons in the group. Pressing a button that’s already selected will turn if off. When turned off, one button in the group will always be turned on. Pressing a button that’s already selected will have no effect. The preferred value depends on the button function. |
| − | * | + | * SEND OFF MESSAGES: when turned on, any button in the group will send its message(s) when turned on and when it’s turned off. When turned off, a button will send its message(s) only when it is turned on, and never when it is turned off. |
| − | + | IA LINK<BR> | |
| + | :When duplicating functionality in multiple buttons (example: Scene buttons on multiple pages), this parameter makes sure that the states of those buttons are synchronized. This mechanism depends on the first IA action. | ||
| − | + | SEND ON PRESET CHANGE<BR> | |
| + | :When turned on, this button will send its messages every time the preset changes, and when the button is pressed. When turned off, this button will only send its messages when it is pressed. Important: for regular operation keep this turned off! Use this parameter only with buttons which are assigned to External Controllers on the Axe-Fx, as explained above. | ||
| − | + | UPDATE ON PRESET CHANGE<BR> | |
| + | :This controls two things: whether the state of a button in a preset is stored by the GT and recalled when loading that preset, and whether the Axe-Fx or the GT is in control of setting the button’s state. When turned off, this button only changes its state when it receives a MIDI message from the device it is associated with, or when the button is pressed. Also, it gives the Axe-Fx control over the button’s state, allowing you to see changes of the effect bypass state and channel. When turned on, the button can also change state when a new preset is selected, and it allows the GT to determine the button’s state, overriding the Axe-Fx. Important: for regular operation keep this turned off! Use this parameter only with buttons which are assigned to External Controllers on the Axe-Fx, to keep things synchronized, or to fix an issue with the button state. This because the Axe-Fx doesn’t manage External Controllers, leaving it to the external device to inform the Axe-Fx about status updates. | ||
| − | + | MOMENTARY<BR> | |
| + | :When turned on, the button engages when pressed and disengages when released. When turned off, the button operates as a latching switch. Use this for functionality such as Volume Increment/Decrement and Scene Increment/Decrement. | ||
| − | + | IA CYCLE<BR> | |
| + | :This lets the button send messages in steps, defined in the button’s properties, like this: | ||
| − | + | :Step 1<BR> | |
| + | :CC ...<BR> | ||
| + | :step 2<BR> | ||
| + | :CC ...<BR> | ||
| + | :step 3<BR> | ||
| + | :CC ...<BR> | ||
| + | :etc. | ||
| − | * | + | BUTTON ACTIONS<BR> |
| + | :This menu provides provides the following additional actions: | ||
| + | * CC TOGGLE: enter CC data to toggle an action | ||
| + | * CC MOMENTARY: enter CC data to momentarily set an action | ||
| + | * PC: enter Program Change data | ||
| + | * NOTE: enter MIDI Notes | ||
| + | * SYSEX: enter a Sysex command, defined in the Sysex menu | ||
| + | * SYSTEM: choose from additional actions. | ||
| − | == | + | ==Looper Undo== |
| − | + | Programming a Looper Undo action requires a trick. | |
| − | + | UNDO is not an on/off (latching) function. So you will want to make this a Momentary button. | |
| − | + | When you press UNDO on the Axe-Fx III front panel, it will exit the Record state, and delete the last recorded layer. | |
| + | But when assigning a button on the GT to UNDO, it does NOT delete the last layer. | ||
| + | Changing the button to OnMsgOnly won't solve this. | ||
| − | + | Solution: change its OFF action from "0" to "NONE". | |
| − | + | Now the GT button will act the same as UNDO on the front panel. | |
| − | = | + | =Expression pedals= |
| − | + | An expression pedal lets you change sound in real time. The common way to configure this is to control a parameter on the Axe-Fx with an External Controller, and then assign the pedal on the GT to that External Controller’s CC. | |
| − | + | If you read the section above about how the GT handles MIDI CCs with the Axe-Fx III, you know that you need to enter CCs for the External Controllers in the MIDI/Remote menu of the Axe-Fx III. | |
| − | . | + | An expression pedal connects to an expression pedal port on the GT with a TRS cable. Calibration of the pedal is required for best results. |
| + | RJM sells an expression pedal, made by Mission Engineering, with special support for the GT. It has a separate switch that behaves just like an onboard switch, with a LED which is powered by the GT. | ||
| + | Based on information from RJM: | ||
| + | * The Mastermind GT can use a variety of expression pedals. Any resistance value from 10k to 250k can be used. | ||
| + | * In general, there are two ways the polarity of an expression pedal is wired: like a Boss/Roland pedal or like a Korg/Rocktron pedal. RJM supports the Korg method. Boss/Roland-style wired pedals are easily made compatible by swapping the tip and ring on one side of the TRS cable. Visit RJM’s forum and support pages for more information. | ||
| + | * Line 6 pedals are incompatible because they use TS connectors instead of TRS. | ||
| + | * While a volume pedal can operate as an expression pedal with an insert cable, their taper may not offer smooth control. The GT’s firmware offers preliminary support for log taper correction). | ||
| + | The GT lets you change an expression pedal’s assignment by pressing a button. This can instantly turn a Wah into a Whammy for example without having to tweak the corresponding Axe-Fx preset extensively. | ||
| + | See also: [http://www.rjmmusic.com/forum/index.php?threads/using-the-mastermind-gt-with-an-axe-fx-iii.3400/#post-16807 Expression Pedal Setup (RJM forum)] | ||
| + | =Songs and setlists= | ||
| − | + | Your GT features a Songs and Setlists Mode. Songs can consist of one or more GT presets, and can be further organized into setlists. | |
| − | + | A SONG MENU button displays all songs. SONG UP/DOWN functionality is available through IA > Actions > System. | |
| − | + | Turn on SONG NAME ONLY in the Display menu to show only the name of the current song in the main display, and not the name of the preset(s) being used by the current song. | |
| − | + | Tip: the song menu and setlists allow changing the order of songs/presets on your GT without breaking the link between presets on the GT and on the Axe-Fx. | |
| − | = | + | =Powering other pedals= |
| − | + | The GT provides two 9VDC ports. Each can supply DC power to outboard gear, like a tuner pedal or a low-power effects pedal. The ports are not isolated so be careful of creating hum. The maximum capacity of both ports together is 100mA. In 2022 RJM started putting in 200mA converters. | |
| − | |||
| − | = | + | =Videos= |
| − | [ | + | [[video:RJM-MIDI]] |
| + | [[video:Yek-RJM1]] | ||
| + | [[video:Yek-RJM2]] | ||
[[category:Axe-Fx2]] | [[category:Axe-Fx2]] | ||
[[category:Axe-Fx3]] | [[category:Axe-Fx3]] | ||
[[category:Remote]] | [[category:Remote]] | ||
| + | [[category:All]] | ||
Latest revision as of 00:49, 3 January 2024
Contents
- 1 Introduction
- 2 Connecting
- 3 First steps
- 4 Important parameters
- 5 Other GT system parameters
- 6 Import preset names
- 7 Import scene names (Axe-Fx III)
- 8 Assign buttons
- 8.1 Button Pages
- 8.2 How to assign buttons
- 8.3 Normal and Hold button modes
- 8.4 Button names
- 8.5 How the GT handles MIDI CCs with an Axe-Fx III
- 8.6 Types of buttons
- 8.7 Preset buttons
- 8.8 Scene buttons
- 8.9 Effect buttons
- 8.10 Tempo button
- 8.11 Tuner button
- 8.12 Adding external buttons
- 8.13 More button parameters
- 8.14 Looper Undo
- 9 Expression pedals
- 10 Songs and setlists
- 11 Powering other pedals
- 12 Videos
Introduction
This page walks you through setting up the RJM Mastermind GT controller to work with your Axe-Fx II or III. This will also work with the FM3 and FM9 guitar processors.
The RJM Mastermind GT is an advanced powerful MIDI controller with a graphical display for each switch (a.k.a. ‘scribble strip’ or ‘mini display’). There are models with 10, 16 and 22 buttons. The GT is a viable option if you want something different from Fractal Audio’s controllers.
The recommendations on this page are based on the writer’s (Yek) experiences and personal preferences, and information provided by RJM on RJM's forum.
Mastering The Mastermind, videos by RJM
Connecting
Connect GT to Axe-Fx III
See also: Using the Mastermind GT with an Axe-Fx III (RJM forum)
Connect the GT and Axe-Fx III with MIDI cables. Alternatively, the GT/22 lets you use a 6-pin XLR cable, see below.
Some connection methods require the use of an additional box or cable to allow running a single cable to the GT, as explained below.
3 pin cables:
- Two 3-pin cables connect the MIDI IN and OUT ports on your Axe-Fx III to the GT’s MIDI OUT and MIDI IN ports, allowing full MIDI communication.
5 pin and 7-pin cables:
- Unlike the Axe-Fx II, you can’t use a single 5-pin or 7-pin cable between the GT and the Axe-Fx III for bidirectional MIDI communications, because the Axe-Fx III does not support this.
- The workaround is to add RJM’s phantom power box to the connection, which lets you run a single cable to your GT and provide power. This requires the version of this box with two MIDI IN ports. Connect the power supply to the box. Connect the box with two 3-pin MIDI cables to the Axe-Fx III and with a 7-pin MIDI cable to the GT. The parameter BIDIRECTIONAL MIDI on the GT needs to be turned on.
- Instead of the phantom power box, a special bi-directional cable can be used, made by Best-Tronics.
6-pin XLR:
- Only the GT with 22 buttons allows the use of a single 6-pin XLR connection at the GT-side. This connection is more rugged than MIDI and also carries power. It requires RJM’s 6-pin XLR phantom power box with two MIDI IN ports. Connect the power supply to the box. Connect the box with two 3-pin MIDI cables to the Axe-Fx III and with a 6-pin XLR cable to the GT. The parameter BIDIRECTIONAL MIDI on the GT needs to be turned on.
- When using the GT/22's XLR port, you can use its separate MIDI OUT port as a secondary MIDI output, for example to echo MIDI PCs to your tablet, computer or MIDI device. And you can still use the MIDI In port, as long as you're using bidirectional MIDI on the XLR MIDI Out to connect to the Axe-Fx. The only limitation is that you can't use the XLR MIDI In port and MIDI In port at the same time. [1]
If the GT is connected to the Axe-Fx III and "Polling" is enabled on the GT (see below), the MIDI LED on the III will flash all the time.
Power: the GT takes either polarity, no polarity flip needed. [2]
Connect GT to Axe-Fx II
You connect the GT and Axe-Fx II with MIDI cables. Alternatively, the GT/22 lets you use a 6-pin XLR cable, see below.
The number of (connected) pins on the MIDI cables determine what’s possible, so choose wisely.
Some connection methods require an additional box to provide phantom power, as explained below.
3 pin cables:
- Two 3-pin cables connect the MIDI IN and OUT ports on your Axe-Fx II to the GT’s MIDI OUT and MIDI IN ports, allowing full MIDI communication.
5 pin cable:
- A single 5-pin cable can be used instead of two 3-pin cables, to connect the MIDI IN port on your Axe-Fx II to the GT’s MIDI OUT port and allow MIDI communication in both directions. The parameter BIDIRECTIONAL MIDI on the GT needs to be turned on.
7 pin cable:
- A 7-pin cable can be used instead of a 5-pin cable, to additionally provide power through the MIDI cable to your GT. This is known as phantom power. This requires RJM’s power supply. You can’t connect the power supply to the phantom power port at the rear of the Axe-Fx, because the GT’s power consumption is too high for the Axe-Fx. RJM’s offers a phantom power box for this purpose (alternatives are available from other sources). The version of the box with a single MIDI IN port suffices. Connect the power supply to the box. Connect the box with a 5-pin MIDI cable to the Axe-Fx II and with a 7-pin MIDI cable to the GT. The parameter BIDIRECTIONAL MIDI on the GT needs to be turned on.
6 pin XLR:
- Only the GT model with 22 buttons allows an alternative connection method: 6-pin XLR. This connection is more rugged than MIDI and also carries power. It requires RJM’s 6-pin XLR phantom power box. The version of the box with a single MIDI IN port suffices. Connect the power supply to the box. Connect the box with a 5-pin MIDI cable to the Axe-Fx II and with a 6-pin XLR cable to the GT. The parameter BIDIRECTIONAL MIDI on the GT needs to be turned on.
- Tip: when using the GT/22's XLR port, you can use its separate MIDI OUT port as a secondary MIDI output, for example to echo outgoing MIDI PCs to your tablet, computer or MIDI device.
Turn MIDI IN or REMOTE IN into an output
The MIDI IN and REMOTE IN ports on your Mastermind GT are bidirectional, meaning that they can be used as a secondary MIDI output, provided you have the required special cable. Turn on BIDIRECTIONAL MIDI on the GT and set MIDI PORT to ‘MIDI In’ or ‘Remote In’. The special cable needed for this purpose looks like a standard MIDI cable, but is wired differently. Look up the wiring here
Use the USB B port for MIDI
The GT’s USB B port is used to connect the editor but it also supports MIDI-over-USB. This means it can be used to transmit MIDI data to another device (like your computer or tablet) through a USB connection.
For incoming data: set the parameter MIDI RECEIVE CHANNEL on the GT to the correct channel to allow communications with the other device. Incoming commands through the USB port will be merged with incoming MIDI data through the MIDI IN port and processed by the GT. If you want this data to be transmitted through the MIDI OUT port again, turn on the parameter MIDI MERGE.
For outgoing data: add a separate device in Setup > Devices, with MIDI OUTPUT set to ‘USB’.
First steps
Checklist
Verify this:
- Your GT has the latest firmware installed.
- You’re using the most recent version of RJM's software editor.
- The GT connects to the Axe-Fx, allowing incoming and outgoing MIDI traffic.
- The GT connects to the software editor.
- You have a backup of previous GT settings, if applicable.
Starting fresh
Perform a full factory reset of your GT. This can be done on the hardware only: Setup > System Functions. A factory reset prevents compatibility issues.
In the Devices menu, replace the first entry ‘Effect Gizmo’ with your Fractal Audio Axe-Fx model. Make sure to select the correct model, and don’t select a ‘Slave’ type. Your selection makes sure that the GT sets critical parameters to correct settings.
Important parameters
With the Axe-Fx III
GT settings
Verify that the GT has the following Setup and MIDI settings:
MIDI CHANNEL = 1 (default)
- Required. Change this only if the Axe-Fx uses another MIDI channel.
BANK TYPE = MSB (default)
- Required. This explains that preset banks are addressed by specifying the Most Significant Byte (MSB) method (default). Remember this when configuring a MIDI app on your tablet, like SetListMaker or BandHelper.
FLAT NUMBERING = on (default)
- Recommended. When checked, you can specify preset numbers for this device as a single preset number. When not checked, you select presets using a Program Change and Bank number. Axe-Fx models support flat numbering, so it’s turned on by default for Axe-Fx devices.
MAX PC = 127 (default)
- Required.
NUMBER OF PRESETS = 1024 (default)
- Required. This is set automatically for the selected Axe-Fx device. Axe-Fx III Mark I: 512, Axe-Fx III Mark II / Turbo: 1024. Be aware that while the GT can access all 1024 presets on the Mark II, it can only store 768 presets in the GT.
SEND PCs = on (default)
- Required. This makes sure that the GT sends Program Changes to the Axe-Fx to switch presets.
IGNORE INCOMING CC = off (default)
- Required. See above. This must be turned off for the GT to recognize changes in effect blocks on your Axe-Fx III.
SEND REDUNDANT PCs = on (default)
- RJM recommends to turn this on.
IGNORE INCOMING PC = off (default)
- Required. This determines if the GT processes or ignores MIDI Program Changes within incoming Sysex messages. This must be turned off for the GT to recognize preset and scene changes on your Axe-Fx III and in Axe-Edit III.
SEND CCs ON PRESET CHANGE = on/off
- When turned off, the Axe-Fx will only receive CC messages from the GT when an IA button is pressed. When turned on, the Axe-Fx will also receive CC messages from the GT when switching presets. This doesn’t need to be turned on to engage/bypass effect blocks on the Axe-Fx. But it is important for IA buttons which control External Controllers on the Axe-Fx and have SEND ON PRESET CHANGE and UPDATE ON PRESET CHANGE enabled. Example: a button which is assigned to External Controller 4, which is controlling Input Boost in the Amp block in your preset. To make such a button stay in sync when switching presets on the Axe-Fx, turn on this parameter.
DIRECT SEND PCs/CCs = off (default)
- When turned off, the GT will attempt to reduce the number of MIDI messages sent to the Axe-Fx. It eliminates duplicate messages and sorts CC messages into numerical order before sending. When turned on, the GT will send messages in the order requested by each action list, and it will not filter out duplicate messages. Set this to OFF with the Axe-Fx III, unless specific situations require it to be turned on.
POLL STATE = on (default)
- Recommended. This enables the GT’s polling mechanism for the Axe-Fx III. This makes the GT aware of changes and adjustments on the Axe-Fx III hardware and in Axe-Edit III: preset changes, scene changes, effect block bypass states and effect block channels. Note: when polling is enabled, the MIDI LED on the III will flash all the time.
SYNC NAMES = off (default)
- Do not turn this on with Fractal Audio devices. [3]
MIDI RECEIVE CHANNEL = none (default)
- This sets the MIDI channel for incoming MIDI messages. A value is not required to enable bidirectional MIDI communication. It defaults to ‘none’, which means that your GT will NOT respond to incoming Bank or Program Change messages through the MIDI IN or USB B ports. Best to NOT set it to the Axe-Fx's MIDI channel, because that can cause problems. Change the value only to enable the GT to process incoming MIDI preset and bank messages from another device (not an Axe-Fx), separately from bidirectional MIDI, but beware of creating a MIDI loop.
MIDI MERGE = off (default)
- Required. This needs to be off when using two cables, otherwise it's sending the Axe-Fx's own messages back to itself.
MIDI BIDIRECTIONAL = on
- Required.
Axe-Fx III settings
Verify that the Axe-Fx III has the following MIDI settings:
MIDI CHANNEL = 1 (default)
- Required. Only change this if your Axe-Fx III uses another MIDI channel than 1.
SCENE REVERT = on/off
- Set as desired. By default the Axe-Fx III remembers which block states are manually bypassed/engaged after having selected a scene. When you select another scene and return to the previous scene (without changing presets), the device will recall those effect block states. If you prefer always recalling a scene in its initial stored state (keeping blocks to their saved states), turn on this parameter. Note that this parameter applies only to scene switching via MIDI or FC controllers; it is ignored when switching scenes on the hardware or in the editor. Also, it is not compatible with PC Mapping.
EFFECT BYPASS MODE = VALUE
- This setting instructs the Axe-Fx III to engage/bypass its effect blocks through MIDI CC values, and not by toggling.
SEND REALTIME SYSEX = on (not default)
- Required. See above. This ensures that 3rd party MIDI controllers such as the GT receive some of the MIDI information they need to support the Axe-Fx III. This information is specified in: Axe-Fx III MIDI for Third-Party Devices
PROG CHANGE = on (default)
- Required. This makes sure that your Axe-Fx III processes incoming MIDI Program Changes from the GT.
IGNORE REDUNDANT PC = off (default)
- If set to ON, this parameter tells the Axe-Fx III to ignore an incoming MIDI Program Change if that preset is already active. This prevents unnecessary reloading and the audio gap that comes with that. My preference is: off.
SEND MIDI PC = off
- When turned on, the Axe-Fx III sends a MIDI program Change through its MIDI OUT port when switching presets, which may be useful to control other MIDI devices. This should not need to be turned on for the GT to recognize presets changes.
PC MAPPING = off
- Required. This turns off the feature that lets the Axe-Fx III map incoming MIDI Program Changes to scenes within presets. This feature is not compatible with the way the GT controls the Axe-Fx III.
With the Axe-Fx II
GT settings
Verify that the GT has the following Setup and MIDI settings:
SEND PCs = on
- Required. This makes sure that the GT sends Program Changes to the Axe-Fx to switch presets.
MIDI CHANNEL = 1
- Required. Change this only if the Axe-Fx uses another MIDI channel.
SEND REDUNDANT PCs = on/off
- When turned off, the GT won’t transmit a MIDI Program Change if it’s the same one as the last one that was sent, which prevents unnecessary preset changes. But since the Axe-Fx has its own method of dealing with incoming redundant Program Changes (see below), it doesn't really matter.
IGNORE INCOMING PC = on
- Recommended. This determines if the GT processes or ignores MIDI Program Changes within incoming Sysex messages. For the Axe-Fx II, this doesn’t need to be turned on to make the GT recognize preset changes on the hardware or in Axe-Edit.
IGNORE INCOMING CC = off
- Required. This determines if the GT processes or ignores MIDI Control Changes within incoming Sysex messages. This must be turned on for the GT to recognize changes in effect blocks on the Axe-Fx II or in Axe-Edit.
DIRECT SEND PCs/CCs = off
- Recommended. When turned off, the GT will attempt to reduce the number of MIDI messages sent to the Axe-Fx. It eliminates duplicate messages and sorts CC messages into numerical order before sending. When turned on, the GT will send messages in the order requested by each action list, and it will not filter out duplicate messages.
SEND CCs ON PRESET CHANGE = on/off
- When turned off, the Axe-Fx will only receive CC messages from the GT when an IA button is pressed. When turned on, the Axe-Fx will also receive CC messages from the GT when switching presets. This doesn’t need to be turned on to engage/bypass effect blocks on the Axe-Fx. But it is important for IA buttons which control External Controllers on the Axe-Fx and have SEND ON PRESET CHANGE and UPDATE ON PRESET CHANGE enabled. Example: a button which is assigned to External Controller 4, which is controlling Input Boost in the Amp block in your preset. To make such a button stay in sync when switching presets on the Axe-Fx, turn on this parameter.
MIDI RECEIVE CHANNEL = none
- Recommended. This sets the MIDI channel for incoming MIDI messages. This parameter is not required (it’s ignored) to enable bidirectional MIDI communication. It defaults to ‘none’, which means that your GT will NOT respond to incoming Bank or Program Change messages through the MIDI IN or USB B ports. Do NOT set it to the Axe-Fx's MIDIO channel, because that will cause problems. Change the value only to enable the GT to process incoming MIDI preset and bank messages from another device (not an Axe-Fx), separately from bidirectional MIDI, but beware of creating a MIDI loop.
MIDI MERGE = off
- Recommended. This needs to be off when using two cables, otherwise it's sending the Axe-Fx's own messages back to itself.
MIDI BIDIRECTIONAL =
- Should be turned on, when there's a single cable running to/from the GT'S MIDI output.
Axe-Fx II settings
Verify that your Axe-Fx II has the following MIDI settings:
MIDI CHANNEL = 1
- Required. Only change this if your Axe-Fx uses another MIDI channel than 1.
PROG CHANGE = on
- Required. This makes sure that your Axe-Fx processes incoming MIDI Program Changes from the GT.
SEND REALTIME SYSEX = all
- Required. This makes sure that the GT receives necessary tempo and tuner information from your Axe-Fx.
IGNORE REDUNDANT PC = on
- Recommended. When turned on, your Axe-Fx will not reload a preset if the incoming Program Change is the same as the currently selected preset. This avoids the audio gap that comes with preset changes. The default setting on the Axe-Fx II: on.
SCENE REVERT = on/off
- Set as desired. By default the Axe-Fx remembers which block states are manually bypassed/engaged after having selected a scene. When you select another scene and return to the previous scene (without changing presets), the device will recall those effect block states. If you prefer always recalling a scene in its initial stored state (keeping blocks to their saved states), turn on the parameter SCENE REVERT in I/O > MIDI. Note that SCENE REVERT applies only to scene switching via MIDI or FC controllers; it doesn't kick in when switching scenes on the hardware. Furthermore, SCENE REVERT doesn't work with PC Mapping.
PC MAPPING = off
- Required. This turns off the feature that lets the Axe-Fx map incoming MIDI Program Changes to scenes within presets. This feature is not compatible with the way the GT controls the Axe-Fx.
Other GT system parameters
Only relevant parameters are discussed below.
BOLD FONTS = on
- Turn this on in the Display menu for better readable text on the displays.
SHOW PAGE NAMES = off
- Turn this on in the Display menu to make your GT show the name of the current button page in the main display when switching pages. When turned off, the GT shows page numbers. To show nothing: make sure all page names are cleared and turn this on.
REVERSE MENUS
- Turn this on in the Display menu to instruct the GT to start ordered menus (like Preset Menu and Song Menu) at bottom-left instead of at the top.
SCENE NAMES
- Turn this on to see the names of scenes on the main display. Turn it off if the display of scene names on buttons suffices.
SHOW ONLY SONG NAME
- Turn this on in the Display menu to show only the name of the current song in the main display, without the name of the preset(s) being used by the current song.
START UP ON LAST PRESET
- This determines if your GT will recall the last loaded preset after powering on.
SHOW TEMPO
- When turned on, the tempo is displayed briefly on the main display every time the tempo changes by more than 2 BPM. When turned off, the tempo is never displayed on the main screen, only on Tap Tempo buttons you’ve defined.
PAGE PREVIEW
- When turned off, the visible button page does not change until you select a new preset. When turned on, the visible button page changes as you move up and down through the banks. The button page associated with the first preset in a bank is the one that will be displayed for that bank.
SYSEX MESSAGES
- You can define custom Sysex messages here and then assign these to IA buttons.
MACROS
- You can create custom macros (set of commands) for special tasks here. You can make a macro execute automatically at startup.
REMOTE MODE
- This is used only to give your GT control over another GT, or take control.
CURRENT SET LIST
- Choose a setlist or All Songs, or set it to NONE to keep the GT in Preset mode on startup.
Import preset names
The GT can import the names of your Axe-Fx II / III presets with the GET PRESET NAMES function (Setup > Devices). You’ll want to do this periodically. See Importing Scene Names below for more information.
Tip: the Axe-Fx III allows this function to be assigned to a button for quick access.
Import scene names (Axe-Fx III)
The Axe-Fx III allows individual scenes of presets to be named. The GT provides two ways to import and display these scene names, both with the GET PRESET NAMES option.
Method 1: GET PRESET NAMES + GET SCENES
- When GET SCENES is selected, and not CREATE SONGS, the GT will import and store all scene names, and the names will be displayed on scene buttons. This probably is the most useful method for most users.
Method 2: GET PRESET NAMES + CREATE SONGS
- When CREATE SONGS is selected, and not GET SCENES, the GT will treat an Axe-Fx preset as a song and its scenes as presets. The GT will run in Song Mode and buttons with scene names will be displayed on the bottom row. Note: this method is limited to the first 127 presets on your Axe-Fx III.
Assign buttons
Button Pages
Your GT has 10, 16 or 22 physical buttons, and even more when using external buttons. Together these make up a single Page.
Your GT can switch between multiple Pages, allowing access to a load of functionality. Example: Page 1 provides the buttons you use most, Page 2 provides buttons you use less often, Page 3 provides Looper controls, etc.
These Pages are global, meaning that they are the same for every preset. However, each preset can also have a dedicated Page with preset-specific buttons: the Local page. This is especially handy with the Axe-Fx II (which does not allow names scenes), because it lets you create song-specific scene buttons with names.
For each preset, you can specify which page should be the default page.
Turn on AUTO PAGE SELECT to immediately recall the default Page for a preset when switching presets. When turned off, the current button page will not change unless you press a Page button or execute a Page action.
If you want a button appear on each Page on the same spot, mark the button as GLOBAL.
You can program a button to scroll through Pages or to display a PAGE MENU. You can also program a button to jump to a specific Page: IA > Actions > System.
Use the MAX BUTTON PAGE parameter to limit the number of Pages that you can access, to prevent unnecessary scrolling.
How to assign buttons
Important: when assigning Axe-Fx II or III functions to buttons, always use the available commands on the hardware and in the GT editor to assign the pre-configured Axe-Fx buttons! Do not configure a button manually. This will save you a lot of headaches.
On the hardware, use Setup > Devices > Assign Buttons. In the editor, use Assign CC in the button context menu.
Normal and Hold button modes
Beside the regular button mode (Normal), buttons also offer a secondary function when pressed-and-held for a short time.
As explained below (see Effect buttons), when the GT is controlling an Axe-Fx III, the Hold function of effect buttons is reserved for selecting channels.
The Setup menu provides timing parameters to finetune the response of the Hold and Repeat functionality. Try this:
- Hold mSec: 450
- 1st Repeat mSec: 1500
- Repeat mSec: 300
Additional options for the Hold function:
ACTIVE IN IA MODE ONLY
- This option limits the Hold function to work only in IA Mode. It will also only be displayed when IA Mode is active.
SHOW NAME
- This allows to you turn on/off the display of the Hold function's name on the button display.
Button names
The following characters have a special purpose in button names:
- \ (backslash): forces a line break in the text
- ^ (carat): forces a line break and displays the 2nd line inverted
- | (vertical line): hides subsequent characters
Tip: use the vertical line in your preset titles on the Axe-Fx to force the GT to separate the main title (displayed on the GT) from auxiliary information (not displayed).
How the GT handles MIDI CCs with an Axe-Fx III
Based on information from RJM:
The Axe-Fx III is being controlled through System Exclusive (Sysex) MIDI messages sent from the GT. However, the GT is really designed to work with MIDI CCs - the built-in device database only uses CC numbers, for example. Also, the Axe-Fx III ships without any CC numbers predefined. Using CCs would require you to manually set all of them in the Axe-Fx III. The way the GT gets around this is to use ‘fake’ CC numbers, which are translated into Sysex messages under the hood. This allows you to continue using the typical features in the GT without so much configuration needed on the Axe-Fx III. The CC settings for all effect blocks and everything else on the Axe-Fx are ignored.
About CCs: in addition to value 0 for bypass and value 127 for active, there are values that select the effect channel. Here’s the complete list:
- Value 0: Bypass effect block
- Value 1: Select channel A
- Value 2: Select channel B
- Value 3: Select channel C
- Value 4: Select channel D
- Value 127: Enable effect block
This method allows using one CC number that can select effect state and channel. Note: currently the GT does not support switching to channels E and F.
The External Controllers are not part of the Fake CC interface. Those have to be done the old way by entering a CC number in the Axe-Fx III’s MIDI/Remote menu. The number must be lower than 27. Start with External 1 as CC #11, and go up sequentially from there.
Volume Increment/Decrement and Scene Decrement/Increment are not part of the Fake CC interface either. Those also have to be done the old way by entering a CC number in the Axe-Fx III’s MIDI/Remote menu. The number must be lower than 27. Configure the buttons on the GT as momentary buttons. More ....
The GT processes CCs below #34 as normal CCs, anything above that the GT will try to convert to a Sysex message. Note: if you’re using other devices to control the Axe-Fx III, through the GT’s MIDI connection (including USB), then you need to enter the required CC data in the III’s MIDI/Remote menu.
Types of buttons
OFF
- Disables the button.
BANK UP/DOWN
- Selects the next or previous bank of presets.
GET PRESET NAMES
- See above.
IA
- General purpose (instant access) button that can execute a list of button actions, see below.
IA MODE
- Switches to IA Mode.
IA STORE
- This stores the current state of the IA button to the current preset. This works only with buttons which have UPDATE ON PRESET CHANGE enabled. BUT: when working with Axe-Fx presets and scenes, you do NOT want to set and store button states on the GT with IA Store. Just program your presets and scenes on the Axe-Fx itself and don't use this function at all.
LABEL
- Only displays text.
PAGE/IA STORE
- This selects the next button page, or when held, stores the current IA state to the current preset (see above).
PAGE UP/DOWN
- Selects the next or previous button page.
PAGE MENU
- Displays alle pages.
PRESET -/+
- Moves down/up one preset.
PRESET
- Selects a preset.
PRESET MENU
- Displays all presets.
PRESET NUMBER
- Lets you select a preset by entering its number.
PREVIOUS PRESET
- Switches back to the previous preset.
SCENE MENU
- Displays all scenes of the preset.
SETLIST MENU
- Pops up a menu of all setlists.
SETUP MODE
- Activates Setup Mode.
SONG MENU
- Pops up a menu of all songs.
Preset buttons
Preset buttons allow you to switch to a specific GT preset. You can assign as many as you want on a page.
Preset buttons are normally linked directly to presets in the Axe-Fx.
The number of assigned preset buttons determine the size of the Bank. Bank Up and Down buttons let you scroll through Banks. The parameters PAGE PREVIEW and INSTANT BANK SWITCHING let you further customize Bank Up/Down behavior.
When INSTANT BANK is turned on, the GT will automatically and immediately switch presets when you press the Bank Up or Bank Down buttons. The GT will switch banks and load the preset that appears on the currently selected preset button. Example: if you are on preset 3, and there are 6 presets per bank, pressing Bank Up will automatically switch to preset 9. Turn off INSTANT BANK to make the GT flash the preset buttons and ask you to select a preset in the new bank, after pressing Bank Up/Down.
Preset buttons display the names from the corresponding Axe-Fx presets, when GETTING PRESET NAMES has been executed, see above.
Caution: when shuffling presets around on the Axe-Fx, preset and scene names can get out of sync; launch GET PRESET NAMES to import these again. Using Local Pages requires extra caution when shuffling presets around on the Axe-Fx.
In the properties of a Preset button SEND ON PRESET CHANGE and UPDATE ON PRESET CHANGE should be turned on.
You can press a Preset button a 2nd time and have it perform a secondary function, specified with the PRESET BUTTON 2nd PRESS parameter:
- SAME: no action
- PREVIOUS: recalls the previously selected preset
- GLOBAL: recalls the Global preset
- RELOAD: recalls the current preset; note that this doesn’t work when IGNORE REDUNDANT PC is turned on on the Axe-Fx
- IA: executes an IA action
- ALTERNATE: lets you recall another preset
A Preset button can be turned into an IA button by enabling IA Mode. This is similar to Reveal on the MFC-101 controller from Fractal Audio. IA Mode is enabled with a button.
You can hold a Preset button to execute its Hold function, if programmed. The parameter SHOW NAME for the Hold function tells the GT to show or hide the IA function on the preset button's display.
The functions PRESET BUTTON 2nd PRESS, IA Mode and Hold can make Preset buttons do double-duty, for example to select scenes, to increment/decrement songs or presets by 1, or to display menus.
And there are other ways to switch presets on your GT:
- PRESET MENU button: displays a list of all GT presets
- PRESET NUMBER button: lets you enter the number of a preset to quickly jump to it
- PREVIOUS PRESET button: jumps back to the previously selected preset
- PRESET - or PRESET + button: decrements or increments the current preset with 1 step
Additional options are available through IA > IA Actions > System.
If the preset numbers on your Axe-Fx and GT differ by one, adjust the parameters DISPLAY OFFSET on the Axe-Fx and 1st PRESET is NUMBER 0 on the GT, to match the numbering.
For each preset on the GT you can specify:
- which button page should be loaded upon preset recall (any of the 16 general pages, or the Local page)
- tempo
- specific behavior of pedals
- special behavior of switches
- specific actions
The ‘Global Preset’ is a regular GT preset which can be recalled at any time by pressing a Preset button a second time (if configured as such).
Scene buttons
Scene buttons allow you to switch to a specific scene within an Axe-Fx preset. An Axe-Fx preset always has 8 scenes.
The button action involves CC #34, with value 0 for scene 1 and going up from there. Note that there’s NO need to set the MIDI CC for Scene Select in the Axe-Fx III’s MIDI/Remote menu.
Scene buttons display the names of the scenes of your Axe-Fx III presets, if GETTING PRESET NAMES with SCENE NAMES has been executed, see above.
Important: Scene buttons should NOT be 'grouped', and SEND ON PRESET CHANGE and UPDATE ON PRESET CHANGE should NOT be turned on.
When assigning Scene Increment and Decrement to buttons, using the Axe-Fx III, make sure to enter CCs for these functions in the MIDI/Remote menu of the III. As mentioned earlier, the GT uses actual CCs for Scene Decrement/Increment, not ‘fake’ CCs. The numbers should be lower than '27'. Also, turn on MOMENTARY for these buttons.
Effect buttons
These IA buttons engage or bypass effect blocks on your Axe-Fx.
Do NOT turn on SEND ON PRESET CHANGE and UPDATE ON PRESET CHAÑGE for these buttons.
With the Axe-Fx II, you can assign other functions to the Hold mode of these buttons. For example, to switch the effect between X and Y.
Tip for the Axe-Fx II: to switch between two Amp blocks and switch their X/Y states too, like a traditional amplifier foot switch, configure two buttons as follows:
- Amp 1: Normal: CC 37, 0-127, assign to a group. Hold: CC 100, 127-0
- Amp 2: Normal: CC 38, 0-127, assign to the same group. Hold: CC 101, 127-0.
With the Axe-Fx III, the Hold mode of these buttons is reserved for selecting channels on the effect block.
Tempo button
A Tempo button shows the preset tempo, making use of the Tempo CC.
If UPDATE ON PRESET CHANGE is turned on, the Tempo button flashes in time with the internal tempo clock. If turned off, the button will only flash when instructed by the connected device.
Tuner button
You can assign the GT’s Tuner function to the Normal or Hold Mode of a button.
A Tuner button contains two button actions: one enables the special Tuner display mode, and the other sets the appropriate CC.
Turn on UPDATE ON PRESET CHANGE in the Tuner button’s properties to make the button aware of preset changes.
Tip: people often assign Tuner to the Hold function of a Tempo button.
Adding external buttons
You can extend the capabilities of the GT by adding external buttons.
RJM sells dual-button external switches, which behave just like the onboard buttons, with LEDS instead of mini displays. The GT always keeps the LEDs synced and powers them using a TRS cable.
Tip: to program an external switch on the GT’s hardware, just press the external button while in the Edit Buttons menu.
More button parameters
COLOR
- Choose your button colors wisely. Names of bypassed effects and non-current presets should still be visible, while engaged buttons should jump out. Example:
- Presets: off = dark red, on = green
- Scenes: off = dark purple, on = purple
- Effects: off = dark aqua, on = green
BUTTON GROUPS
- Button groups let you set up buttons so that only one button in a group is allowed to be turned on at a time. Activating one button will turn off the other buttons in this group. Note: Scene buttons should NOT be grouped.
- General groups setting can be set in Setup and allow fine-tuning of the grouped buttons:
- ALLOW ALL BUTTONS OFF: when turned on, it is possible to turn off ALL buttons in the group. Pressing a button that’s already selected will turn if off. When turned off, one button in the group will always be turned on. Pressing a button that’s already selected will have no effect. The preferred value depends on the button function.
- SEND OFF MESSAGES: when turned on, any button in the group will send its message(s) when turned on and when it’s turned off. When turned off, a button will send its message(s) only when it is turned on, and never when it is turned off.
IA LINK
- When duplicating functionality in multiple buttons (example: Scene buttons on multiple pages), this parameter makes sure that the states of those buttons are synchronized. This mechanism depends on the first IA action.
SEND ON PRESET CHANGE
- When turned on, this button will send its messages every time the preset changes, and when the button is pressed. When turned off, this button will only send its messages when it is pressed. Important: for regular operation keep this turned off! Use this parameter only with buttons which are assigned to External Controllers on the Axe-Fx, as explained above.
UPDATE ON PRESET CHANGE
- This controls two things: whether the state of a button in a preset is stored by the GT and recalled when loading that preset, and whether the Axe-Fx or the GT is in control of setting the button’s state. When turned off, this button only changes its state when it receives a MIDI message from the device it is associated with, or when the button is pressed. Also, it gives the Axe-Fx control over the button’s state, allowing you to see changes of the effect bypass state and channel. When turned on, the button can also change state when a new preset is selected, and it allows the GT to determine the button’s state, overriding the Axe-Fx. Important: for regular operation keep this turned off! Use this parameter only with buttons which are assigned to External Controllers on the Axe-Fx, to keep things synchronized, or to fix an issue with the button state. This because the Axe-Fx doesn’t manage External Controllers, leaving it to the external device to inform the Axe-Fx about status updates.
MOMENTARY
- When turned on, the button engages when pressed and disengages when released. When turned off, the button operates as a latching switch. Use this for functionality such as Volume Increment/Decrement and Scene Increment/Decrement.
IA CYCLE
- This lets the button send messages in steps, defined in the button’s properties, like this:
- Step 1
- CC ...
- step 2
- CC ...
- step 3
- CC ...
- etc.
BUTTON ACTIONS
- This menu provides provides the following additional actions:
- CC TOGGLE: enter CC data to toggle an action
- CC MOMENTARY: enter CC data to momentarily set an action
- PC: enter Program Change data
- NOTE: enter MIDI Notes
- SYSEX: enter a Sysex command, defined in the Sysex menu
- SYSTEM: choose from additional actions.
Looper Undo
Programming a Looper Undo action requires a trick.
UNDO is not an on/off (latching) function. So you will want to make this a Momentary button.
When you press UNDO on the Axe-Fx III front panel, it will exit the Record state, and delete the last recorded layer. But when assigning a button on the GT to UNDO, it does NOT delete the last layer. Changing the button to OnMsgOnly won't solve this.
Solution: change its OFF action from "0" to "NONE".
Now the GT button will act the same as UNDO on the front panel.
Expression pedals
An expression pedal lets you change sound in real time. The common way to configure this is to control a parameter on the Axe-Fx with an External Controller, and then assign the pedal on the GT to that External Controller’s CC.
If you read the section above about how the GT handles MIDI CCs with the Axe-Fx III, you know that you need to enter CCs for the External Controllers in the MIDI/Remote menu of the Axe-Fx III.
An expression pedal connects to an expression pedal port on the GT with a TRS cable. Calibration of the pedal is required for best results.
RJM sells an expression pedal, made by Mission Engineering, with special support for the GT. It has a separate switch that behaves just like an onboard switch, with a LED which is powered by the GT.
Based on information from RJM:
- The Mastermind GT can use a variety of expression pedals. Any resistance value from 10k to 250k can be used.
- In general, there are two ways the polarity of an expression pedal is wired: like a Boss/Roland pedal or like a Korg/Rocktron pedal. RJM supports the Korg method. Boss/Roland-style wired pedals are easily made compatible by swapping the tip and ring on one side of the TRS cable. Visit RJM’s forum and support pages for more information.
- Line 6 pedals are incompatible because they use TS connectors instead of TRS.
- While a volume pedal can operate as an expression pedal with an insert cable, their taper may not offer smooth control. The GT’s firmware offers preliminary support for log taper correction).
The GT lets you change an expression pedal’s assignment by pressing a button. This can instantly turn a Wah into a Whammy for example without having to tweak the corresponding Axe-Fx preset extensively.
See also: Expression Pedal Setup (RJM forum)
Songs and setlists
Your GT features a Songs and Setlists Mode. Songs can consist of one or more GT presets, and can be further organized into setlists.
A SONG MENU button displays all songs. SONG UP/DOWN functionality is available through IA > Actions > System.
Turn on SONG NAME ONLY in the Display menu to show only the name of the current song in the main display, and not the name of the preset(s) being used by the current song.
Tip: the song menu and setlists allow changing the order of songs/presets on your GT without breaking the link between presets on the GT and on the Axe-Fx.
Powering other pedals
The GT provides two 9VDC ports. Each can supply DC power to outboard gear, like a tuner pedal or a low-power effects pedal. The ports are not isolated so be careful of creating hum. The maximum capacity of both ports together is 100mA. In 2022 RJM started putting in 200mA converters.